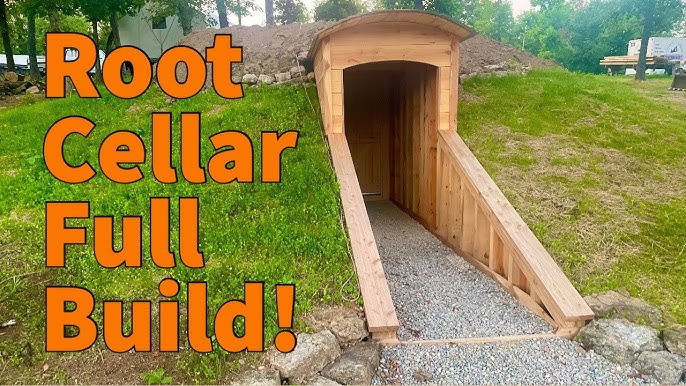
Empower Your Homestead: Build Your Own Backyard Root Cellar - A Beginner's Guide to Preserving Your Harvest Year-Round
Sarah, remember that bumper crop of carrots you had last fall? All that beautiful produce, overflowing from your garden, only to wither away in the crisper drawer weeks later. We’ve all been there! The dream of a thriving, self-sufficient homestead includes more than just growing food; it's about preserving that bounty to nourish your family year-round. That’s where a root cellar comes in.
Imagine stepping into a cool, humid space in the dead of winter and pulling out a perfectly preserved potato, onion, or apple, bursting with flavor. A root cellar isn't just a storage space; it's a key to unlocking true homestead self-sufficiency.
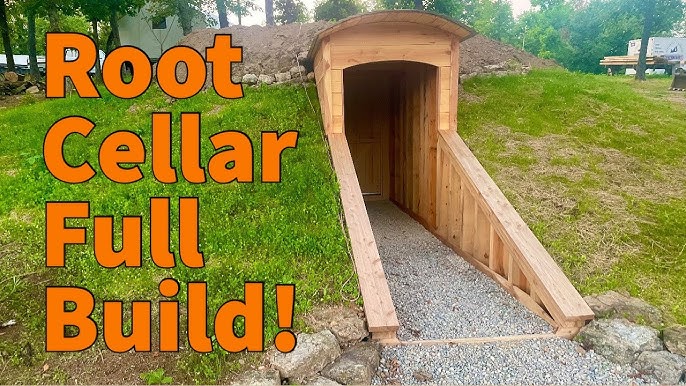
This guide will walk you through building your own backyard root cellar, even if you're a beginner. We'll explore options for different skill levels and budgets, covering both above-ground and in-ground designs. Get ready to extend your harvest and enjoy the fruits (and vegetables!) of your labor all year long. Let's get started on this DIY root cellar project! This root cellar construction is perfect for any energy-efficient homestead.
Why Build a Root Cellar?
Beyond the obvious benefit of food preservation, a root cellar offers several advantages:
- Reduces Food Waste: Extend the life of your harvest, minimizing waste and maximizing your investment in your garden.
- Saves Money: Reduce your reliance on grocery stores, especially during the off-season.
- Preserves Nutrients: Root cellaring is a natural preservation method that retains more nutrients than canning or freezing.
- Reduces Energy Consumption: Unlike refrigerators or freezers, root cellars rely on natural cooling and humidity, significantly reducing your energy footprint.
Choosing the Right Root Cellar Design for You
There are several root cellar designs to choose from, each with its own advantages and disadvantages. Here are two popular options:
- In-Ground Root Cellar: This is the classic design, offering the most consistent temperature and humidity. It involves digging into the earth and building a structure that is partially or completely buried.
- Above-Ground Root Cellar (or "Cold Room"): This is a simpler and more accessible option, especially for those with limited space or concerns about digging. It involves building an insulated structure above ground, often utilizing an existing shed or outbuilding.
For this guide, we'll focus on a simple in-ground root cellar suitable for beginners. However, we will also touch on the basics of an above-ground cold room. Remember to consider your root cellar plans carefully!
Building Your Simple In-Ground Root Cellar: A Step-by-Step Guide
This guide provides the steps to build a basic, functional in-ground root cellar. Adapt the dimensions and materials to suit your specific needs and budget.
Materials List with Budget Breakdown (Estimates)
- Untreated lumber (for framing and shelving): $200-$400
- Concrete blocks or stones (for walls): $150-$300
- Gravel (for drainage): $50-$100
- Insulation (rigid foam or straw bales): $100-$200
- Heavy-duty plastic sheeting (for moisture barrier): $30-$50
- Door (salvaged or new): $50-$200
- Ventilation pipes: $20-$40
- Fasteners (screws, nails): $20-$30
- Total Estimated Cost: $620 - $1320 (This can vary widely based on material choices)
Tools You'll Need:
- Shovel or excavator
- Wheelbarrow
- Level
- Measuring tape
- Saw
- Drill
- Hammer
- Safety glasses
- Gloves
Step 1: Planning and Site Selection
- Choose a Location: Select a well-drained area with a slightly sloped surface. Avoid areas prone to flooding or with a high water table. North-facing slopes are ideal to minimize sun exposure.
- Size and Dimensions: Determine the size of your root cellar based on your storage needs. A small 6ft x 8ft cellar is a good starting point.
- Check Local Regulations: Before you start digging, check with your local authorities for any permits or building codes related to root cellars.
Step 2: Excavation
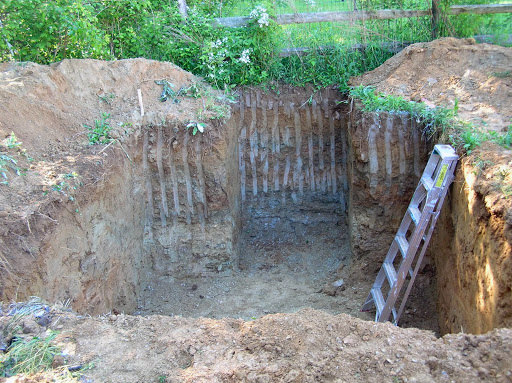
- Dig the Hole: Excavate the hole to the desired depth, allowing for a layer of gravel at the bottom and the height of your walls. The depth will influence the temperature stability; aim for at least 4 feet deep.
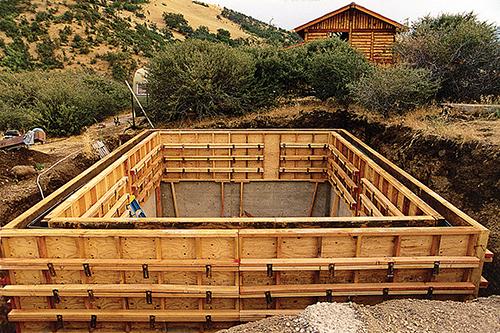
Step 3: Drainage
- Gravel Base: Add a layer of gravel (4-6 inches) at the bottom of the hole to ensure proper drainage. This will prevent water from seeping into your root cellar.
Step 4: Wall Construction
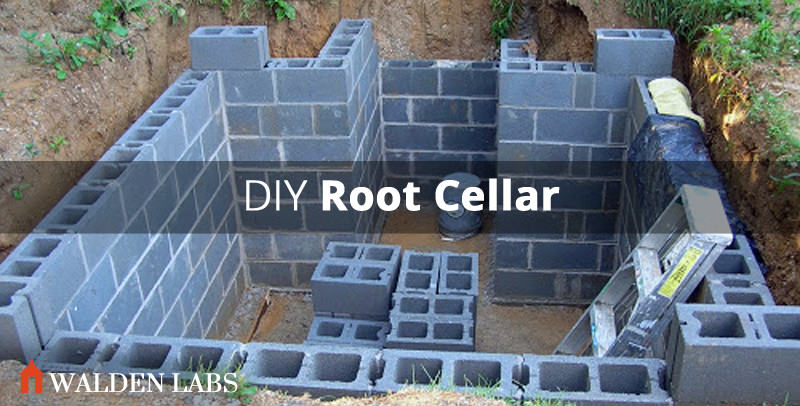
- Build the Walls: Construct the walls using concrete blocks, stones, or treated lumber. Ensure the walls are level and plumb. If using lumber, consider using a double layer with insulation between.
- Moisture Barrier: Line the inside of the walls with heavy-duty plastic sheeting to prevent moisture from entering.
Step 5: Roofing and Insulation
- Construct the Roof: Build a sturdy roof using lumber, ensuring it is strong enough to support the weight of the soil. Slope the roof slightly to allow for water runoff.
- Insulate the Roof: Insulate the roof with rigid foam insulation or straw bales. Cover the insulation with plastic sheeting to protect it from moisture.
- Bury the Roof: Cover the roof with soil, creating a mound that blends into the surrounding landscape. This will help maintain a consistent temperature inside the root cellar.
Step 6: Ventilation
- Install Ventilation Pipes: Install two ventilation pipes: one near the floor and one near the ceiling. This will allow for air circulation and prevent the buildup of moisture and gases. Cover the ends of the pipes with screens to prevent pests from entering. This is important for your simple gray water system.
Step 7: Door Installation
- Install the Door: Install a sturdy, insulated door to keep out pests and maintain a consistent temperature. Weather stripping around the door will help seal it tightly.
Step 8: Interior Finishing
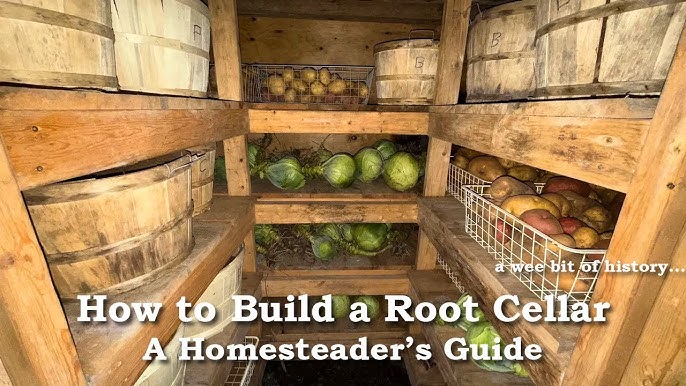
- Build Shelving: Construct shelving using untreated lumber to store your produce. Ensure the shelves are well-ventilated to prevent moisture buildup.
- Add Lighting: Install a low-wattage light bulb for occasional use. Avoid using incandescent bulbs, as they generate heat.
Above-Ground Root Cellar (Cold Room) Basics
An above-ground root cellar, or cold room, is essentially a heavily insulated shed or room. Key considerations include:
- Location: Choose a shaded location, preferably on the north side of a building.
- Insulation: Maximize insulation in the walls, roof, and floor.
- Ventilation: Provide adequate ventilation to control temperature and humidity.
- Earth Berming: Consider adding earth berms around the base of the structure for added insulation.
Safety Precautions
- Cave-in Prevention: When excavating, shore up the sides of the hole to prevent cave-ins.
- Ventilation: Ensure adequate ventilation to prevent the buildup of harmful gases, such as carbon dioxide.
- Electrical Safety: If installing lighting, use a ground fault circuit interrupter (GFCI) outlet to prevent electric shock.
- Structural Integrity: Build a sturdy structure that can withstand the weight of the soil and any other loads.
Troubleshooting Tips
- Moisture Buildup: If you notice moisture buildup inside your root cellar, increase ventilation.
- Temperature Fluctuations: Insulate the root cellar more effectively to minimize temperature fluctuations.
- Pest Problems: Seal any cracks or openings to prevent pests from entering. Use traps or other pest control methods as needed.
My Personal Experience
When I built my first root cellar, I underestimated the importance of drainage. After a heavy rain, the bottom of the cellar flooded! I had to dig a trench to divert water away from the structure and add more gravel to the base. Lesson learned: drainage is crucial! I also found that using salvaged materials, like an old door and recycled lumber, significantly reduced the cost of the project.
Alternative Root Cellar Ideas:
- Trash Can Root Cellar: Bury a large trash can in the ground for a small, inexpensive root cellar

- Old Freezer Root Cellar: Convert an old chest freezer into a small root cellar

Call to Action
Ready to take the plunge and build your own backyard root cellar? Share your plans and experiences in the comments below! What challenges are you anticipating? What materials are you planning to use? We're all in this together, learning and growing our homesteads one project at a time. Check out our other articles on Better Homes and Harvests for more homesteading DIY ideas! Remember these steps when thinking about how to repair a barn foundation yourself. By building a root cellar, we're taking a significant step towards a more self-sufficient and resilient lifestyle. Happy homesteading!