Elderflower Fritters, Natural Dyeing, and Vermicomposting: A Homesteading Trifecta
Imagine wandering through a sun-drenched meadow, the air thick with the sweet, heady scent of elderflowers carried on a gentle breeze. These delicate blossoms, often overlooked, offer a taste of wild elegance and a connection to the natural world that resonates deeply with the homesteading spirit. Today, we'll transform these foraged treasures into Elderflower Fritters, a simple yet exquisite treat that celebrates the fleeting beauty of the season. But our journey doesn't end in the kitchen; let's also delve into the art of using these foraged materials to create beautiful dyes and take a look at worm composting.

Elderflower Fritters: A Taste of Wild Elegance
The sweet, floral aroma of elderflowers is intoxicating, and their delicate flavor lends itself perfectly to a light and airy fritter. These fritters are best enjoyed fresh, while the elderflowers are still fragrant and the batter is crisp.
Ethical Foraging
Before we gather our elderflowers, let's discuss the importance of ethical foraging. Always positively identify elderflowers (Sambucus canadensis or Sambucus nigra) to avoid poisonous look-alikes such as Water Hemlock. Only harvest from areas where elderflowers are abundant, and never take more than 1/4 of the blossoms from any one bush, respecting local wildlife and ensuring the plant can still produce berries later in the season. And remember, always obtain permission before foraging on private land. Wear appropriate clothing to protect from insects and thorny plants, and be mindful of your impact on the surrounding environment.

Ingredients You'll Need
- 2 cups fresh elderflower blossoms (gently rinsed and patted dry with a soft linen cloth)
- 1 cup unbleached all-purpose flour
- 1 teaspoon aluminum-free baking powder
- 1/4 teaspoon finely ground sea salt
- 1 cup whole milk (from grass-fed cows, or almond milk for a dairy-free option)
- 1 large free-range egg (lightly beaten)
- 2 tablespoons raw cane sugar
- Organic cold-pressed sunflower oil for frying
- Organic powdered sugar for dusting
- Raw, unfiltered local honey for drizzling (optional)
Equipment
- Large vintage Pyrex mixing bowl
- Stainless steel whisk with a comfortable grip
- Heavy-bottomed cast iron skillet
- Perforated stainless steel slotted spoon
- Unbleached paper towels
- Hand-thrown pottery platter
Step-by-Step Fritter Creation
- Prepare the Batter: In a large mixing bowl, whisk together the flour, baking powder, and salt until evenly distributed. In a separate bowl, whisk together the milk, egg, and sugar until smooth. Gradually add the wet ingredients to the dry ingredients, whisking gently until just combined. Do not overmix; a few lumps are okay, as this will result in a more tender fritter. Let the batter rest for 10 minutes.
- Heat the Oil: Pour enough sunflower oil into a heavy-bottomed cast iron skillet to reach a depth of about 1/2 inch. Heat the oil over medium heat until it shimmers and a small piece of batter dropped into the oil sizzles gently, about 350°F (175°C) using a thermometer to check.
- Fry the Fritters: Gently dip clusters of elderflower blossoms into the batter, coating them evenly and shaking off any excess. Carefully drop the battered blossoms into the hot oil, being careful not to overcrowd the pan. Fry for 2-3 minutes per side, or until golden brown and crispy, turning gently with a slotted spoon.
- Drain and Dust: Use a slotted spoon to transfer the fritters to a plate lined with unbleached paper towels to drain excess oil. Dust generously with organic powdered sugar using a fine-mesh sieve for an even coating. Drizzle with raw, unfiltered local honey, if desired. Serve immediately on a hand-thrown pottery platter and enjoy the taste of wild elegance.
I remember the first time I foraged for elderflowers with my grandmother, Elsie. She taught me the importance of respecting the land and only taking what we needed, whispering stories of the fairies that guarded the elderflower bushes. These fritters are a reminder of those special moments and a way to connect with the natural world around me, a tradition I now share with my own grandchildren.
Natural Dyeing with Foraged Materials: A Sustainable Art
Beyond the kitchen, foraged plants offer another valuable resource: natural dyes. With a little knowledge and patience, you can transform humble plants into vibrant colors, creating beautiful and sustainable fabrics and yarns. This practice not only reduces our reliance on synthetic dyes but also connects us to the ancient traditions of textile art, honoring the wisdom of our ancestors and the beauty of the natural world.
Materials
- Foraged plant materials (1 cup of crushed elderberries, 1 cup of loosely packed onion skins (yellow or red), 1 cup of packed marigold petals)
- Mordant (1 tablespoon of alum for bright colors or 1 teaspoon of iron for muted colors, measured precisely)
- Fiber (100 grams of pre-washed and scoured wool yarn, cotton fabric, or linen fabric)
- Large stainless steel or enamel pot (at least 6 quarts)
- Smooth wooden stirring stick
- Heavy-duty rubber gloves (nitrile gloves recommended)
- Stainless steel measuring spoons
- Fine-mesh cheesecloth or nylon stocking
Instructions
- Gather and Prepare Plant Materials: Collect your chosen plant materials, ensuring they are clean and free of debris. For berries, crush them slightly to release their juices using a mortar and pestle. For flowers and leaves, chop them finely with a sharp knife on a wooden cutting board.
- Mordant the Fiber: Mordanting prepares the fiber to receive the dye and ensures colorfastness. Common mordants include alum (potassium aluminum sulfate) for bright colors and iron (ferrous sulfate) for muted colors. Follow the mordant instructions carefully, using a precise measurement, as excessive mordanting can damage the fiber. Weigh your fiber and use the mordant at 10% of the weight of the fiber (WOF) for alum or 2% WOF for iron. Simmer the fiber in a pot with the mordant for 1 hour, then let cool in the mordant bath before rinsing.
- Create the Dye Bath: Fill a large stainless steel or enamel pot with 4 quarts of water and add your foraged plant materials. Bring to a simmer (not a boil) over medium heat and let steep for at least one hour, or up to several hours, to extract the dye. The longer the steeping time, the richer the color. Strain the dye bath through fine-mesh cheesecloth or a nylon stocking to remove any plant debris, reserving the liquid.
- Dye the Fiber: Add the mordanted fiber to the dye bath, ensuring it is fully submerged and can move freely. Simmer gently for 1-2 hours, stirring occasionally with a wooden stirring stick to ensure even dyeing. Monitor the color development and remove when the desired shade is achieved.
- Rinse and Dry: Remove the fiber from the dye bath using tongs and rinse thoroughly with cool water until the water runs clear. Gently squeeze out excess water and hang to dry away from direct sunlight in a well-ventilated area.

Vermicomposting: A Homesteaders Best Friend
Now, let's turn our attention to the earth beneath our feet and the magic of transforming kitchen scraps into garden gold! Vermicomposting, or worm composting, is an efficient and odorless way to compost organic material using worms, especially red wigglers (Eisenia fetida). This method creates nutrient-rich compost perfect for the homestead, enriching the soil and reducing our reliance on synthetic fertilizers.

Setting Up Your Worm Bin
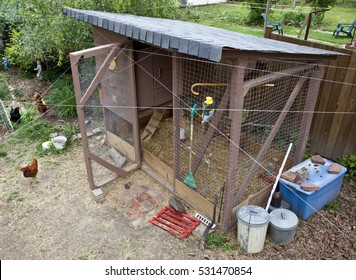
- Choose Your Bin: Use two stacking opaque dark gray or black plastic bins (18-gallon size is ideal), or create a homemade one from recycled materials! Ensure the top bin has numerous small holes (1/4 inch) drilled into the bottom for drainage and aeration, and the bottom bin is a solid container to catch leachate (worm tea). The goal is to keep it dark, moist, and well-ventilated!
- Bedding: Worms need a comfortable and nutritious home, so add a mixture of shredded newspaper (black and white only, avoid glossy paper), coconut coir, and peat moss. Moisten the bedding thoroughly until it feels like a wrung-out sponge, about 75% volume. Add a handful of garden soil to introduce beneficial microorganisms.
- Worms: Add 1,000-2,000 worms (about 1 pound) for best results. Purchase red wigglers (Eisenia fetida) from a reputable worm farm or online supplier. Do not use earthworms, as they are not suited for vermicomposting.
- Location: Find a dark, cool, and well-ventilated spot indoors, such as a basement or garage, or in a shady outdoor area protected from extreme temperatures. Maintain a temperature between 55°F and 75°F (13°C and 24°C) for optimal worm activity.
Feeding your Worms
- Appropriate food: Vegetable scraps (carrot peels, lettuce leaves, potato skins), fruit peels (apple cores, banana peels), coffee grounds (with paper filters), tea bags (remove staples), crushed eggshells. Chop food scraps into small pieces to speed up decomposition. Avoid meat, dairy, oily foods, processed foods, and citrus in large amounts, as they can attract pests and create unpleasant odors.
- Bury: Bury the food scraps under the bedding to avoid attracting fruit flies and other pests. Create a small pocket in the bedding, add the food scraps, and cover them with bedding.
- How Much: Start with a small amount of food scraps and monitor consumption. You should only feed the worms what they can eat within a few days (about 1/4 to 1/2 pound per day for 1,000 worms). Overfeeding can lead to foul odors and anaerobic conditions.
Harvesting the Compost
- Dump and Sort: The easiest way (although the most labor-intensive) is to dump out the entire contents of the worm bin onto a large tarp and hand-sort out the worms, returning them to the bin with fresh bedding. This method allows for complete harvesting of the compost.
- Light Method: Worms are photophobic (they don't like the light), so use a bright light source (such as a lamp) on one side of the worm bin. The worms will move away from the light and burrow deeper into the bedding, allowing you to scrape off the top layer of finished compost. Repeat this process several times until most of the compost has been harvested.
- Remove and Replace: Gently scrape off the top layer of bedding where most of the fresh food has been recently added, and transfer it to a new worm bin or holding container. The compost in the lower portion of the bin is now ready to be harvested and used in your garden!
As we embrace the changing seasons, let's celebrate the bounty of the natural world and the skills that empower us to live more sustainably. From foraging for wild delicacies like elderflowers to transforming those foraged materials into natural dyes, and using our waste products to produce nutrient rich soil, the homesteading lifestyle offers a unique opportunity to connect with nature and create a more meaningful way of life. What are your favorite foraged treats and eco-friendly projects? Share your tips, tricks, and recipes in the comments below! We'd love to hear from you and learn from your experiences, as we all navigate this journey towards a more self-sufficient and harmonious existence.
Keywords: organic gardening, seasonal harvest, homegrown, sustainable home, cozy living, backyard projects, farmhouse life, elderflower fritters, foraging, ethical foraging, natural dyeing, vermicomposting, worm composting, composting, red wiggler worms, Sambucus canadensis, Sambucus nigra