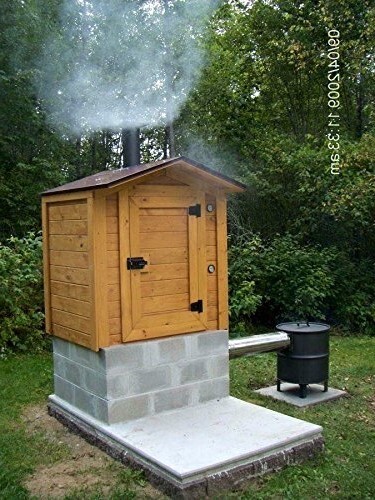
DIY Smokehouse: Preserve Your Harvest for Year-Round Eating
Imagine the smoky, savory aroma of home-cured bacon or the tender, flavorful taste of smoked salmon, all from your own backyard. Building a smokehouse unlocks a world of food preservation possibilities, allowing you to enjoy the fruits (and meats!) of your labor long after the growing season ends. Smoking is a fantastic method of food preservation that not only extends the shelf life of your harvests but also enhances their flavor profile in a way that’s simply irresistible.
This blog post will walk you through building a DIY smokehouse, an accessible project that empowers homesteaders to take control of their food supply and embrace a more self-sufficient lifestyle. Not only is it a rewarding project, but it's also significantly more cost-effective than purchasing a pre-made smokehouse, offering unparalleled customization options to fit your specific needs and preferences. Get ready to embark on a journey to build your own backyard food security powerhouse!

Section 1: Planning Your Smokehouse
Careful planning is the cornerstone of any successful building project, and your DIY smokehouse is no exception. Before you start swinging a hammer, take the time to consider these crucial aspects:
Location, Location, Location: Just like in real estate, location matters when it comes to your smokehouse. Choose a site that's a safe distance away from your home, barn, or any other flammable structures. A minimum of 20 feet is generally recommended. Consider the prevailing winds in your area; you don’t want smoke constantly blowing into your house or your neighbor's windows. Ideally, the location should also be easily accessible from your garden and kitchen for convenient transport of your harvests.
Size and Capacity: The size of your smokehouse will depend on the volume of food you plan to smoke regularly. If you’re a small-scale homesteader primarily smoking meats for your family, a smaller smokehouse (e.g., 3ft x 3ft x 6ft) might suffice. However, if you plan to smoke larger quantities or cure whole hams, you'll need a larger structure. Consider the interior layout as well - will you be hanging food, using racks, or both?
Materials Selection: When it comes to building materials, you have several options, each with its own advantages and disadvantages.
- Wood: Wood is a classic choice for smokehouses, offering a rustic aesthetic and good insulation. However, it’s essential to choose durable, rot-resistant woods like cedar, redwood, or cypress. Avoid using treated lumber, as the chemicals can leach into your food.
- Cinder Blocks: Cinder blocks offer excellent fire resistance and durability but can be more expensive and less aesthetically pleasing than wood. They also retain heat well, which can be beneficial in colder climates.
- Reclaimed Materials: Consider using reclaimed materials like old barn wood, salvaged bricks, or recycled metal roofing to save money and reduce waste. Ensure that any reclaimed materials are clean and free from harmful chemicals.
Design Considerations: The design of your smokehouse will influence its functionality and efficiency.
- Hot Smoking vs. Cold Smoking: Hot smoking involves cooking food at higher temperatures (160-250°F) while simultaneously imparting a smoky flavor. Cold smoking, on the other hand, is done at lower temperatures (below 90°F) and is primarily used for preserving and flavoring food without cooking it. Choose a design that aligns with your intended smoking methods.
- Key Components: A well-designed smokehouse should include a smoke source (e.g., fire pit, smoker box), a smoking chamber (where the food is hung or placed), a chimney or vent to regulate smoke flow, and an adjustable ventilation system to control temperature.
Safety First: Fire safety is paramount when building and operating a smokehouse. Ensure that the smoke source is properly contained and away from flammable materials. Keep a fire extinguisher and a water hose nearby. Also, be mindful of food safety; always use a reliable meat thermometer to ensure that your food reaches a safe internal temperature.
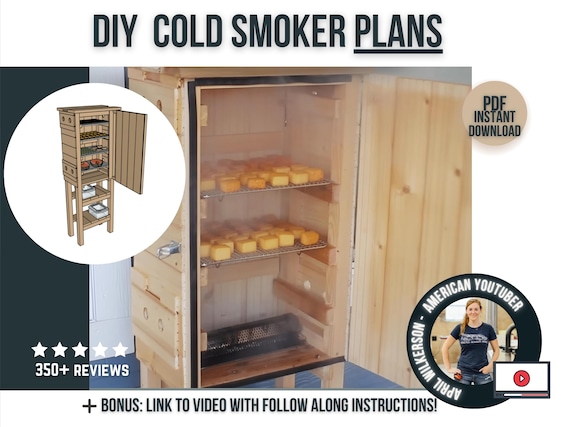
Key Takeaways: Careful planning is essential for a successful smokehouse. Consider location, size, materials, and design based on your specific needs and regional climate.
Section 2: Gathering Your Materials and Tools
With a solid plan in place, it's time to gather the necessary materials and tools. A well-organized inventory will streamline the construction process and prevent frustrating delays.
Detailed Materials List:
- Lumber (cedar, redwood, or cypress): Calculate the required amount based on your smokehouse dimensions. Costs vary depending on the type of wood and your location.
- Exterior Siding (optional): If you're using cinder blocks or a simple wood frame, you may want to add exterior siding for aesthetic appeal and added insulation. Costs vary.
- Roofing Material (metal roofing, shingles): Choose a durable, weather-resistant roofing material. Metal roofing is a great sustainable option.
- Hardware (nails, screws, hinges, latches): Stock up on a variety of hardware to assemble the structure.
- Insulation (optional): If you live in a cold climate, consider adding insulation to the walls and roof for improved temperature control.
- Chimney or Vent Pipe: Select a suitable chimney or vent pipe to ensure proper smoke exhaust.
- Door (salvaged door, custom-built door): A sturdy, well-sealing door is essential for maintaining temperature and smoke control.
- Smoker Box or Fire Pit Materials: Depending on your chosen smoke source, you may need materials for building a smoker box or fire pit.
- Meat Hooks or Racks: Purchase or fabricate meat hooks or racks for hanging or placing food inside the smokehouse.
- Thermometer: A reliable meat thermometer is crucial for monitoring the internal temperature of your food.
Approximate Cost:
The cost of building a DIY smokehouse can vary widely depending on the materials you choose, the size of the structure, and whether you source recycled materials. A basic smokehouse built with reclaimed wood and a simple smoker box could cost as little as $100-$300. A more elaborate smokehouse with premium materials and insulation could cost $500 or more.
Essential Tools:
- Saw (circular saw, hand saw)
- Drill
- Hammer
- Level
- Measuring Tape
- Safety Glasses
- Gloves
- Shovel (for digging a fire pit, if applicable)
- Wrench/Pliers (assorted sizes)
Sourcing Recycled Materials:
One of the best ways to save money and reduce your environmental impact is to source recycled or salvaged materials. Check with local salvage yards, construction sites, or online marketplaces for used lumber, bricks, metal roofing, and other materials. Pallets can be a great source of free lumber, but be sure to inspect them carefully for signs of chemical treatment.
Budgeting and Cost-Saving Tips:
- Compare prices from different suppliers before making any purchases.
- Negotiate with suppliers for discounts, especially if you're buying in bulk.
- Utilize existing resources, such as tools and materials you already have on hand.
- Consider building a smaller smokehouse if you're on a tight budget.
- Don't be afraid to get creative and improvise with recycled materials.
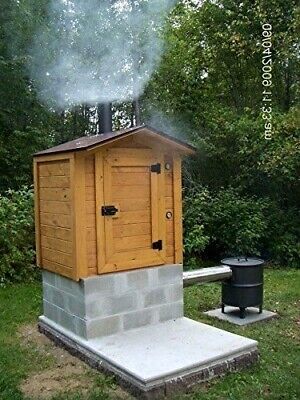
Key Takeaways: Accurate material and tool gathering streamlines the construction process and minimizes delays. Explore recycled options to reduce costs and environmental impact.
Section 3: Building the Smokehouse Structure
Now comes the fun part: bringing your smokehouse vision to life! The following steps provide a general guideline for building a basic wooden smokehouse. Adapt these instructions to suit your specific design and materials.
Step-by-Step Construction Guide:
- Prepare the Foundation: Level the ground at your chosen location and create a stable foundation for the smokehouse. You can use concrete blocks, gravel, or a simple wooden frame.
- Build the Frame: Construct a sturdy wooden frame using 2x4 or 4x4 lumber. Ensure that the frame is square and level.
- Attach the Siding: Attach the siding to the frame using nails or screws. Overlap the siding boards slightly to create a weather-tight seal.
- Build the Roof: Construct a simple pitched roof using lumber and roofing material. Ensure that the roof is properly sloped to allow for water runoff.
- Install the Door: Install a sturdy, well-sealing door with hinges and a latch. Ensure that the door fits snugly to prevent smoke from escaping.
- Install Ventilation: Cut ventilation holes near the top of the smokehouse walls to allow for smoke to escape. Cover the holes with screens to prevent insects from entering.
- Add Chimney/Flue: Position the flu/chimney in a location that optimizes airflow and heat, depending on if you are using a hot or cold smoking process.
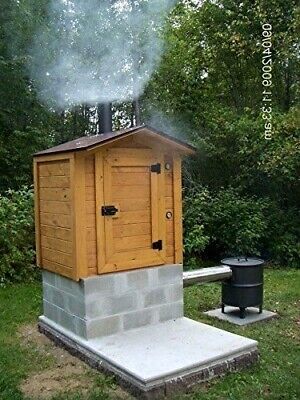
Key Takeaways: Follow the step-by-step instructions carefully and use visual aids to ensure accurate construction. Pay attention to ventilation and insulation for optimal smokehouse performance.
Section 4: Setting Up the Smoke Source
The heart of any smokehouse is its smoke source. The type of smoke source you choose will impact the flavor of your smoked foods and the overall ease of operation.
Types of Smoke Sources:
- Wood Chips: Wood chips are a popular and affordable option for generating smoke. They can be used in a smoker box or placed directly on hot coals.
- Smoker Box: A smoker box is a metal container that holds wood chips and is placed inside the smokehouse or near the heat source. It allows for controlled smoke generation.
- Electric Smoker: Electric smokers offer precise temperature control and are easy to use, but they require a power source.
- Charcoal: Charcoal can be used as a heat source and for generating smoke, but it can be more difficult to control the temperature and smoke density.
Selecting Wood Chips:
The type of wood you use for smoking will significantly impact the flavor of your food.
- Hickory: Hickory imparts a strong, bacon-like flavor and is ideal for smoking pork and beef.
- Apple: Applewood offers a mild, fruity flavor and is excellent for smoking poultry and fish.
- Mesquite: Mesquite provides a strong, earthy flavor and is best suited for smoking beef and game meats.
- Cherry: Cherry wood imparts a sweet, fruity flavor and is a versatile choice for smoking a variety of foods.
Positioning the Smoke Source:
The position of the smoke source will depend on the design of your smokehouse.
- Inside the Smokehouse: If you're using a smoker box or electric smoker, you can place it directly inside the smokehouse.
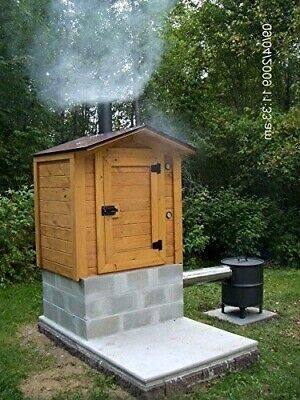
- Outside the Smokehouse: If you're using a fire pit, you'll need to position it outside the smokehouse and pipe the smoke into the chamber through a vent.
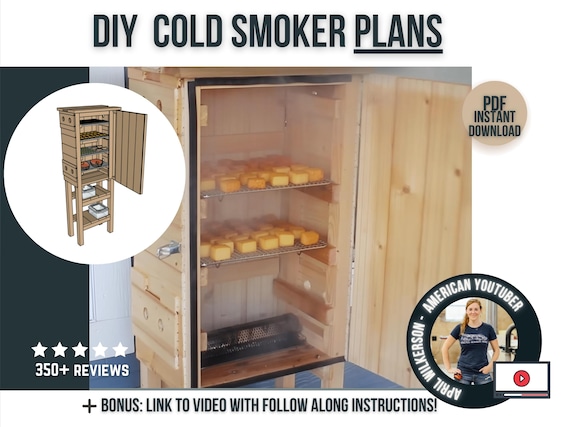
Key Takeaways: Choose a smoke source that meets your needs and budget. Experiment with different wood types to find your favorite smoke flavors. Prioritize fire safety when operating the smoke source.
Section 5: Testing and Fine-Tuning
Before you load up your smokehouse with a prized ham or salmon, it's essential to test and fine-tune the system to ensure optimal performance.
Initial Test Runs:
Conduct several test runs without any food to familiarize yourself with the smokehouse and fine-tune the temperature and smoke flow.
Monitoring Temperature:
Use a reliable meat thermometer to monitor the temperature inside the smokehouse. The ideal temperature range will depend on the type of food you're smoking and the smoking method you're using.
Adjusting Ventilation:
Adjust the ventilation openings to control the temperature and smoke density. Open the vents to increase ventilation and lower the temperature. Close the vents to decrease ventilation and increase the temperature.
Troubleshooting Common Issues:
- Uneven Smoking: Ensure that the food is evenly spaced inside the smokehouse and that the smoke is circulating properly.
- Temperature Fluctuations: Use a more consistent heat source or add insulation to the smokehouse walls.
- Excessive Smoke: Increase ventilation to reduce the amount of smoke inside the smokehouse.
Key Takeaways: Test runs are crucial for optimizing smokehouse performance. Monitor temperature and ventilation closely to achieve consistent and flavorful results.
Section 6: Long-Term Maintenance
Maintaining your smokehouse will ensure its longevity and optimal performance for years to come. Clean the interior of the smokehouse regularly to remove creosote buildup. Inspect the roof and walls for leaks or damage and repair them promptly. Store wood chips in a dry place to prevent them from getting moldy.
Benefits and Impact
Beyond the immediate benefits of preserving food and adding incredible flavor, this project will contribute to a more self-sufficient and resilient homestead by reducing your reliance on commercially produced food and empowering you to take control of your food supply. We've been using our smokehouse on our homestead for several years and have seen a significant increase in our ability to preserve our harvests and enjoy delicious, home-smoked foods year-round. Plus, it is a great way to connect with time-honored traditions.
Your Homestead Story
Building a DIY smokehouse is a rewarding project that can transform your homestead and elevate your culinary experiences. Embrace the process, experiment with different techniques, and most importantly, enjoy the delicious results.
What are you most excited to smoke in your new smokehouse? Share your plans in the comments below! If you found this guide helpful, please share it with other homesteaders! Check out our other blog posts on food preservation and homesteading projects for more inspiration. Join our homesteading community forum to ask questions, share tips, and connect with other like-minded individuals.
Relevant Keywords
homesteading DIY, sustainable living, smokehouse plans, smokehouse tutorial, smokehouse guide, food preservation, smoking meat, cold smoking, hot smoking, DIY smoker, build a smokehouse, backyard smokehouse, wood smoking, food security, homesteading projects.