DIY Root Cellar on a Budget: A Homesteader's Guide to Winter Food Storage
As homesteaders, we're constantly striving for greater self-sufficiency and resilience. One of the most rewarding aspects of this lifestyle is harvesting our own food, but what happens when winter arrives? That’s where a root cellar comes in. A budget root cellar allows you to extend the life of your garden's bounty well into the colder months, providing fresh, homegrown produce long after the last frost. Building a DIY root cellar doesn't have to break the bank. This guide will walk you through creating an affordable, functional root cellar that will revolutionize your winter food storage. Let's dive in!

Why Build a Root Cellar? The Benefits of Underground Storage
Before we get into the "how," let's talk about the "why." A root cellar provides a naturally cool, humid environment ideal for storing root vegetables, fruits, and even some canned goods. This means less reliance on store-bought produce, reduced food waste, and significant cost savings. Think of it as your homestead's natural refrigerator, powered by the earth itself. The benefits of underground storage are numerous:
- Food Preservation: Extends the shelf life of your harvest.
- Cost Savings: Reduces your grocery bill, especially during winter.
- Self-Reliance: Increases your food security and independence.
- Natural Storage: Avoids the need for electricity-guzzling appliances.
- Reduced Waste: Prevents spoilage and minimizes food waste.
- Off Grid Storage: Providing a storage solution that works independently of the electric grid.
Planning Your Budget Root Cellar: Design Considerations
The first step in building a cheap root cellar is careful planning. Consider your space, budget, and the amount of food you intend to store. There are several root cellar design options to choose from, each with its own advantages.
Location, Location, Location
The ideal location for a DIY root cellar is a cool, dark, and naturally humid spot. A north-facing slope is often a good choice, as it receives minimal direct sunlight. If you have a basement, a corner away from the furnace can work well. Key considerations include:
- Proximity to the Garden: Easy access for harvesting and stocking.
- Soil Drainage: Avoid areas prone to flooding or standing water.
- Sun Exposure: Minimize direct sunlight to maintain cool temperatures.
- Accessibility: Ensure easy access even during snowy or icy conditions.
- Local Building Codes: Check for any regulations or permits required in your area.
Design Options: From Simple to Elaborate
Here are a few cheap root cellar ideas:
- The Underground Pit: The simplest and most affordable option. Dig a pit, line it with straw or wood, and cover it with a thick layer of soil and insulation.
- The Basement Corner: Utilize an existing basement space by building insulated walls and a door to create a dedicated root cellar.
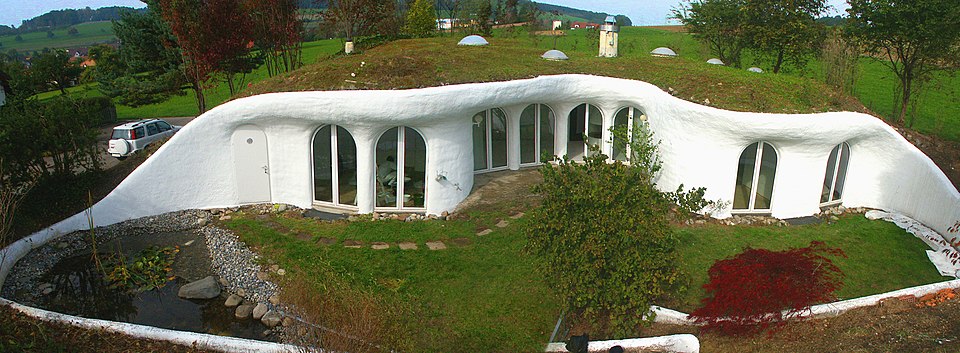
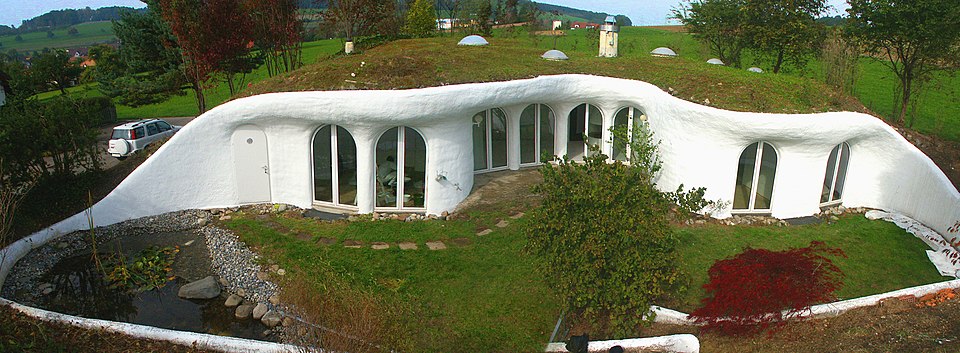
- The Earth Berm Cellar: Build a structure partially underground, then cover the walls and roof with earth for insulation.
For this guide, we'll focus on the basement corner root cellar, as it's a relatively straightforward and accessible option for many homesteaders.
Step-by-Step Guide: Building a Basement Corner Root Cellar
This project will demonstrate how to build a DIY root cellar on a budget for beginners, in a basement setting.
Step 1: Gathering Materials
To keep costs down, we'll focus on using readily available and affordable materials.
- Framing Lumber: 2x4s for framing the walls (reclaimed lumber is a great budget-friendly option).
- Insulation: Rigid foam insulation boards (salvaged or seconds can save money).
- Vapor Barrier: Plastic sheeting to prevent moisture buildup.
- Plywood or OSB: For sheathing the walls (consider using recycled materials).
- Door: A solid-core door is ideal, but a repurposed exterior door will work.
- Hardware: Screws, nails, hinges, latches.
- Ventilation: A simple vent pipe with a screen to allow for airflow.
- Shelving: Lumber for building shelves (consider using pallets for a truly budget-friendly option).

Step 2: Framing the Walls
Frame the walls using the 2x4 lumber. Ensure the frame is square and plumb. Attach the framing to the basement walls and floor using appropriate fasteners. Remember to leave space for the door and ventilation.

Step 3: Insulation and Vapor Barrier
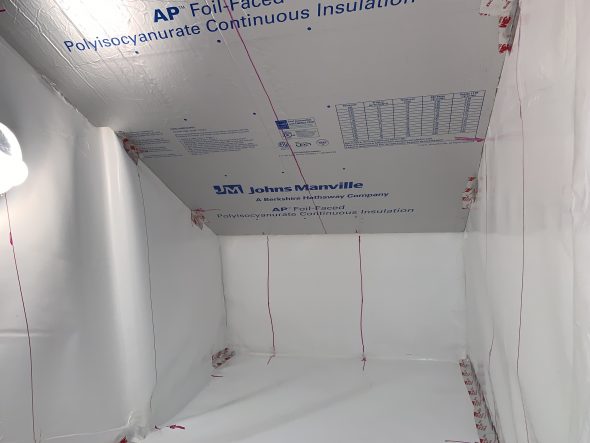
Insulate the walls with rigid foam insulation, cutting the boards to fit snugly between the studs. Seal the seams with tape to prevent air leaks. Install a vapor barrier over the insulation to protect against moisture.
Step 4: Sheathing the Walls
Cover the insulated walls with plywood or OSB. This will provide structural support and a finished surface.
Step 5: Installing the Door
Install the door frame and hang the door. Ensure the door seals tightly to prevent warm air from entering the root cellar.
Step 6: Ventilation
Install a vent pipe through the wall to provide fresh air circulation. Cover the vent with a screen to keep out pests.
Step 7: Building Shelves
Construct shelves using lumber or repurposed pallets. Ensure the shelves are sturdy enough to hold the weight of your stored produce. Proper ventilation is key to your root cellar design and should be incorporated into the shelving to keep air circulating

Step 8: Testing and Adjusting
Monitor the temperature and humidity inside the root cellar. The ideal temperature range is 32-40°F (0-4°C), with a humidity level of 85-95%. Adjust the ventilation as needed to maintain these conditions.
Troubleshooting Common Challenges
- Excessive Moisture: Increase ventilation or add a dehumidifier.
- Temperature Fluctuations: Add more insulation or adjust ventilation.
- Pest Infestation: Seal any cracks or openings and use traps if necessary.
- Condensation: Make sure you have an effective vapor barrier in place.
What to Store in Your Root Cellar
A root cellar is perfect for storing a variety of fruits and vegetables, including:
- Potatoes
- Carrots
- Onions
- Garlic
- Apples
- Cabbage
- Beets
- Turnips
Proper storage techniques are essential for maximizing the shelf life of your produce. Store vegetables in bins or crates lined with straw or sawdust. Keep fruits separate from vegetables to prevent premature ripening.
The Sweet Rewards of Self-Sufficiency
Building a DIY root cellar on a budget is an investment in your homestead's self-sufficiency and resilience. By extending the life of your garden's bounty, you'll enjoy fresh, homegrown produce throughout the winter months, save money on groceries, and reduce food waste. It's a rewarding project that will deepen your connection to the land and enhance your homesteading journey. Embrace the challenge, and savor the fruits (and vegetables!) of your labor. Start building your cheap root cellar today!