DIY Reclaimed Cold Frame: Extend Your Growing Season on the Homestead
Remember that sinking feeling when an unexpected late frost blankets your precious seedlings, the tiny green shoots you've nurtured so carefully indoors? Last spring, that’s exactly what happened to me. My dreams of an early tomato harvest withered along with my tender pepper plants. It was then I knew I needed a better solution than just lugging flats of plants in and out of the house every time the temperature dipped. The answer? A simple, effective, and beautifully rustic DIY cold frame built from reclaimed materials.
This project is perfect for homesteaders of all levels who are eager to extend their growing season, protect delicate seedlings, and embrace the resourceful spirit of self-sufficiency. Not only will you be giving your plants a head start, but you'll also be giving discarded materials a new lease on life!
Why Build a Cold Frame?
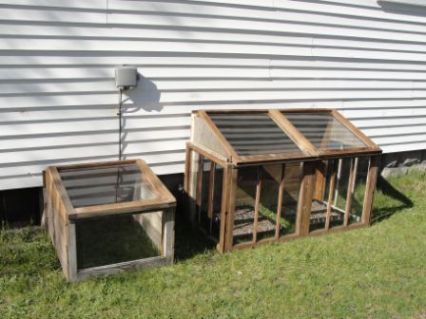
A cold frame is essentially a miniature greenhouse – an enclosed structure with a transparent cover that allows sunlight to warm the soil and protect plants from the elements. It’s a game-changer for:
- Starting seeds earlier: Get a jumpstart on the growing season by starting seeds weeks or even months before the last frost.
- Protecting seedlings: Shield vulnerable young plants from frost, wind, and pests.
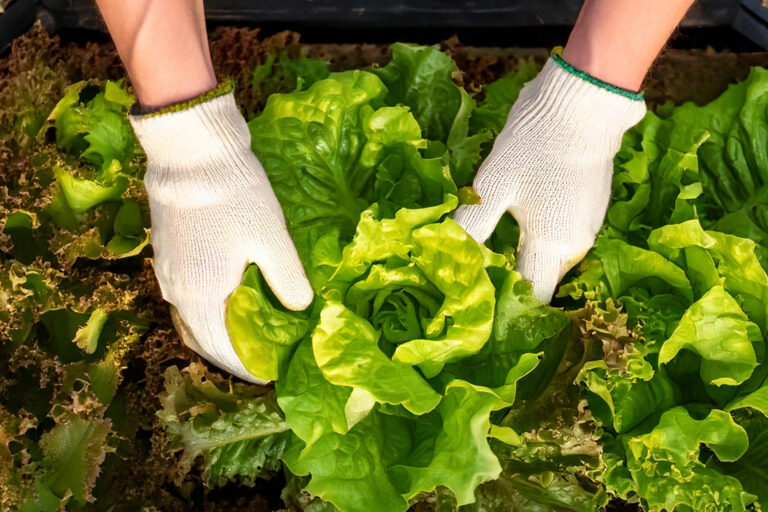
- Extending the harvest: Keep growing cool-season crops like lettuce, spinach, and kale well into the fall and even winter.
- Hardening off plants: Acclimate indoor-grown seedlings to outdoor conditions gradually, preventing shock.
Gathering Your Reclaimed Materials
The beauty of this project lies in its sustainability. We're giving discarded materials a second chance to shine. Sourcing reclaimed materials is often more affordable and adds character to your homestead. Here's what you'll need:
- Old Windows: These will form the transparent lid of your cold frame. Look for single-pane windows (double-pane windows are heavier and retain too much heat). Check architectural salvage yards, online marketplaces (Facebook Marketplace, Craigslist), or ask friends and neighbors who might be doing renovations. The size of your window will determine the overall size of your cold frame.
- Scrap Wood: You'll need lumber for the frame. Consider using reclaimed wood from old pallets, fences, or construction sites. Pine, cedar, or redwood are excellent choices as they are naturally rot-resistant.
- Hinges: To attach the window lid to the frame. You can often find these at salvage yards or reuse old door hinges.
- Screws/Nails: For assembling the frame.
- Handle/Latch (optional): For easy opening and closing of the lid and for securing it in windy conditions.
- Paint/Wood Preservative (optional): To protect the wood from the elements and enhance its appearance.
Cost-Effective Alternatives:
- Instead of old windows: Use heavy-duty greenhouse plastic stretched over a wooden frame. While not as aesthetically pleasing, it's a budget-friendly option.
- Instead of lumber: Use reclaimed concrete blocks or bricks for the frame.
Step-by-Step Guide to Building Your Reclaimed Cold Frame
Here's how to bring your vision to life:
Step 1: Design and Planning
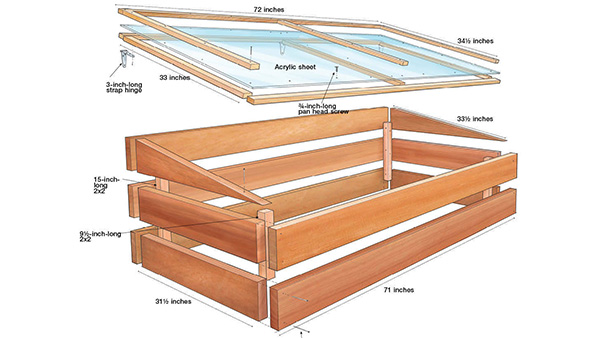
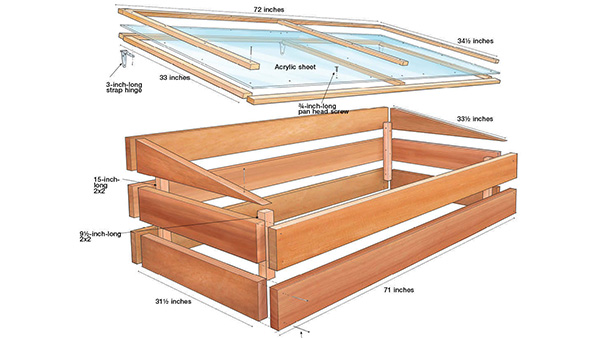
Before you start cutting wood, plan your cold frame’s dimensions. The size will depend on the size of your window and the available space in your garden. A general guideline is to make the back of the cold frame slightly taller than the front, creating a sloping lid that maximizes sunlight exposure and allows rainwater to run off. A 6-12 inch slope is ideal.
Step 2: Cut the Wood
Cut the lumber according to your planned dimensions. You'll need:
- Two side pieces (with a sloping top edge)
- A front piece
- A back piece
Safety First: Always wear safety glasses and gloves when working with power tools.
Step 3: Assemble the Frame
Attach the side pieces to the front and back pieces using screws or nails. Ensure the frame is square and sturdy. If using reclaimed pallet wood, carefully disassemble the pallet and remove any nails or staples.
Step 4: Prepare and Attach the Lid (Window)
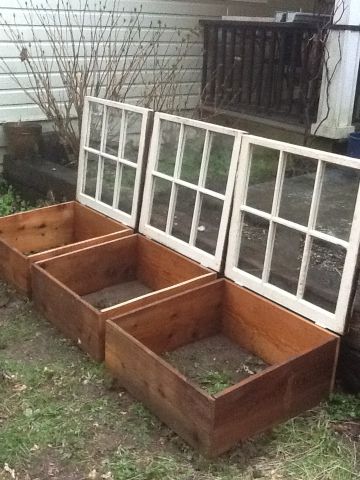
Clean the old window thoroughly. If desired, paint the wooden frame of the window to protect it from the elements. Attach the window to the back of the frame using hinges.
Step 5: Finishing Touches
Add a handle or latch to the front of the lid for easy opening and closing. This is especially useful for ventilation. Consider adding a coat of paint or wood preservative to the entire cold frame to protect it from the elements and enhance its appearance.
Step 6: Choose a Location
Select a sunny, sheltered location in your garden for your cold frame. Ideally, it should face south to maximize sunlight exposure. Ensure the location has good drainage.
Step 7: Prepare the Soil
If you plan to plant directly into the cold frame, amend the soil with compost and other organic matter to improve drainage and fertility. Alternatively, you can place seed trays or pots inside the cold frame.
Troubleshooting and Tips
- Ventilation is Key: Overheating can be a major problem in cold frames, especially on sunny days. Open the lid to ventilate the cold frame regularly, especially during the warmest part of the day. You can prop the lid open with a stick or brick.
- Moisture Control: Avoid overwatering, as this can lead to fungal diseases. Water early in the day so the foliage has time to dry before nightfall.
- Pest Control: Monitor your plants regularly for pests and diseases. Use organic pest control methods, such as insecticidal soap or neem oil.
- Insulation: In very cold climates, you can insulate the cold frame by banking straw or hay around the outside.
- Heavy Lid? If your reclaimed window is particularly heavy, consider adding a support arm to hold the lid open.
Aesthetically Pleasing Design Ideas
- Distressed Finish: Embrace the rustic charm of reclaimed wood by leaving it with a distressed finish.
- Decorative Paint: Paint the cold frame in a color that complements your garden.
- Stone Base: Build a base for the cold frame using stones or bricks for added stability and visual appeal.
- Living Roof: Plant succulents or sedum on the roof of the cold frame for a unique and eco-friendly touch.
Cold Frame Benefits in Action
Imagine harvesting fresh lettuce in the middle of winter, or transplanting strong, healthy tomato seedlings weeks before your neighbors. With a reclaimed cold frame, these dreams become reality. The difference is undeniable. Before the cold frame, my growing season was dictated by the whims of the weather. Now, I'm in control.
Share Your Project!
Building a cold frame is a rewarding experience that connects you to the land and empowers you to grow your own food year-round. We'd love to see your creations! Share photos of your DIY reclaimed cold frame projects in the comments below. What reclaimed materials did you use? What challenges did you overcome?
Looking for more homesteading inspiration? Check out our other articles on [insert related article link 1 here] and [insert related article link 2 here]. And don't forget to subscribe to the Better Homes and Harvests newsletter for more tips and tricks on creating a thriving homestead!
A reclaimed cold frame isn't just a gardening structure; it's a symbol of self-sufficiency, sustainability, and the enduring power of resourcefulness. By embracing this simple DIY project, you're not just extending your growing season – you're cultivating a deeper connection to the earth and creating a more resilient and abundant homestead. So, gather your reclaimed materials, roll up your sleeves, and get ready to grow!