DIY Rainwater Harvesting: A Homestead Essential for Water Security
[VISUAL: Lush garden being watered by rainwater from a barrel]
Remember last summer? The garden started to wilt, the creek dried up, and the well… well, let’s just say the well started to sound a little anxious. More and more homesteaders are finding themselves facing water restrictions and unreliable water sources. The reality is, water scarcity is becoming a pressing issue for many of us.
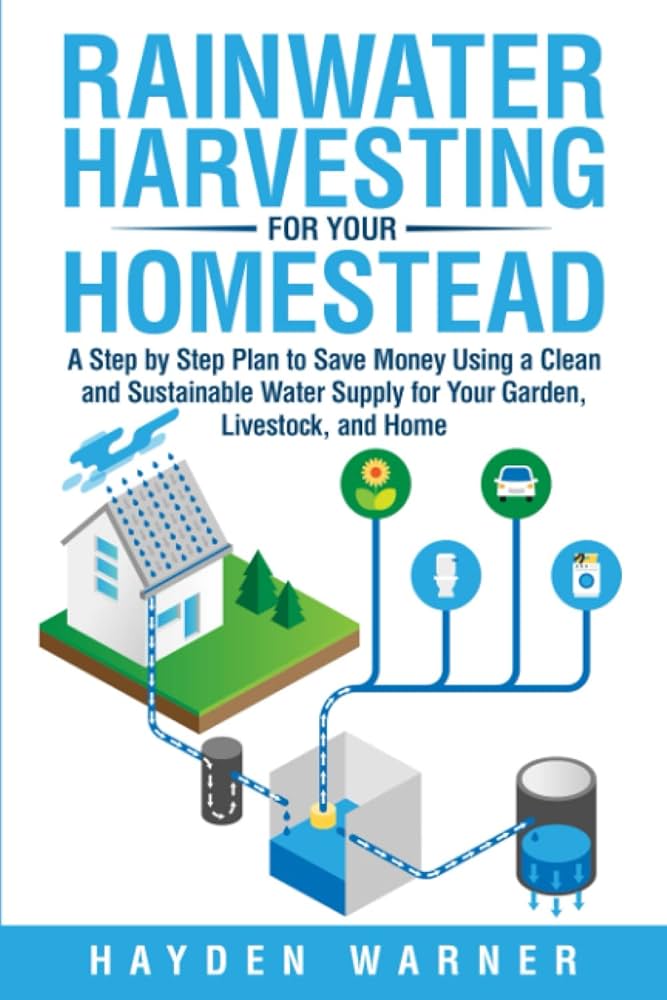
Rainwater harvesting offers a practical and empowering solution. It's the simple act of collecting rainwater from your roof and storing it for later use. This collected water can then be used for a variety of purposes, from watering your garden and livestock to washing equipment.
Beyond just convenience, rainwater harvesting promotes water conservation by reducing your reliance on municipal water supplies and deep wells. It allows you to become more self-sufficient and resilient, especially during times of drought. Think of it as creating your own personal water reserve.
Some might think, “Rainwater harvesting? That’s only for dry climates!” But that's a misconception. Even in areas with consistent rainfall, harvesting rainwater helps conserve resources, reduces stormwater runoff, and provides a reliable water source for your homestead.
Before we dive in, it’s important to note that rainwater harvesting regulations vary by location. Always check your local laws and ordinances regarding rainwater collection before starting this project.
Ready to take control of your water supply? This guide will walk you through building a simple, effective, and affordable rainwater harvesting system for your homestead, step-by-step.
Key Takeaway: Rainwater harvesting is a smart, sustainable, and increasingly necessary practice for homesteaders, offering water security and reducing reliance on municipal water sources.
Planning Your Rainwater Harvesting System
[VISUAL: Hand drawn sketch rainwater harvesting system]
Like any good homesteading project, successful rainwater harvesting starts with careful planning. Jumping in without a strategy can lead to inefficiencies and wasted resources.
Assessing Your Water Needs: The first step is to determine how much water you actually need. Consider what you’ll be using the rainwater for – gardening, livestock, cleaning, or even potentially household uses (with proper filtration and permits). A small vegetable garden will require significantly less water than a herd of goats. Keep track of your current water usage for a month to establish a baseline. Online water usage calculators can also help you estimate your needs.
Calculating Rainfall Potential: This is where things get exciting! Use historical rainfall data for your area to estimate how much water you can realistically collect. NOAA (National Oceanic and Atmospheric Administration) provides detailed rainfall data. Local weather stations and online resources like RainfallReady.com can also be helpful. Multiply your average annual rainfall (in inches) by the square footage of your roof to estimate your collection potential. Remember, this is an estimate, as rainfall varies from year to year.
Choosing the Right Collection Surface: Not all roofs are created equal when it comes to rainwater harvesting. Metal roofs are generally considered the best option, as they are non-toxic and don't leach chemicals into the water. Asphalt shingle roofs are also commonly used, but they can release small amounts of granules over time, requiring more frequent filter maintenance. Regardless of your roofing material, regular cleaning is essential to remove debris and prevent contamination. Consider installing gutter guards to minimize leaf and debris buildup.
System Design Considerations: Where will you place your storage tank(s)? The ideal location is close to a downspout and on a level surface. Factor in the weight of a full tank – water weighs approximately 8.34 pounds per gallon! Consider a raised platform for easier access and to create gravity-fed water pressure. If you live in an area with freezing temperatures, you'll need to take precautions to prevent your system from freezing and cracking. Insulating your tank or burying it underground can help. Also consider the tank size, the bigger, the better!
Key Takeaway: Proper planning, including assessing water needs and rainfall potential, is crucial for designing an effective rainwater harvesting system tailored to your specific homestead.
Gathering Your Materials & Tools (Budget-Friendly Focus)
[VISUAL: variety used recycled materials rainwater harvesting]
Now for the fun part – gathering the materials! A rainwater harvesting system doesn't have to be expensive. By focusing on repurposed materials and budget-friendly options, you can build a system that’s both effective and affordable.
Rain Barrel/Storage Tank Options: The heart of your system is the storage tank. Food-grade plastic barrels (55-gallon drums) are a popular and affordable option. Look for them at local food processing plants, beverage distributors, or online marketplaces like Craigslist or Facebook Marketplace. IBC totes (Intermediate Bulk Containers) are larger and can hold 275 or 330 gallons. These are also often available used, but be sure they previously contained food-grade materials. Clean them thoroughly before use. New tanks are available at agricultural supply stores.
Gutters & Downspouts: If your home already has gutters, you're halfway there! Make sure they're clean and in good repair. If you need to install new gutters, consider PVC gutters – they're lightweight, inexpensive, and easy to install. Local building supply stores offer a variety of options.
Filtration System: Clean water is essential, especially if you plan to use the rainwater for your garden. A basic filtration system should include a leaf screen to prevent debris from entering the tank, a first flush diverter to discard the initial rainwater that washes contaminants off your roof, and a sediment filter to remove fine particles. You can DIY a first flush diverter using PVC pipe and fittings. Pre-made filters are also available online and at garden supply stores.
Connecting Hardware: You'll need various fittings, pipes, and connectors to connect the gutters, downspout, tank, and filtration system. PVC pipe and fittings are readily available at your local hardware store. Be sure to use food-grade or potable water-safe materials.
Essential Tools: You'll need a few basic tools for assembly, including a drill, saw, measuring tape, level, sealant (silicone or plumbers putty), and potentially a ladder.
Key Takeaway: By repurposing materials and choosing budget-friendly options, you can build a rainwater harvesting system without breaking the bank.
Step-by-Step Construction Guide
[VISUAL: Person installing first flush diverter system]
Gutter Installation/Modification (Estimated time: 2-4 hours): If you're installing new gutters, follow the manufacturer's instructions. Ensure they have a slight slope towards the downspout. If using existing gutters, thoroughly clean them and inspect for any damage. Repair any leaks or sagging sections.
Downspout Connection (Estimated time: 1-2 hours): Cut the downspout to the desired height, leaving enough space for the leaf screen and first flush diverter. Connect the downspout to your tank using PVC pipe and fittings.
Installing the First Flush Diverter (Estimated time: 1-2 hours): A simple first flush diverter can be made from a length of PVC pipe capped at the bottom with a valve. Calculate the volume of water you want to divert (typically the first gallon or two per 100 square feet of roof area). The length of the PVC pipe will determine the volume of water diverted. Attach the diverter to the downspout so that the initial rainwater flows into the diverter, and subsequent rainwater flows into the tank. Remember to open the valve after each rain event to drain the collected water.
Tank Placement & Connection (Estimated time: 1-2 hours): Place your storage tank on a level surface. If using multiple tanks, connect them together using PVC pipe and fittings, creating a manifold. Ensure the tanks are securely anchored to prevent them from tipping over.
Installing the Filtration System (Estimated time: 30 minutes - 1 hour): Install the chosen filtration system between the tank and your water source. This may involve connecting a sediment filter to the outlet of the tank. Be sure to follow the manufacturer's instructions for installation.
Overflow Management (Estimated time: 1 hour): Provide an overflow outlet on your tank to prevent it from overflowing and causing water damage. Direct the overflow water to a safe area, such as a rain garden or a drainage ditch.
Key Takeaway: By following these step-by-step instructions, you can easily construct a functional and efficient rainwater harvesting system for your homestead.
Maintenance & Troubleshooting
Like any system, your rainwater harvester will require some regular TLC.
Regular Cleaning: Clean gutters every few months, especially after heavy foliage falls. Remove any debris from the leaf screen regularly. Periodically empty and clean the first flush diverter.
Filter Replacement: Replace sediment filters according to the manufacturer's recommendations.
Winterizing Your System: In cold climates, disconnect the downspout from the tank in the winter to prevent freezing. Drain the tank partially or completely. Consider insulating the tank to prevent freezing.
Troubleshooting Common Issues:
Leaks: Check all connections for leaks. Tighten fittings or replace damaged sections of pipe.
Clogs: Clear any clogs in the gutters, downspout, or filtration system.
Algae Growth: If algae growth is a problem, consider using a dark-colored tank or adding a small amount of chlorine bleach (food grade). Always use caution when handling chemicals and follow safety instructions carefully.
Key Takeaway: Regular maintenance and timely troubleshooting will ensure the long-term functionality and efficiency of your rainwater harvesting system.
Expanding Your System & Advanced Techniques (Optional)
Once you have a basic system in place, you can explore more advanced techniques:
Increasing Storage Capacity: Add more tanks to increase your water storage capacity, especially if you have a large roof area or high water demands.
Connecting to a Drip Irrigation System: Connect your rainwater harvesting system to a drip irrigation system for efficient and targeted watering of your garden.
Indoor Use (with Disclaimer): With proper filtration and disinfection, and after checking local regulations, rainwater can potentially be used for non-potable indoor purposes like toilet flushing or laundry. However, potable water, meant for drinking, must be rigorously tested and purified, and may not be legal in your area. Always consult with a water quality expert and local authorities before using rainwater for indoor purposes.
Water Quality Testing: Regular water quality testing is essential to ensure the safety of your rainwater. Test for bacteria, heavy metals, and other contaminants.
Key Takeaway: There are numerous ways to expand and improve your rainwater harvesting system to further enhance its benefits for your homestead.
Embrace the Rain for a Sustainable Future
Building a rainwater harvesting system is an empowering step towards self-sufficiency and sustainability. By collecting and conserving rainwater, you can reduce your reliance on municipal water sources, lower your water bills, and protect the environment. Remember to plan carefully, choose your materials wisely, and maintain your system regularly.
Start small, learn as you go, and embrace the rain. Your homestead, and the planet, will thank you for it.
Now, tell me about your rainwater harvesting ideas in the comments below! What are your biggest concerns? Share your questions or photos of your system! Let's learn together.
Related Articles
- [link to article about water conservation on homesteads]
- [link to article about drought-resistant gardening]
- [link to article about irrigation systems]