DIY Rainwater Harvesting: A Beginner's Guide to Water Independence
Across the country, homesteaders are facing rising water costs and increasing concerns about water security, especially during dry spells. Your vegetable garden wilts, your livestock thirsts, and you wonder if there’s a better way. The good news? There is. It's a free resource that falls from the sky: rainwater!

Rainwater harvesting offers a simple, sustainable, and cost-effective solution to supplement your water supply. Whether you're a seasoned homesteader or just starting, building your own rainwater collection system is an achievable project that can significantly reduce your reliance on municipal water or well water, saving you money and enhancing your self-sufficiency.
This guide will walk you through the process of designing, building, and maintaining a simple rainwater harvesting system. We'll cover everything from assessing your water needs to choosing the right materials and troubleshooting common problems. Let's get started and tap into nature's free water source!
1. Planning Your Rainwater Harvesting System
Before you start buying barrels and connecting pipes, careful planning is crucial. It ensures your system meets your needs and complies with local regulations.
![Homestead map identifying rain collection areas]
- Assessing Your Needs: How much water do you actually need? This depends on factors like the size of your garden, the number of livestock you have, and whether you intend to use the water for household purposes (check local regulations first!). A small garden might only require a single 55-gallon barrel, while a larger operation could benefit from multiple interconnected tanks.
To calculate your potential water collection, you'll need to know the average annual rainfall in your area. Online resources like the National Weather Service or local agricultural extension offices can provide this information. You’ll also need to know your roof’s surface area. Simply multiply the length and width of the roof that will drain into your gutters.
Then, use this formula: Gallons collected = Roof Area (sq ft) x Rainfall (inches) x 0.623 (gallons per inch of rain per sq ft) x 0.85 (efficiency factor)
This will give you a good estimate of how much water you can realistically collect.
![Person using rain guage outdoors ]
Choosing Your Collection Area: Your roof is the primary collection surface. Metal roofs are ideal because they are clean and don't leach any chemicals. Asphalt shingle roofs are acceptable but require more frequent cleaning of the system, as they tend to shed granules. Avoid roofs treated with chemical preservatives, as these could contaminate your water. Also, consider trees hanging over your roof. They deposit leaves and debris that can clog gutters and contaminate the water.
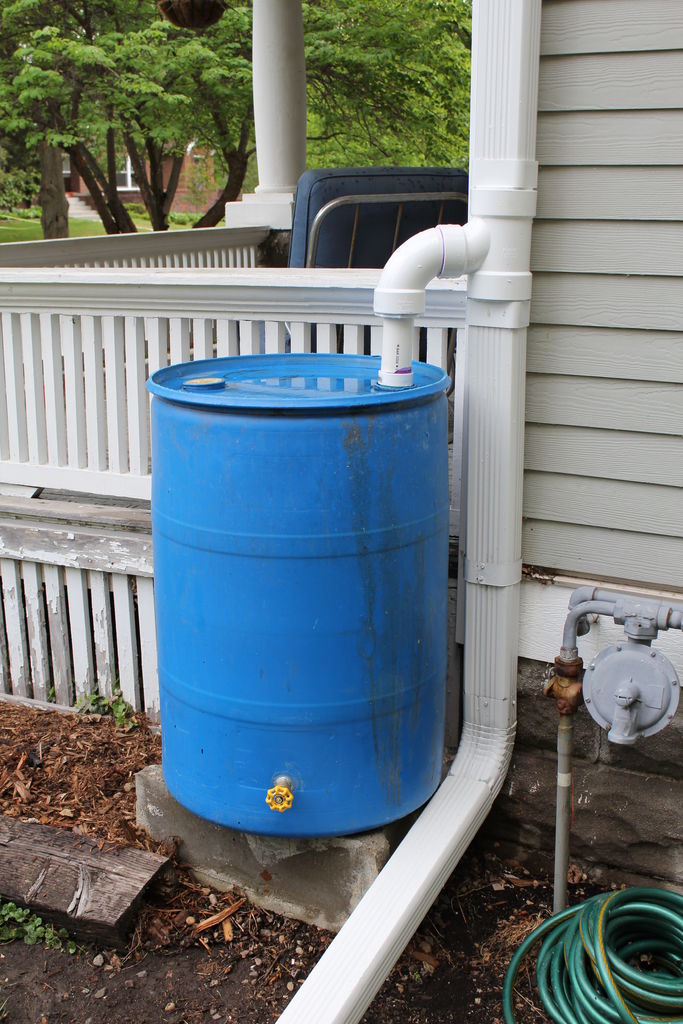
Location, Location, Location: Where will you place your storage tank(s)? Choose a location that is easily accessible for maintenance, relatively level to prevent tipping, and shaded to minimize algae growth. Proximity to your garden or areas where you'll use the water is also essential. Consider the weight of a full barrel – a 55-gallon barrel weighs over 450 pounds! A solid, level base is a must.
Local Regulations and Permits: This is crucial! Research local laws and regulations regarding rainwater harvesting. Some areas may have restrictions on storage volume, intended use (e.g., prohibiting indoor use), or require permits. Contact your local building department or water authority to ensure you are compliant. Ignoring these regulations can lead to fines or even the forced removal of your system.
2. Gathering Your Supplies (The Budget-Friendly Approach)
Now for the fun part: gathering your supplies. The key to a cost-effective rainwater harvesting system is to prioritize repurposed materials.
![Rain barrel connectors downspout hardware]
Rain Barrel/Tank: This is the heart of your system. Here are a few options:
- New Rain Barrels: These are readily available at home improvement stores, but they are often the most expensive option. Consider their capacity and durability.
- Repurposed Food-Grade Plastic Barrels: This is the best value. Look for 55-gallon or larger barrels that were previously used to store food products. Contact local food processors, farms, or beverage distributors. Important: Thoroughly clean these barrels before use.
- Cleaning Instructions: Wash the barrel with hot, soapy water. Rinse thoroughly. Then, sanitize with a solution of one part bleach to ten parts water. Let the solution sit in the barrel for at least an hour, then rinse thoroughly again. Allow the barrel to air dry completely before use.
Guttering and Downspouts: Evaluate your existing guttering and downspouts. If they are in good condition, you may not need to replace them. If replacement is necessary, consider PVC or aluminum options. PVC is more affordable, while aluminum is more durable. Ensure the gutters are properly sloped to direct water towards the downspout.
First Flush Diverter: This is an essential component that prevents the first, dirtiest water from entering your storage tank. The initial rainfall washes away accumulated debris from your roof, and you don't want that in your clean water supply. You can build a simple DIY diverter using PVC pipe.
![DIY first flush diverter diagram ]
- DIY First Flush Diverter Instructions: You’ll need a length of PVC pipe (4-6 inches in diameter), a cap for the bottom, and a connector to attach it to your downspout. The length of the pipe depends on how much water you want to divert. A general rule is 1 inch of pipe diameter for every 100 square feet of roof area. The pipe fills with the initial dirty water, and once full, the cleaner water overflows into your rain barrel. Periodically empty the diverter.
Hardware and Fittings: You’ll need various connectors, adapters, clamps, screens, and a spigot. Use rust-resistant materials (stainless steel or brass) to prevent corrosion. A screen is crucial to prevent leaves and debris from entering the barrel.
Tools: Here’s a list of basic tools you’ll need:
- Drill with various drill bits (including a hole saw for creating openings for fittings)
- Saw (for cutting PVC pipe)
- Measuring tape
- Level
- Wrench or pliers
3. Building and Installing Your Rainwater Harvesting System (Step-by-Step)
Now it’s time to put everything together.
Preparing the Rain Barrel/Tank: Thoroughly clean the barrel as described above. Once dry, determine where you want to place the inlet (where water enters), outlet (for the spigot), and overflow. Use a hole saw to drill the appropriate sized holes for your fittings.

Installing the First Flush Diverter: Connect the diverter to the downspout, ensuring it is properly positioned to collect the initial runoff. Make sure the bottom of the diverter is accessible for periodic emptying.
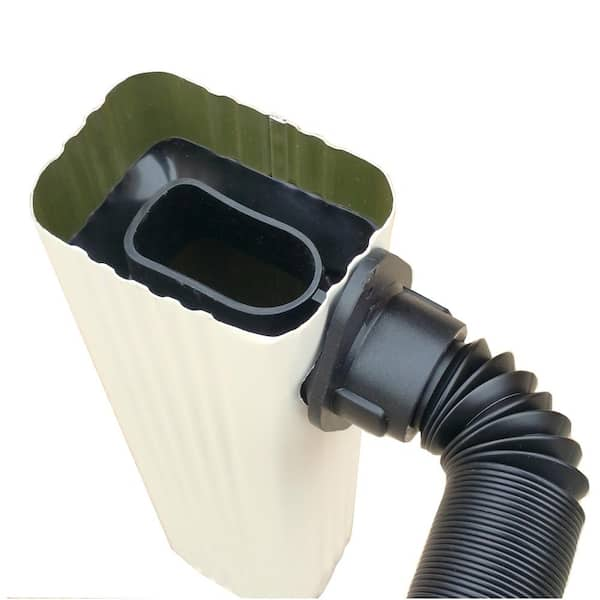
Connecting the Downspout to the Barrel: Use appropriate connectors and fittings to connect the downspout to the barrel inlet. Ensure the connection is secure and watertight.
![Hands attaching downspout to rain barrel ]
Adding an Overflow: Install an overflow outlet near the top of the barrel to prevent overfilling. Direct the overflow away from your foundation to prevent water damage. You can connect a hose to the overflow and direct the water to another rain barrel or a designated drainage area.
Elevating the Barrel (Optional but Recommended): Place the barrel on cinder blocks or a sturdy platform to improve water pressure and make it easier to access the spigot. This also allows you to fill watering cans or buckets more easily.

Screening for Debris: Install a screen over the barrel inlet to prevent leaves and debris from entering the system. You can use a fine mesh screen or even an old nylon stocking.
4. Maintaining Your Rainwater Harvesting System
Maintenance is key to the long-term success of your rainwater harvesting system.
Regular Cleaning: Clean the gutters and downspouts regularly, especially in the fall, to prevent clogs. Inspect and clean the first flush diverter and barrel screen frequently.
Algae Control: Algae can grow in rain barrels, especially in sunny locations. To control algae growth, keep the barrel shaded. You can also add a small amount of copper sulfate (available at garden centers) to the water. However, use copper sulfate sparingly, as it can be toxic to aquatic life.
Winterizing: If you live in a cold climate, disconnect the system and drain the barrel before the first freeze to prevent damage. Store the barrel indoors or cover it to protect it from the elements.
Water Testing (Optional): If you plan to use the rainwater for drinking or other household purposes, have it tested regularly for contaminants. Contact your local health department for information on water testing services.
![Person winterizing rain barrel system outdoors]
Embrace Water Independence
Rainwater harvesting is more than just collecting water; it's about embracing a sustainable lifestyle and taking control of your water security. It’s a relatively easy and inexpensive project that offers significant long-term benefits, from reducing your water bill to providing a reliable water source for your garden.
![Thriving vegetable garden watered rain barrel]
Ready to ditch the dependence and embrace the drizzle? Start small, learn as you go, and enjoy the satisfaction of harvesting nature’s free gift.
Call to Action:
Share your rainwater harvesting success stories in the comments below! What tips and tricks have you learned?