Ditch the Grocery Store: Build Your Own DIY Root Cellar for Fresh Food All Winter Long!
Imagine biting into a crisp, juicy apple in the middle of January, or roasting homegrown potatoes on a snowy evening. Sounds idyllic, right? With a DIY root cellar, this dream can become a reality. Forget those wilted, tasteless supermarket veggies that have traveled thousands of miles. A root cellar allows you to preserve your garden's bounty, reduce your reliance on grocery stores, and enjoy fresh, delicious produce all winter long. For the aspiring homesteader, it's a crucial step towards self-sufficiency and food security. Building one might seem daunting, but with this guide, you'll discover just how simple and affordable it can be. Let's get started!
Gathering Your Supplies: The Affordable Route
Building a root cellar doesn't have to break the bank. By utilizing reclaimed materials, you can significantly reduce costs and give a second life to discarded items. Here's a list of what you'll need:
- Reclaimed Concrete Blocks (approx. 50-100): Check local classifieds, demolition sites, or construction companies for surplus blocks. Cost: $50-$150
- Weathered Barn Boards/Salvaged Lumber: Perfect for framing the entrance and roof. Look for sturdy, untreated wood. Cost: $30-$80
- Gravel/Crushed Stone: For drainage and a stable base. Cost: $20-$50
- Heavy-Duty Plastic Sheeting (6-mil): Acts as a moisture barrier. Cost: $15-$30
- Insulation (Rigid Foam or Straw Bales): Crucial for maintaining consistent temperature. Cost: $40-$100
- Door (Solid Wood or Reclaimed): Ensure it seals well to prevent drafts. Cost: $20-$75
- Ventilation Pipe (4-inch PVC): Essential for air circulation and preventing mold. Cost: $10-$20
- Hardware (Nails, Screws, Hinges, Latch): Gather a variety of sizes for different applications. Cost: $10-$30
- Tools: Shovel, wheelbarrow, level, measuring tape, saw, drill, hammer, safety glasses, and work gloves. Cost: (Assuming you own most tools) $0
Remember, these are approximate costs. Scouring salvage yards and online marketplaces can lead to even greater savings. The goal is to build a functional root cellar without emptying your wallet.
Step-by-Step Construction: From Excavation to Edible Treasures
Here's how to build your partially underground root cellar:
Step 1: Planning and Site Selection.
Choose a location that is well-drained, preferably on a slight slope to prevent water from pooling. North-facing slopes are ideal as they receive less direct sunlight. Ensure the site is easily accessible from your garden and home. Consider the size of your family and the amount of produce you plan to store when determining the dimensions of your root cellar. A good starting point is 6ft x 8ft.

Step 2: Excavation.
Dig a rectangular hole, approximately 3-4 feet deep. The exact depth will depend on your local frost line – aim to have the floor of the root cellar below the frost line to maintain a stable temperature. Slope the walls slightly inward for added stability. Remember to call 811 before you dig to locate any underground utilities.
Step 3: Laying the Foundation.
Spread a 6-inch layer of gravel or crushed stone at the bottom of the excavation for drainage. Compact it well using a tamper. This will prevent water from seeping into your root cellar and damaging your stored produce.
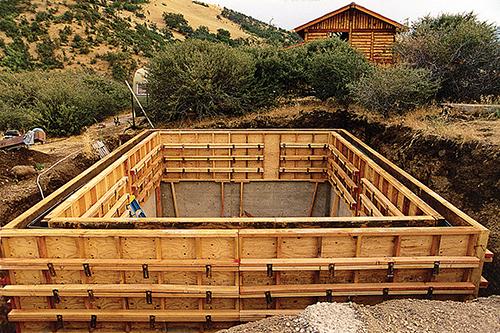
Step 4: Building the Walls.
Stack the reclaimed concrete blocks to create the walls of your root cellar. Use a level to ensure each row is straight. Stagger the blocks for added strength, like building a brick wall. Leave a small gap for ventilation (more on that later). The walls should extend approximately 2-3 feet above ground level.
Step 5: Installing Ventilation.
Insert a 4-inch PVC pipe through one of the gaps in the concrete block wall, near the floor. This will serve as your intake vent, bringing in cool air from outside. Extend the pipe a few inches beyond the wall on both sides. You'll add an exhaust vent higher up later.
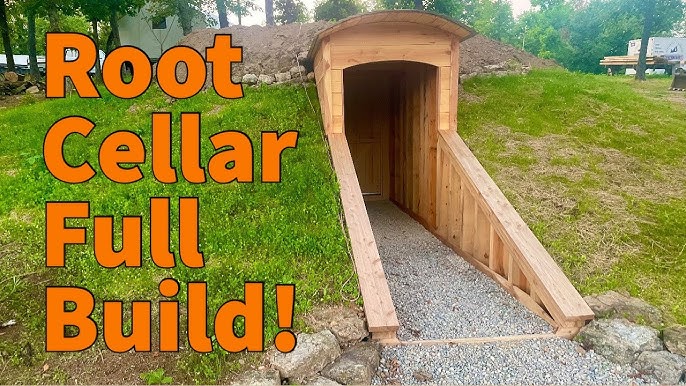
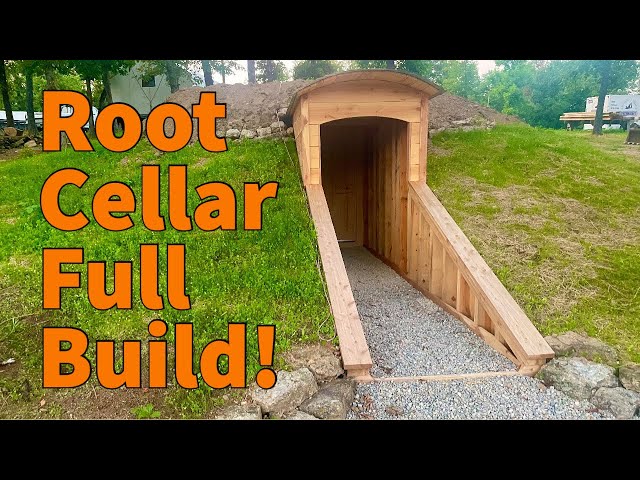
Step 6: Framing the Entrance.
Use salvaged lumber to frame the entrance to your root cellar. Ensure the frame is sturdy and weatherproof. Attach hinges to one side of the frame for your door.
Step 7: Constructing the Roof.
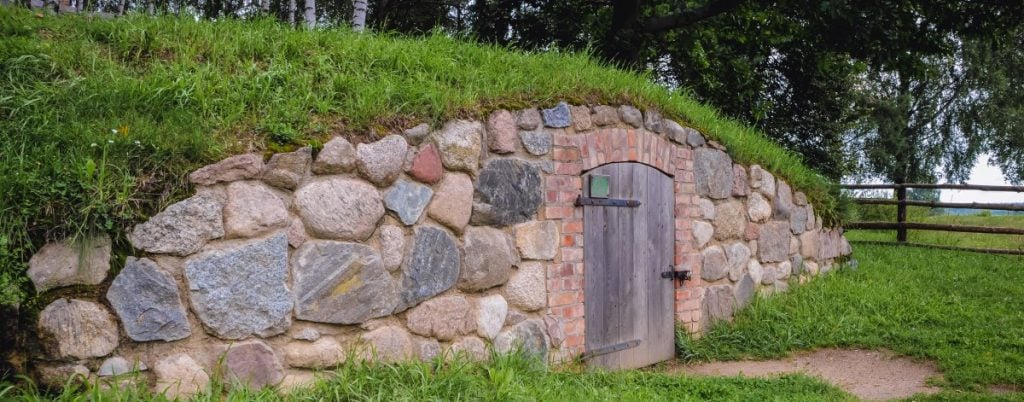
This can be the trickiest part, but using reclaimed materials keeps it simple. You can create a sloped roof using more salvaged lumber, ensuring it overhangs the walls slightly to prevent water from running down the sides. Cover the lumber with heavy-duty plastic sheeting to create a waterproof barrier. Then, cover the plastic with a layer of soil and sod for insulation and a natural look. Alternatively, a simpler flat roof can be built by laying sturdy planks across the top of the walls, overlapping them for strength, and then covering them with plastic sheeting and soil.
Step 8: Insulating the Walls and Roof.
Insulation is key to maintaining a stable temperature. Line the interior walls with rigid foam insulation, cutting it to fit snugly between the concrete blocks. Alternatively, pack straw bales around the outside of the walls for a more natural and affordable insulation method. If you opted for a soil roof, ensure the soil layer is thick enough (at least 12 inches) to provide adequate insulation.
Step 9: Installing the Door.
Hang your reclaimed or solid wood door on the hinges. Ensure it seals tightly to prevent drafts. Add weather stripping around the edges of the door for an even better seal. Install a secure latch to keep pests out.
Step 10: Adding an Exhaust Vent.
Install a second 4-inch PVC pipe near the top of the wall, opposite the intake vent. This will serve as your exhaust vent, allowing warm air to escape. The difference in height between the two vents will create natural convection, promoting air circulation. Cover both vents with mesh screens to prevent rodents and insects from entering.
Step 11: Interior Finishing (Optional).
Line the floor with gravel or crushed stone for drainage. Build shelves using more reclaimed lumber to organize your produce. Consider adding a thermometer and hygrometer to monitor temperature and humidity.

Safety First! Always wear safety glasses and work gloves when handling concrete blocks and lumber. Be careful when digging to avoid collapsing walls. If you're unsure about any step, consult with a qualified professional.
Troubleshooting Tips: Keeping Your Root Cellar in Tip-Top Shape
- Too Warm: Increase ventilation by opening the vents wider, or adding a fan to circulate air. Consider adding more insulation to the walls and roof.
- Too Cold: Close the vents partially or completely. Add a layer of straw or blankets to insulate the produce.
- Too Humid: Increase ventilation. Add a container of calcium chloride (a dehumidifying agent) to absorb excess moisture.
- Too Dry: Sprinkle water on the floor to increase humidity. Store produce in perforated plastic bags to retain moisture.
- Mold Growth: Improve ventilation. Remove any moldy produce immediately. Clean the affected area with a solution of water and bleach.
- Pest Infestation: Seal any cracks or holes in the walls and door. Use traps or natural pest repellents to control pests.
Regularly inspect your root cellar for any signs of problems and address them promptly to ensure your produce stays fresh and delicious all winter long.
My Root Cellar Adventure: Lessons Learned from the Trenches
Building my first root cellar was definitely a learning experience. I thought I had planned everything perfectly, but underestimated the amount of excavation required. My "weekend project" turned into a two-week marathon! I also learned the hard way that proper drainage is crucial. After a heavy rain, my root cellar flooded, and I lost a significant portion of my potato crop. Now, I ensure the drainage is impeccable, and I haven't had a problem since. Don't be afraid to make mistakes; they're valuable learning opportunities! The satisfaction of harvesting fresh produce from my own root cellar in the dead of winter makes all the effort worthwhile.
Embrace the Bounty: Build Your Root Cellar Today!
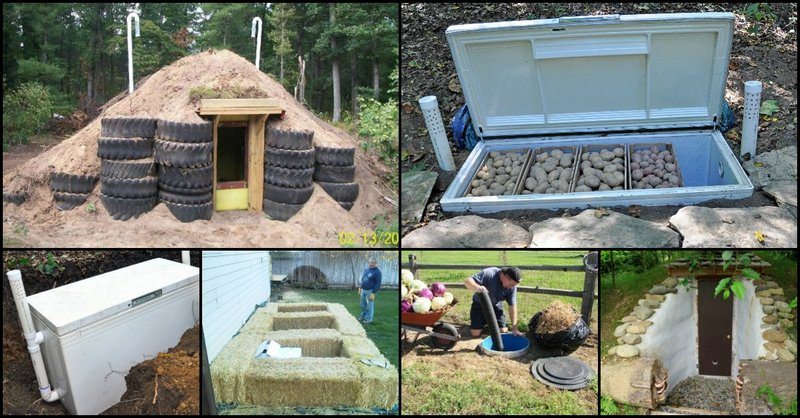
A DIY root cellar is more than just a storage space; it's an investment in your self-sufficiency, your health, and your connection to the land. By utilizing reclaimed materials and following these simple steps, you can create an affordable and effective root cellar that will provide you with fresh, delicious produce all winter long. So, grab your shovel, gather your supplies, and get building! Your taste buds (and your wallet) will thank you. Share your root cellar projects with us on social media using #BHHRootCellar!
