Digging Deep: Building a Root Cellar from Reclaimed Materials for Homestead Self-Sufficiency
For those of us drawn to the homesteading life, self-sufficiency isn't just a buzzword; it's a way of life. It's about reducing our reliance on external systems and becoming more resourceful with what we have. And when it comes to food security, few things are as satisfying as harvesting a bountiful garden and knowing you have a way to preserve that goodness for the leaner months. That's where a root cellar comes in. Today, I’m sharing how we built our charming (and effective!) root cellar from mostly reclaimed materials – a project that significantly boosted our homestead's resilience. Get ready to dig in – literally!
This project wasn't just about saving money; it was about resourcefulness, creativity, and a deep connection to the land. Using reclaimed materials for homestead building aligns with our values of sustainability and minimizing waste. Plus, there's something incredibly rewarding about breathing new life into discarded items. This DIY root cellar is perfect for sustainable food storage, ensuring we have fresh produce even during the coldest winters.
Why a Root Cellar?
Before we dive into the how-to, let's talk about the why. In our modern world of refrigeration, the humble root cellar might seem like a relic of the past. But it's so much more than that. A well-designed root cellar provides a cool, humid environment perfect for storing root vegetables, fruits, and even some canned goods. It’s a natural, energy-free way to extend the harvest, reduce food waste, and connect with traditional methods of food preservation. This is especially useful in our temperate climate here in the Pacific Northwest, where temperature fluctuations can be challenging.
Planning and Design: Location, Location, Location!
The most crucial step is planning. Consider these factors:
- Location: Ideally, your root cellar should be located on a north-facing slope or underground to take advantage of the earth's natural insulation. Proper location minimizes temperature fluctuations. We chose a spot at the back of our property, nestled into a small hill. The key is consistent shade and good drainage.

Size: Determine the size based on your storage needs and the amount of available space. We opted for a small, walk-in cellar – approximately 8' x 10' – sufficient for our family's needs.
Materials: We primarily used reclaimed concrete rubble (broken up pieces of old sidewalk), salvaged lumber from an old shed we were dismantling, and repurposed metal roofing sheets. Keep your eyes peeled for demolition sites, online classifieds, and local businesses that might be getting rid of unwanted materials. Don't forget safety gear, gloves, and eye protection!
Ventilation: Adequate ventilation is critical for preventing mold and rot. Plan for both an intake vent near the floor and an exhaust vent near the ceiling to promote air circulation.
Step-by-Step Construction: From Hole to Harvest
Now, let’s get down to the nitty-gritty. Remember to adjust these steps based on your specific design and materials.
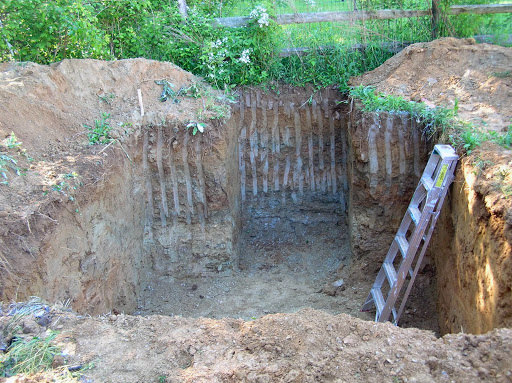
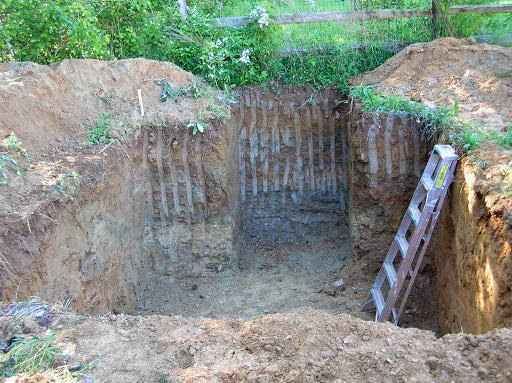
- Dig the Hole: This is the most labor-intensive part! Enlist some help, rent a small excavator if possible, and get digging. Make sure the hole is slightly larger than your planned dimensions to allow for wall construction and drainage.
Foundation and Drainage: Create a level base using gravel or crushed stone for good drainage. This prevents moisture buildup, which is the enemy of long-term food storage. We also installed a perforated drain pipe around the perimeter, leading to a lower point on the property.
Wall Construction: We used the reclaimed concrete rubble to build sturdy walls, mortaring them together with a mixture of cement, sand, and lime. This provided excellent thermal mass and insulation. A traditional stone foundation also provides excellent stability and longevity.
Roofing: We framed the roof with salvaged lumber, ensuring it was strong enough to support a layer of soil for added insulation. We then covered the frame with repurposed metal roofing sheets before adding a thick layer of earth.
Ventilation: Install the intake and exhaust vents. We used PVC pipes that were run through the walls, extending above ground level. Make sure the exhaust vent is higher than the intake vent to create a natural chimney effect.
Door: Build a sturdy, insulated door to minimize temperature fluctuations. We used salvaged wood and added a layer of rigid foam insulation. A tight-fitting door is essential to maintaining a consistent temperature.
Interior Shelving: Construct shelves using more salvaged lumber. Leave space between shelves for good air circulation.
Challenges and Triumphs: Lessons Learned
Of course, no DIY project is without its hiccups. One of our biggest challenges was sourcing enough suitable reclaimed materials. We spent weeks scouring online marketplaces and networking with local contractors. Persistence paid off, but it required patience.
Another challenge was maintaining consistent humidity levels. Initially, the cellar was too dry. We solved this by placing a large container of water on the floor, which gradually increased the humidity to the ideal range (80-90%). Regularly monitoring temperature and humidity is crucial for long-term success.
The biggest triumph? Opening that door in the middle of winter and pulling out a perfectly preserved potato or apple, a tangible reward for our hard work.
Long-Term Impact: Food Security and Beyond
Our DIY root cellar has transformed our homestead. We've significantly reduced our reliance on store-bought produce during the winter months, increased our food security, and minimized food waste. But beyond the practical benefits, this project has instilled a deeper connection to the land and a greater appreciation for the wisdom of traditional methods.
Building this root cellar was more than just a DIY project; it was an investment in our self-sufficiency and sustainability. It's a reminder that with a little ingenuity and elbow grease, we can create a more resilient and fulfilling life, rooted in the principles of homesteading. So, grab your shovel, gather your reclaimed materials, and start digging! Your winter self will thank you. Building a root cellar for winter storage is so rewarding!
Bonus Recipe: Root Cellar Roasted Vegetables
Here’s a simple and delicious way to enjoy your root cellar bounty:
Ingredients:
- Assorted root vegetables (potatoes, carrots, parsnips, beets), peeled and chopped
- Onion, chopped
- Garlic, minced
- Olive oil
- Rosemary, thyme, or other herbs
- Salt and pepper
Instructions:
- Preheat oven to 400°F (200°C).
- Toss vegetables with olive oil, garlic, herbs, salt, and pepper.
- Spread vegetables in a single layer on a baking sheet.
- Roast for 30-40 minutes, or until tender and slightly caramelized, flipping halfway through.
Enjoy the fruits (and vegetables!) of your labor!
(No video was provided. If you have one, please provide URL.)