Dig In! Building an Energy-Efficient Root Cellar from Reclaimed Materials for Ultimate Food Security

Hello, fellow homesteaders! It's your neighborly, slightly dirt-covered, always-learning, homesteader here. For years, I've preached the gospel of growing your own food, and most of you know that the real magic of homesteading isn't just the planting and harvesting, it's about extending that harvest. That’s where proper food preservation comes in. Today, we’re diving deep into a project that can revolutionize your food security: building an energy-efficient root cellar from reclaimed materials.
Forget expensive freezers that chew through electricity and leave you vulnerable to power outages. A root cellar is a time-honored, natural way to keep your garden bounty fresh through the winter months. I’ll be honest, my first attempt was… less than successful. Let’s just say a family of very happy, very well-fed mice spent the winter in my potato stash. But I learned from my mistakes, and I’m here to share my hard-won wisdom with you so you can sidestep those pitfalls.
Why a Root Cellar? Unearthing the Benefits
Before we grab our shovels and start scavenging for materials, let's talk about why a root cellar is a game-changer for any serious homesteader. In short, it is your key to long-term food security.
- Natural Temperature and Humidity Control: A well-designed root cellar leverages the earth's natural insulation to maintain cool, consistent temperatures and high humidity, ideal for storing root crops, fruits, and other produce.
- Reduced Energy Consumption: Say goodbye to sky-high electricity bills! Root cellars require no electricity, making them a sustainable and cost-effective food storage solution.
- Preservation of Nutrients: Unlike some other preservation methods, root cellaring helps retain the nutritional value of your produce.
- Independence and Resilience: In uncertain times, having a reliable food storage system gives you peace of mind and strengthens your self-sufficiency.
- Reduced Food Waste: Storing crops properly means less food waste and more on your table.

Alt text: A thriving garden demonstrates the need for efficient food preservation methods like a root cellar.
Gathering Your Treasures: Sourcing Reclaimed Materials
The beauty of this project lies in its potential for cost-effectiveness and sustainability. Instead of buying new materials, we'll be rescuing discarded treasures and giving them a new lease on life. Here are some prime candidates for reclaimed root cellar building:
- Concrete Blocks: Salvaged from demolition sites, construction projects, or even online marketplaces. Just make sure to inspect them for cracks or damage.
- Tires: An unconventional but surprisingly effective building material. Tires provide excellent insulation and are readily available. Search online marketplaces or your local tire shops.
- Lumber: Repurposed lumber from old barns, sheds, or construction sites can be used for framing, shelving, and doors.
- Doors and Windows: Salvaged doors and windows can be repurposed for ventilation and access. Be sure to measure the opening and modify as needed.
- Bricks: Reclaimed bricks can be used for flooring or walls, adding a touch of rustic charm to your root cellar.
- Gravel and Stone: Can be used for drainage and foundation.
Pro Tip: Always prioritize safety when handling reclaimed materials. Wear gloves, eye protection, and a dust mask. Thoroughly clean and disinfect materials before using them in your root cellar.
Step-by-Step: Building Your Energy-Efficient Root Cellar
Okay, let's get down to the nitty-gritty! This guide assumes you're building a small, partially buried root cellar, roughly 6ft x 8ft, but you can adjust the dimensions to suit your needs and the materials you have on hand.
Step 1: Planning and Site Selection
- Choose a location that is cool, shaded, and well-drained. A north-facing slope is ideal.
- Consider the water table. You don't want your root cellar to become a swimming pool.
- Sketch out your design, taking into account the materials you'll be using and the desired layout.
Step 2: Excavation and Foundation
- Dig a hole slightly larger than your planned root cellar dimensions.
- Create a level foundation using gravel or compacted soil.
- Consider adding a layer of crushed stone for drainage.
Step 3: Wall Construction (Concrete Blocks)
- Lay the first course of concrete blocks on the foundation, ensuring they are level and aligned.
- Use mortar to secure the blocks together, staggering the joints for added strength.
- Continue building the walls to the desired height, leaving openings for ventilation and access.
Remember to apply weather sealant to the exterior for the best insulation.

Alt text: Proper storage is just as important as the canning process.
Step 4: Wall Construction (Tires)
- Level the ground and begin layering tires in the desired shape for your structure.
- Fill the tires with packed dirt or clay, to provide support and thermal mass.
- Offset tire placement, and overlap for stability.
- As with the concrete blocks, consider sealing the exterior of the tires.
Step 5: Roofing
- Construct a sturdy roof frame using reclaimed lumber.
- Cover the frame with plywood or metal roofing.
- Insulate the roof with straw bales, soil, or other insulating materials.
- Consider adding a layer of sod to the roof for added insulation and a natural look.
Step 6: Ventilation
- Install ventilation pipes to allow for air circulation.
- Position the pipes at different heights to promote natural convection.
- Use dampers or shutters to control airflow.
I personally like to use PVC pipe for ventilation, capped with mesh to keep pests out.
Step 7: Door and Entryway
- Install a sturdy door to keep out pests and maintain a consistent temperature.
- Consider building a small entryway or airlock to minimize temperature fluctuations when entering and exiting.
Step 8: Interior Finishing
- Install shelves using reclaimed lumber or pallets.
- Organize your produce according to its specific storage needs.
Step 9: Backfilling and Landscaping
- Backfill around the root cellar with soil, compacting it as you go.
- Plant vegetation around the root cellar to provide shade and further insulate the structure.

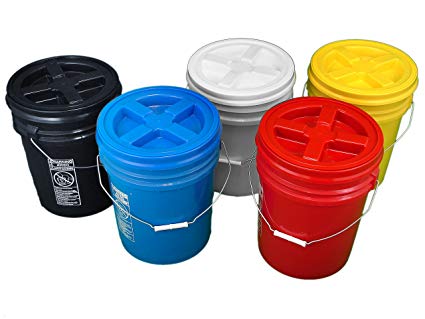
Alt text: Grains and dry goods can be placed in sealed buckets for storage in your newly built root cellar.
Temperature and Humidity Control: The Key to Success
Maintaining the right temperature and humidity levels is crucial for successful root cellaring.
- Temperature: Aim for a temperature between 32°F and 40°F (0°C and 4°C).
- Humidity: Maintain a humidity level of 85% to 95%.
- Monitoring: Use a thermometer and hygrometer to monitor temperature and humidity levels.
- Adjustments: Adjust ventilation as needed to maintain optimal conditions. You can also add a humidifier or dehumidifier if necessary.
What to Store in Your Root Cellar: A Gardener's Guide
Different types of produce have different storage requirements. Here's a quick guide:
- Root Crops (Potatoes, Carrots, Beets): Store in bins or crates covered with damp sand or burlap sacks.
- Onions and Garlic: Hang in mesh bags or braids in a cool, dry area.
- Apples and Pears: Store in single layers in trays or crates.
- Cabbage: Hang upside down from the rafters.
- Winter Squash: Store on shelves in a cool, dry area.

Alt text: Canning is another preservation method that when combined with root cellaring, can greatly increase food security.
My Root Cellar Fails (and How I Fixed Them!)
I mentioned my first root cellar adventure turned into a mouse hotel, right? Well, it wasn’t just that. The humidity was off the charts, leading to mold and rot. Here's what I learned:
- Pest Control is Essential: Seal any cracks or openings to prevent rodents and insects from entering. Use traps or other pest control methods as needed. I now have a dedicated cat (Mittens) who takes her job very seriously.
- Ventilation is Key: Proper ventilation is crucial for maintaining optimal humidity levels and preventing mold growth. Don't skimp on ventilation pipes!
- Regular Inspection is a Must: Check your produce regularly for signs of spoilage. Remove any damaged or rotting items immediately to prevent them from affecting the rest of your stash.
A Call to Action: Let's Build a More Resilient Future Together!

Alt text: It is essential that homesteaders focus on proper food preservation to ensure a harvest lasts.
Building an energy-efficient root cellar from reclaimed materials is a rewarding project that can significantly increase your homestead's self-sufficiency and resilience. It's not always easy, but it's definitely worth the effort.
Now, I want to hear from you! Have you built a root cellar before? What challenges did you face? What tips can you share with your fellow homesteaders? Share your experiences in the comments below!
And if you're ready to take the plunge and build your own root cellar, be sure to subscribe to the Better Homes and Harvests newsletter for more tips, tricks, and inspiration. Let's build a more resilient future, one root cellar at a time! Happy homesteading!
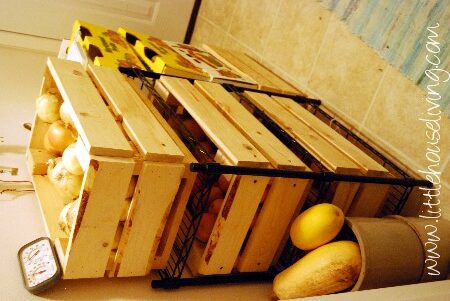
Alt text: An example of efficient vegetable and fruit storage.