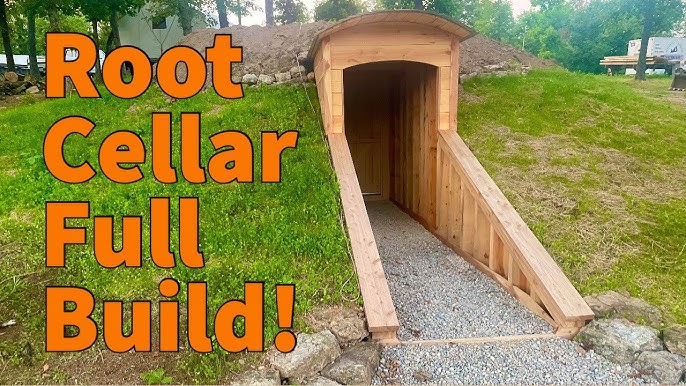
Crafting Resilience: Build a Budget-Friendly Root Cellar for Fall's Bounty
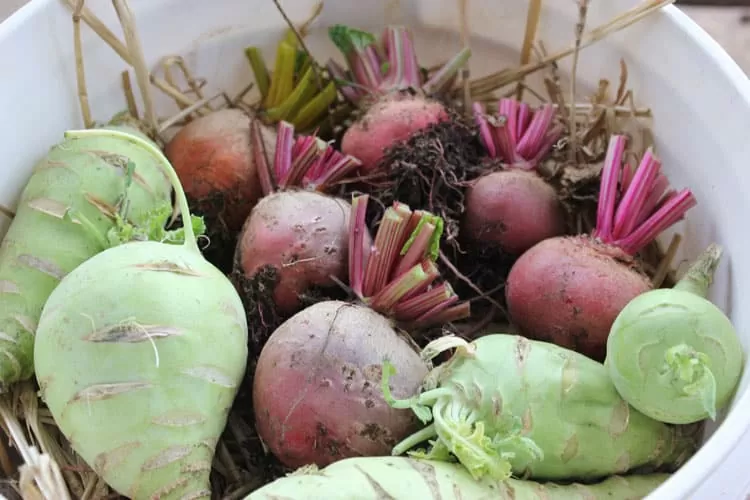
The crisp air of fall signals more than just pumpkin spice lattes and cozy sweaters. For homesteaders, it’s a call to action: a time to harvest the fruits (and vegetables!) of our labor and prepare for the leaner months of winter. But what if you don't have a fancy, expensive root cellar? Fear not! You can build a budget-friendly root cellar that will keep your precious produce fresh all winter long. The idea of DIY food storage might seem daunting, but with a little planning and elbow grease, you can create a simple, effective root cellar using readily available materials. Is this too difficult? Can I really do this? Absolutely! Let's dive in and discover how to craft resilience, one root vegetable at a time.
Why Build a Root Cellar?
Before we get our hands dirty, let's talk about why root cellars are so valuable. In a world increasingly reliant on complex supply chains, having a secure source of food is more important than ever. A root cellar is a time-tested method of food preservation, offering a low-tech, energy-efficient way to store fruits and vegetables for extended periods. This allows you to:
- Reduce food waste: Keep your harvest from spoiling before you can use it.
- Save money: Avoid buying produce at peak prices during the winter.
- Enhance food security: Ensure you have a supply of healthy, homegrown food even when the garden is dormant.
- Reduce reliance on the grid: No electricity needed!
Planning Your Budget Root Cellar: Location, Location, Location!
The key to a successful root cellar is choosing the right location. Look for a spot that naturally stays cool and consistently damp. Ideally, you want:
- Shade: A north-facing slope or area shaded by trees is ideal.
- Good drainage: Avoid areas prone to flooding or standing water.
- Proximity to your garden: Easier to transport your harvest!
Consider local building codes and regulations before starting construction. While a small, simple root cellar often doesn't require a permit, it's always best to check with your local authorities.
Designing Your Pallet Root Cellar: Keeping it Simple
For our budget-friendly build, we'll be focusing on a small, above-ground root cellar utilizing repurposed pallets, reclaimed wood, or concrete blocks. This design minimizes excavation and simplifies construction, making it perfect for beginner homesteaders.
Here's the general idea: We'll create a rectangular structure, partially buried into the ground for temperature regulation. The walls will be built from pallets or concrete blocks, insulated with straw or other natural materials, and covered with a thick layer of soil for added insulation.
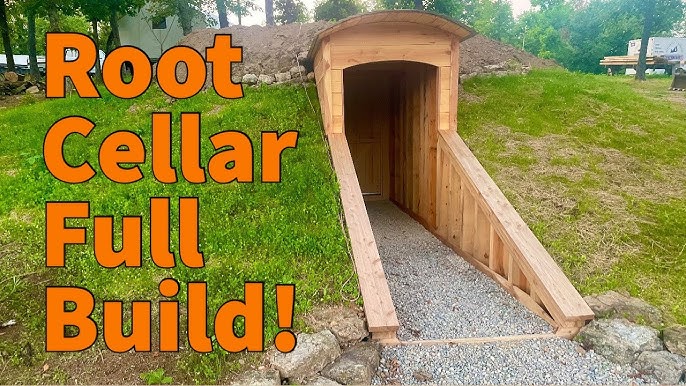
Materials:
- Pallets/Concrete Blocks/Reclaimed Wood: Enough to build the walls of your desired size. Aim for at least 4ft x 6ft interior space.
- Reclaimed Lumber: For framing the roof and door.
- Heavy-Duty Plastic Sheeting: To create a moisture barrier.
- Straw/Hay: For insulation.
- Soil: For covering the structure.
- Hardware: Nails, screws, hinges, latches.
- Gravel: For drainage.
Tools:
- Shovel
- Level
- Hammer/Drill
- Saw
- Measuring Tape
- Gloves
- Safety Glasses
Step-by-Step Construction: Let's Get Building!
Step 1: Site Preparation
- Clear the area of vegetation and debris.
- Level the ground where you'll be building.
- Excavate a shallow trench around the perimeter, about 6-12 inches deep, to partially bury the walls.
Step 2: Building the Walls
- If using pallets, inspect them for damage and choose sturdy ones.
- Position the pallets vertically in the trench, forming the walls of your root cellar.
- Secure the pallets together using screws or nails. For added stability, consider driving metal stakes into the ground alongside the pallets.
- If using concrete blocks, lay them in a staggered pattern, using mortar to bind them together.
- If using reclaimed lumber, construct a frame using 2x4s or similar material, ensuring it's strong enough to support the roof.
Step 3: Creating a Moisture Barrier
- Line the inside of the walls with heavy-duty plastic sheeting. This will prevent moisture from seeping into the insulation. Overlap the seams and secure the plastic to the walls with nails or staples.
Step 4: Insulating the Walls
- Pack the space between the pallets (or around the concrete blocks/lumber frame) with straw or hay. This will provide crucial insulation, helping to maintain a consistent temperature inside the root cellar.
Step 5: Building the Roof
- Construct a simple, sloping roof frame using reclaimed lumber. Ensure the roof is strong enough to support the weight of the soil.
- Cover the roof frame with plywood or similar material.
- Apply a layer of plastic sheeting to the roof to prevent moisture from seeping through.
- Cover the roof with a thick layer of soil (at least 12 inches). This will provide excellent insulation.
Step 6: Installing the Door
- Build a simple door using reclaimed lumber.
- Install hinges and a latch to secure the door.
- Insulate the door with straw or hay.
Step 7: Ventilation
- Proper ventilation is essential to prevent mold and mildew growth. Install a simple ventilation pipe (a piece of PVC pipe works well) that extends from the inside of the root cellar to the outside. You can regulate airflow by covering the pipe with a cap or screen.
Step 8: Final Touches
- Add gravel around the base of the root cellar for drainage.
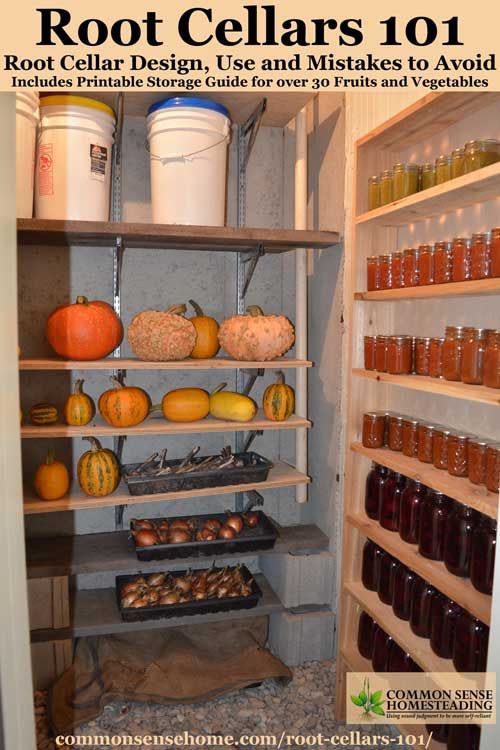
- Create shelves or bins inside the root cellar to organize your produce.
Optimizing the Environment: Temperature and Humidity Control
The ideal temperature for a root cellar is between 32°F and 40°F, with high humidity (85-95%). Here's how to achieve that:
- Temperature: Burying the root cellar partially underground helps maintain a consistent temperature. Insulation also plays a crucial role.
- Humidity: The soil covering the structure helps retain moisture. You can also add a container of water inside the root cellar to increase humidity.
Different crops require different conditions:
- Potatoes: Cool (35-40°F), dark, and humid.
- Carrots: Cool (32-35°F) and very humid (90-95%). Store them in damp sand or sawdust.
- Apples: Cool (32-40°F) and humid (80-90%). Store them in a single layer to prevent bruising.
- Onions & Garlic: Cool (32-40°F) and dry (60-70%).
Troubleshooting Common Challenges
- Mold and Mildew: Ensure proper ventilation and remove any decaying produce promptly.
- Rodents: Seal any cracks or openings in the walls. Consider using traps or deterrents.
- Freezing: Add extra insulation during extremely cold weather.
Cost Breakdown (Estimated)
- Pallets/Reclaimed Wood/Concrete Blocks: $0 - $50 (depending on availability and source)
- Lumber: $20 - $50
- Plastic Sheeting: $15 - $30
- Straw/Hay: $10 - $20
- Hardware: $10 - $20
Total Estimated Cost: $55 - $170
This doesn't include the cost of your labor, but think of it as an investment in your self-sufficiency!
Conclusion: Your Journey to Food Security Starts Now
Building a budget-friendly root cellar is an empowering step towards self-sufficiency and food security. It may seem like a challenging project at first, but by breaking it down into manageable steps and utilizing readily available materials, you can create a valuable asset for your homestead. By carefully planning your design, optimizing the environment, and addressing potential challenges, you can enjoy a bountiful harvest throughout the winter months.
Remember, the goal isn't perfection, but progress. Start small, learn as you go, and don't be afraid to experiment. Every step you take towards greater self-reliance is a victory!
Now it’s your turn! Share your own root cellar experiences or preservation tips in the comments below. What challenges have you faced? What successes have you celebrated? Your insights can help other homesteaders on their journey.
For a handy checklist of essential tools and materials needed for this project, sign up for the Better Homes & Harvests newsletter below!