Crafting Cozy: Slow-Stitch Quilting from Garden Scraps for a Farmhouse Heirloom
The crisp air of late autumn carries the scent of drying herbs – rosemary, thyme, and the last of the lavender. Sunlight streams through the kitchen window, illuminating a basket overflowing with colorful fabric scraps – remnants from summer sewing projects, old linens, and even a few well-worn shirts. Each piece holds a memory, a story whispering of sunny days and bustling activity. It's a feeling of abundance just before the quiet of winter sets in, and with that feeling comes the urge to create, to transform these fragments into something beautiful and lasting. Learn how to transform your garden's bounty and fabric scraps into a stunning slow-stitch quilt, a cozy heirloom that tells a story of the season.
The Heart of Slow Stitch
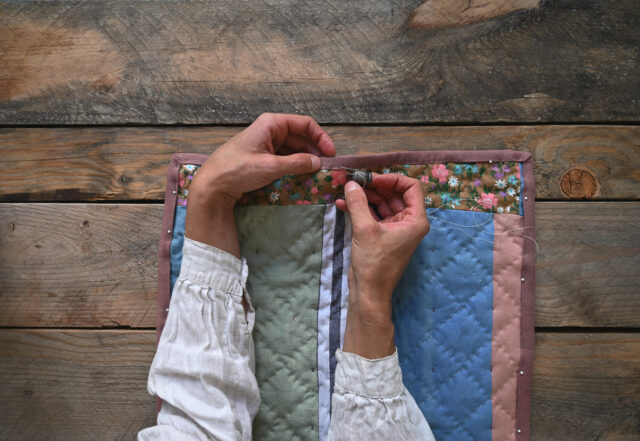
Slow stitching is more than just sewing; it's a mindful practice, a way to connect with the present moment and the materials at hand. It's about embracing imperfection, celebrating the handmade, and finding joy in the process. Unlike the precise, machine-driven world of mass production, slow stitching encourages a deliberate pace, allowing you to savor each stitch and create a truly unique piece of art.
I remember the first time I tried slow stitching. Frustrated with a complicated quilt pattern, I abandoned the machine and picked up a needle and thread. I simply started stitching small pieces of fabric together, letting the colors and textures guide me. The result was far from perfect – stitches were uneven, seams weren’t straight – but it was beautiful in its imperfection. It felt like a tangible representation of the slow, intentional life I was striving for. It was meditative and calming, a balm to my soul. This connects to the historical homesteading tradition, where quilting wasn't just a craft, but a necessity. Scraps were precious, and quilts were a way to repurpose and create warmth for the family. They became visual diaries, telling stories of births, deaths, and everyday life on the farm.
Sourcing Your Garden Palette
One of the most rewarding aspects of this project is incorporating the bounty of your organic gardening efforts. Think beyond the fabric store and look to your garden for inspiration and materials. And don't forget the power of compost to fuel your dye plants!
First, gather your fabric scraps. Old linens, worn-out clothes (especially natural fibers like cotton, linen, and silk), and leftover quilting cotton are all excellent choices. Next, consider creating natural dyes from the garden. Onion skins yield beautiful yellows and oranges, berries create vibrant pinks and purples, and flower petals (like marigolds or cosmos) can produce sunny yellows and oranges.
Here’s a simple method for dyeing fabric with onion skins:
- Gather your onion skins: Save the skins from yellow and red onions for a richer color.
- Prepare the dye bath: Place the onion skins in a stainless steel pot and cover them with water. Use approximately twice as much water as onion skins.
- Simmer the dye: Bring the water to a simmer (not a boil) and let it simmer for at least an hour, or even longer for a deeper color. The longer it simmers, the more concentrated the dye will be.
- Mordant your fabric: Mordanting helps the dye bind to the fabric. Alum is a common mordant. Follow the instructions on your alum package for the correct amount to use. Simmer the fabric in the mordant bath for an hour, then rinse thoroughly.
- Dye your fabric: Strain the onion skins from the dye bath. Add the mordanted fabric to the dye bath, ensuring it’s fully submerged.
- Simmer and stir: Simmer the fabric in the dye bath for at least an hour, stirring occasionally to ensure even dyeing.
- Rinse and dry: Remove the fabric from the dye bath and rinse it thoroughly in cool water until the water runs clear. Hang the fabric to dry out of direct sunlight.
Experiment with different plants and techniques to create a unique palette of colors for your quilt. Remember that natural dyes may fade slightly over time, adding to the farmhouse charm and handmade feel of your heirloom quilt.
Creating the Quilt Design
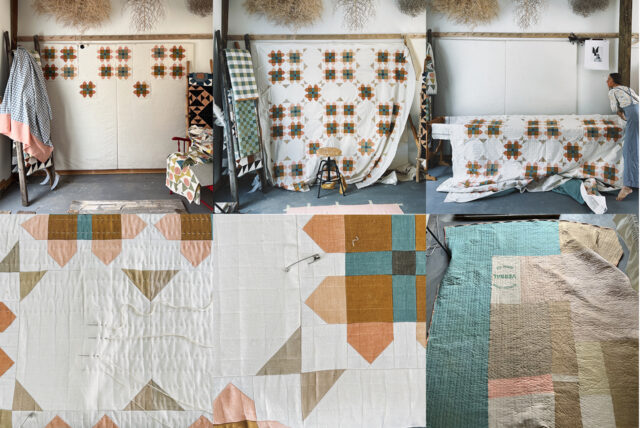
Don't be intimidated by the thought of designing a quilt. Even a simple design can be stunning, especially when created with hand-dyed fabrics and upcycled materials. Start with a sketch. A basic grid of squares or rectangles is a great starting point for beginners.
Think about incorporating motifs inspired by your garden. Simple leaf shapes, stylized flowers, or even abstract representations of vegetables can add a personal touch.
- Start with a sketch: Draw a grid on a piece of paper. Decide on the size of your quilt and the number of blocks you want.
- Choose your motifs: Sketch out some simple designs inspired by nature. Leaves, flowers, berries, or even simple geometric shapes can work well.
- Plan your color palette: Consider the colors you achieved with your natural dyeing process. Choose complementary colors that will create a harmonious design.
- Arrange your fabric scraps: Lay out your fabric scraps on a table and experiment with different arrangements. Consider the size, color, and texture of each piece.
- Cut your fabric: Cut your fabric scraps into the desired shapes and sizes. Remember to leave a seam allowance (usually ¼ inch) around each piece.
The key is to have fun and let your creativity flow. There is no right or wrong way to design a garden scrap quilt.
The Art of the Stitch
Now for the heart of the project: slow stitching. This is where the magic happens, where the individual pieces of fabric come together to create a cohesive whole. Don’t feel pressured to stitch perfectly! These are a few basic stitches to get you started.
Running Stitch: This is the simplest stitch and is used for joining fabric pieces together. Simply bring the needle up through the fabric and then down a short distance away, creating a series of dashes.
Back Stitch: This stitch creates a stronger, more secure seam. Bring the needle up through the fabric, then back down a short distance away. Bring the needle up again a short distance ahead of the first stitch, then back down into the end of the previous stitch.
Blanket Stitch: This decorative stitch can be used to embellish the edges of your quilt or to add a decorative border to your blocks.
Experiment with different thread colors and weights to add visual interest. Consider adding small embellishments like beads, buttons, or even dried flower petals for a truly rustic touch. To incorporate dried flowers, carefully stitch them onto the fabric using small, discreet stitches.
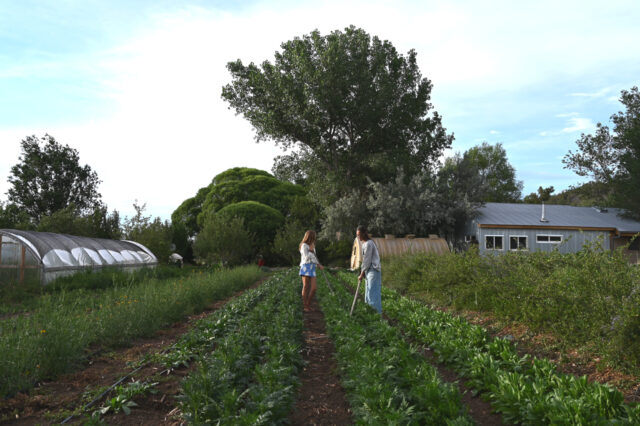
Remember, slow stitching is about the journey, not the destination. Embrace the imperfections, celebrate the handmade quality, and enjoy the process of creating something beautiful and unique. The meditative aspect of slow stitching can really help you embrace cozy living. It's a form of craft therapy!
Finishing Touches & Cozy Care
Once you've stitched all your blocks together, it's time to finish your quilt.
Binding: The binding is the fabric that wraps around the edges of the quilt, protecting the raw edges and adding a decorative finish. You can use a coordinating fabric or a contrasting fabric to create a visual impact.
Backing: Choose a soft, comfortable fabric for the backing of your quilt. Flannel, cotton, or even an old blanket can work well.
Layering and Quilting: Layer the backing fabric (right side down), batting (the filling), and quilt top (right side up). Baste the layers together with safety pins or long stitches. You can then quilt the layers together by hand or by machine. Simple straight lines or free-motion quilting can add texture and dimension to your quilt.
To care for your finished quilt, gentle washing is key. Hand wash in cold water with a mild detergent or machine wash on a delicate cycle. Always air dry to prevent shrinking and fading. Proper care will ensure that your farmhouse heirloom quilt lasts for generations to come.

Closing Reflection & Call to Action
Creating a slow-stitch quilt from garden scraps is a deeply rewarding experience. It's a chance to connect with nature, express your creativity, and create something beautiful and sustainable with your own two hands. Embrace the imperfections, celebrate the unique character of your quilt, and know that you've created a true heirloom, filled with love and intention. This project is a perfect fit for a sustainable home and a chance to engage in backyard projects.
Now, it's your turn! We would love to see your slow-stitch creations. Share photos of your own garden scrap quilts on Instagram using the hashtag #BetterHomesHarvestQuilts. Tag us @BetterHomesAndHarvests for a chance to be featured! We can't wait to see what you create! Let's inspire each other to embrace the beauty of handmade and the joy of seasonal harvest.