Crafting a Sustainable Oasis: Build Your Own Budget-Friendly Rainwater Harvesting System | Better Homes and Harvests
Imagine the satisfaction of watering your garden with rainwater you've collected yourself, reducing your water bill, and contributing to a more sustainable homestead. In this step-by-step guide, we'll explore how to build a simple, cost-effective rainwater harvesting system that's perfect for beginner homesteaders. This project focuses on enhancing water conservation at your homestead. Are you ready to take the plunge into rainwater harvesting? Let's get started!
1. Share Your Story: Why Rainwater Harvesting?
Here at Better Homes and Harvests, we're always looking for ways to reduce our environmental impact and become more self-sufficient. For us, water is a precious resource, and in recent years, we've experienced increasingly dry summers. Our well, while reliable, puts a strain on the local aquifer, especially during peak gardening season. We knew we needed a better solution.
That's when we started exploring DIY water conservation methods, and rainwater harvesting quickly rose to the top of the list. The idea of capturing free rainwater to nourish our garden, reduce our reliance on well water, and lower our water bill was incredibly appealing. Plus, it's a tangible way to practice sustainable living and teach our children about the importance of resource management. We also wanted a sustainable water system for our livestock.
Our homestead's primary challenge was finding an affordable rainwater harvesting setup that wouldn't require extensive plumbing or construction. We needed a system that was easy to install, maintain, and expand as our needs grow. This guide reflects our journey in creating just that.
2. Materials List (with Budget Breakdown)
Here's a detailed list of the materials you'll need to build your own budget rainwater harvesting system. Prices are approximate and may vary depending on your location and the retailer.
- Rain Barrel (55-gallon plastic drum): $30-50 (Check local classifieds, farm supply stores, or food-grade barrel suppliers. Repurposed barrels are a great budget-friendly option).
- Downspout Diverter: $15-30 (Essential for diverting rainwater from your gutter into the barrel. Look for models with a built-in screen to filter out debris. Example: https://www.amazon.com)
- Spigot: $5-10 (For easy access to the collected water. Choose a durable, rust-resistant spigot).
- Hose Adapter: $3-5 (To connect your garden hose to the spigot).
- Screen Mesh: $5-10 (To cover the top of the rain barrel and prevent mosquitoes and debris from entering).
- PVC Pipe (short length for overflow): $2-5 (For directing excess water away from your foundation).
- PVC Connector (to attach overflow pipe to barrel): $1-3
- Plumbing Tape: $2 (For sealing threaded connections).
- Gravel or Concrete Blocks: $10-20 (To elevate the rain barrel and provide stable support).
- Drill with Hole Saw Attachment: (If you don't already have one, borrow or rent. A hole saw the size of your spigot fitting is necessary).
- Safety Glasses: $5-10 (Essential for eye protection).
- Gloves: $5-10 (To protect your hands).
Total Estimated Cost: $83 - $155
Budget-Friendly Alternatives:
- Free Rain Barrel: Contact local businesses like food processing plants or car washes. They often have used (but clean) food-grade barrels they are willing to give away.
- DIY Downspout Diverter: You can create a simple diverter using PVC pipe and fittings. Search online for tutorials.
3. Step-by-Step Instructions (with Visuals)
Here's how to build your own DIY rainwater harvesting system:
Step 1: Prepare the Rain Barrel
- Thoroughly clean the rain barrel with soap and water to remove any residue. Rinse well.
- Determine the location for your spigot near the bottom of the barrel.
Caption: Cleaning the rain barrel before installation ensures no contaminants affect the water quality.
Step 2: Install the Spigot
- Using the hole saw attachment on your drill, carefully drill a hole at the marked location.
- Apply plumbing tape to the threads of the spigot.
- Insert the spigot into the hole and tighten securely.
Step 3: Install the Overflow Pipe
- Drill another hole near the top of the barrel for the overflow pipe.
- Attach the PVC connector to the barrel.
- Connect the short length of PVC pipe to the connector to direct overflow away from your foundation.
Step 4: Position and Elevate the Rain Barrel
- Choose a level location near a downspout for your rain barrel.
- Place gravel or concrete blocks to create a stable and elevated base for the barrel. This will improve water pressure and make it easier to fill watering cans.
- Position the rain barrel on the base.
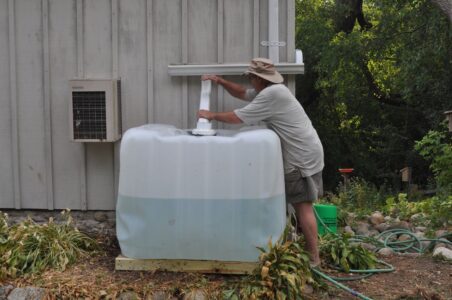
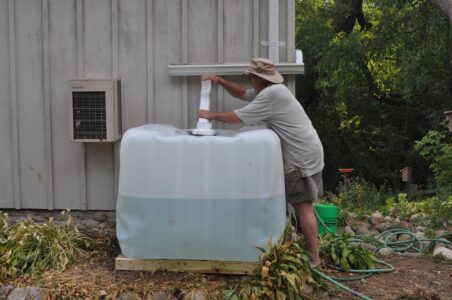
Step 5: Install the Downspout Diverter
- Cut the downspout above the rain barrel.
- Install the downspout diverter according to the manufacturer's instructions. Make sure it's properly aligned to direct water into the barrel.
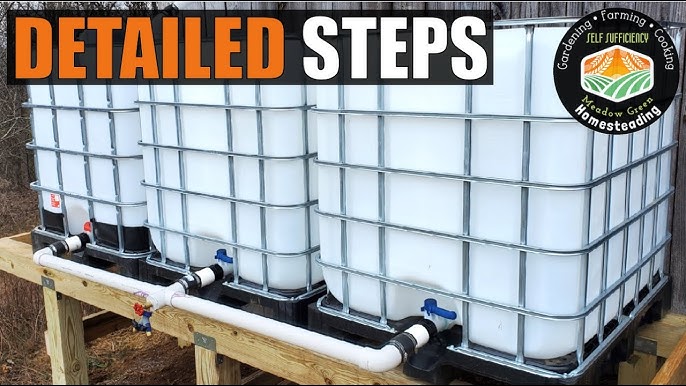
Caption: Installing the downspout diverter to redirect rainwater into the collection barrel.
Step 6: Cover the Barrel
- Secure the screen mesh over the top of the rain barrel to prevent debris and mosquitoes from entering.
Troubleshooting Tips:
- Leaking Spigot: Apply more plumbing tape or tighten the spigot.
- Slow Water Flow: Ensure the barrel is elevated sufficiently.
- Clogged Diverter: Regularly clean the diverter screen to remove debris.
4. Safety Considerations
Safety is paramount when undertaking any DIY project. Here are some crucial safety precautions to keep in mind during your rainwater harvesting installation:
- Eye Protection: Always wear safety glasses when drilling or cutting materials.
- Hand Protection: Wear gloves to protect your hands from sharp edges or rough surfaces.
- Ladder Safety: If you need to use a ladder to reach the downspout, ensure it's stable and properly positioned.
- Electrical Safety: If you're using any power tools, ensure they are properly grounded and avoid working in wet conditions.
- Barrel Stability: Ensure the rain barrel is placed on a stable and level surface to prevent it from tipping over, especially when full.
5. Long-Term Benefits & Maintenance
Investing in a rainwater harvesting system offers numerous long-term benefits:
- Water Savings: Reduce your water bill by using collected rainwater for gardening, washing cars, or other non-potable uses.
- Environmental Impact: Conserve precious water resources and reduce your reliance on municipal water supplies.
- Healthier Plants: Rainwater is naturally soft and free of chemicals, making it ideal for plants.
- Emergency Water Supply: In some cases, with proper filtration, stored rainwater can provide an emergency water supply.
Maintenance Tips:
- Regular Cleaning: Clean the rain barrel and downspout diverter regularly to remove debris.
- Inspect for Leaks: Check the system for leaks and make repairs as needed.
- Winterization: In cold climates, disconnect the downspout diverter and drain the rain barrel to prevent freezing and damage.
- Algae Control: Periodically clean the inside of your rain barrel to prevent algae growth. Dark-colored barrels help to limit light exposure which can slow algae proliferation. If algae does become a problem, consider using a commercially available rain barrel cleaner, or carefully scrub the interior with a mild bleach solution (ensure you rinse thoroughly afterwards!).
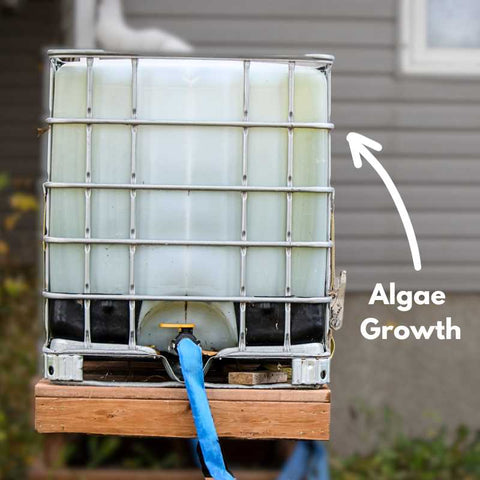
Caption: Algae buildup is a common problem in water storage containers.
6. Troubleshooting & FAQs
Q: Is rainwater safe to drink?
A: Rainwater can be safe to drink with proper filtration and purification. However, this system is designed for non-potable uses. If you plan to use rainwater for drinking, research appropriate filtration methods and consult with a water quality expert.
Q: How do I prevent mosquitoes from breeding in my rain barrel?
A: Ensure the screen mesh is securely in place and regularly inspect it for any holes. You can also use mosquito dunks (available at most hardware stores) to kill mosquito larvae.
Q: How much water can I collect?
A: The amount of water you collect depends on rainfall and the size of your roof. A general rule of thumb is that 1 inch of rain on 1,000 square feet of roof will yield about 600 gallons of water.
Q: What if my rain barrel overflows?
A: The overflow pipe will direct excess water away from your foundation. Ensure the overflow is directed to a safe location where it won't cause erosion or flooding.
Q: How do I know if my barrel is food grade?
A: Look for a recycling symbol with the number 2 (HDPE - High-Density Polyethylene) or 4 (LDPE - Low-Density Polyethylene). These plastics are generally considered safe for food and water storage.
7. Share Your Results!
We'd love to see your completed rainwater harvesting systems! Share photos of your setups in the comments section below and tell us about your experiences, any modifications you made, and how much water you're saving! We look forward to learning from your experiences and building a community of sustainable homesteaders.
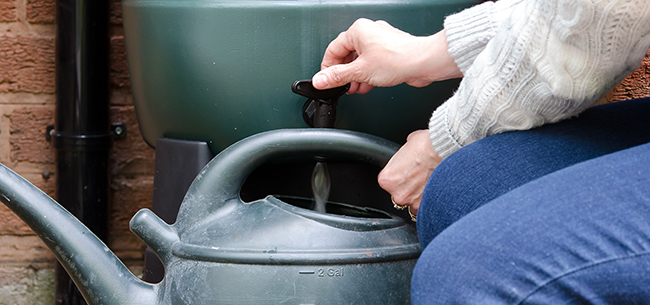
Caption: Using collected rainwater to water the garden.
Conclusion
Building your own rainwater harvesting system is a rewarding project that can significantly contribute to a more sustainable and self-sufficient homestead. We hope this guide empowers you to take control of your water resources and enjoy the benefits of this eco-friendly solution. Embrace DIY water conservation and watch your garden (and your wallet) thrive!
Don't forget to subscribe to the Better Homes and Harvests newsletter and follow us on social media for more homesteading tips and inspiration! Check out our other articles on water conservation and homesteading projects for more ideas.