Cozy Up Your Fall Harvest: 5 Simple DIY Projects to Bring the Garden Indoors
The air is crisp, carrying the scent of ripe apples and the earthy aroma of fallen leaves. The garden, once bursting with vibrant blooms, is now transitioning into its autumn hues of gold, russet, and brown. As summer fades, a bittersweet feeling often creeps in for us gardeners, a pang of longing for the endless bounty. But don't despair! The joy of the harvest doesn't have to end with the season. Let's bring the beauty of the outdoors inside with some simple, heartwarming DIY projects that will infuse your home with cozy, natural charm.
Fragrant Fall: Crafting a Dried Herb Wreath
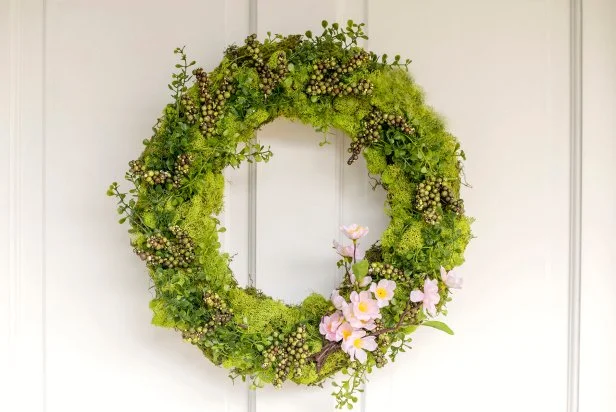
A dried herb wreath is more than just a pretty decoration; it's an aromatic reminder of your garden's abundance, bringing a touch of farmhouse life to your sustainable home. Imagine the subtle fragrance of lavender and rosemary greeting you every time you enter a room! Plus, it's a fantastic way to use up those homegrown herbs from your organic gardening efforts before the first frost.
Materials List:
- Grapevine wreath form (various sizes available at craft stores)
- Dried herbs (lavender, rosemary, thyme, sage, oregano – use what you have!)
- Twine or floral wire
- Scissors or pruning shears
- Optional: Dried flowers, seed pods, cinnamon sticks, small pinecones for added texture
Step-by-Step Instructions:
- Gather your dried herbs. Ensure they are completely dry to prevent mold. The best time to harvest herbs for drying is in the morning after the dew has evaporated.
- Bundle the herbs into small sprigs and secure them tightly with twine or floral wire. Aim for bundles about 3-4 inches long.
- Attach the herb bundles to the grapevine wreath form, overlapping each bundle slightly to conceal the stems and create a full, lush look. Use floral wire to secure each bundle to the wreath frame.
- Continue adding herb bundles until the entire wreath form is covered.
- Embellish! Add dried flowers, seed pods, cinnamon sticks, or small pinecones for visual interest. Secure these with floral wire or hot glue.
- Hang your fragrant creation and enjoy!
My Story: I remember the first herb wreath I ever made. I was so excited to use the lavender I had painstakingly grown that year. The fragrance was intoxicating, and every time I walked past it, I was transported back to sunny summer days in my garden. I even added a few sprigs of dried chamomile for its calming properties – perfect for creating a relaxing atmosphere.
Seeds of Hope: Preserving Memories with a Seed Saving Display
Seed saving is a cornerstone of self-sufficiency, allowing you to cultivate your favorite varieties year after year and build a collection of truly homegrown treasures. But beyond the practical benefits, it’s also a way to preserve memories of your garden's past glories. A seed saving display turns this practical task into a beautiful piece of DIY home decor.
Materials List:
- Small glass jars or vials (recycled spice jars work great!)
- Twine or ribbon
- Labels (paper, chalkboard, or printable)
- Decorative box, tray, or shadow box frame
- Optional: Dried flowers, small pinecones, or other natural elements to embellish the display
Step-by-Step Instructions:
- Gather your saved seeds. Ensure they are completely dry before storing them to prevent mold.
- Fill the glass jars with seeds, leaving a little space at the top.
- Create labels for each jar, noting the plant variety, harvest date, and any other relevant information (e.g., "Heirloom Tomato, 2023, saved from Grandma's prize-winning plant").
- Tie twine or ribbon around the neck of each jar and attach the label.
- Arrange the jars in a decorative box, tray, or shadow box frame.
- Embellish the display with dried flowers, small pinecones, or other natural elements to create a visually appealing arrangement.
Sustainability Tip: Reuse materials you already have! Old spice jars, baby food jars, or even small mason jars are perfect for storing seeds. Decorate the display with repurposed wood scraps or foraged natural elements for a truly eco-friendly project.
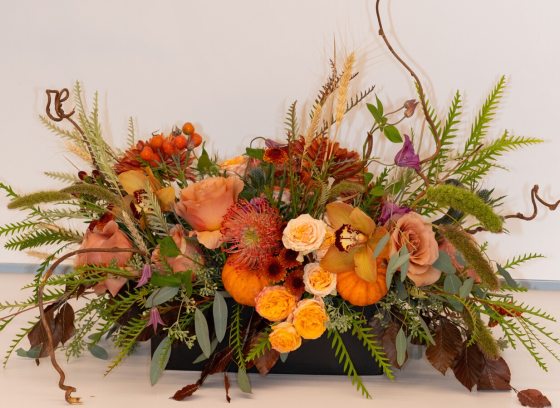
Gourdgeous: Using Fall Gourds for your Autumn Table Centerpiece
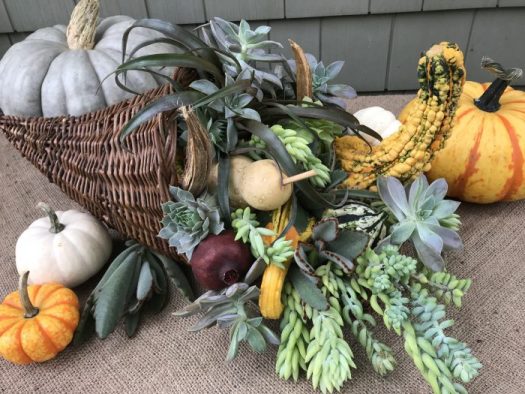
Nothing says "fall" quite like a vibrant display of gourds! These quirky, colorful vegetables are a perfect way to bring the seasonal harvest indoors and create a stunning autumn table centerpiece. The best part is, you can customize your centerpiece to perfectly match your personal style and farmhouse fall decor.
Materials List:
- Assorted gourds (different shapes, sizes, and colors)
- Fall foliage (leaves, branches, berries)
- Candles (pillar candles, taper candles, or tea lights)
- Vase, wooden bowl, or tray
- Optional: Moss, pinecones, raffia, burlap ribbon
Step-by-Step Instructions:
- Choose a vase, wooden bowl, or tray as the base for your centerpiece.
- Arrange the gourds in the base, starting with the larger ones and filling in the gaps with smaller ones.
- Add fall foliage, such as colorful leaves, branches with berries, or dried grasses, to create texture and visual interest.
- Incorporate candles into the arrangement. Pillar candles can be placed directly among the gourds, while taper candles can be placed in candle holders.
- Fill in any remaining gaps with moss, pinecones, raffia, or burlap ribbon to create a full, lush centerpiece.
Actionable Tips for a Cozy, Natural Fall Home
Beyond these specific DIY projects, there are countless other ways to bring the warmth and beauty of fall into your home:
- Embrace the bounty: Scatter pumpkins and gourds of all shapes and sizes on shelves, mantels, and tables.
- Cozy up with textiles: Use natural fabrics like wool and linen for blankets and pillows to add warmth and texture.
- Sip the season: Brew seasonal teas with herbs and spices like cinnamon, cloves, and ginger. A steaming mug of apple cider or a homemade herbal infusion is the perfect way to warm up on a crisp autumn evening.
- Light it up: Use candles and warm-toned lighting to create a cozy, inviting atmosphere.
As you embrace these fall crafts, don't forget to give some love to your compost pile! Organic gardening and composting go hand in hand, even as the weather cools.
Closing Reflection
Bringing the fall harvest indoors is about more than just decorating; it's about connecting with the rhythms of nature and finding joy in simple, nature-inspired crafts. It's a way to extend the beauty of the garden into your home, creating a cozy and inviting space that celebrates the season. As the days grow shorter, remember to also prepare your garden for winter. (You can find helpful tips in our guide on preparing your garden for winter).
Now, I'd love to hear from you! What are your favorite DIY fall projects? Share your ideas and creations in the comments below! And for more seasonal tips and inspiration, be sure to join our Better Homes and Harvests newsletter. Happy crafting!