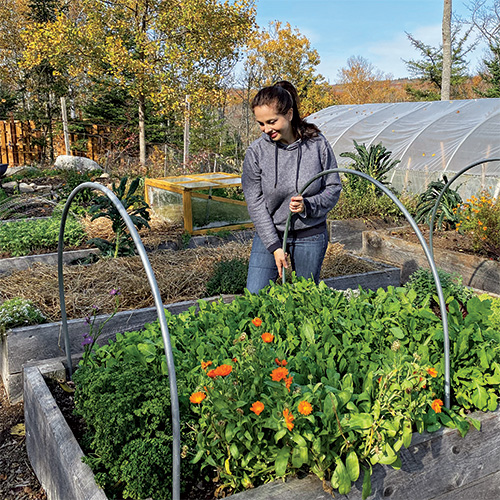
Cozy Crops: Building a Simple Hoop House for Winter Vegetables
Value Proposition: This article provides practical advice for building a simple hoop house, allowing you to extend your gardening season and enjoy fresh, homegrown vegetables even as the weather cools.
As summer's warmth fades and the first hints of frost kiss our gardens, a familiar feeling settles in: the gardening season is coming to an end. The vibrant colors of tomatoes, peppers, and zucchini slowly give way to browns and yellows. But what if you could defy the changing seasons, extend your harvest, and enjoy fresh, homegrown vegetables well into winter? With a simple hoop house, you can! This affordable and accessible season extension technique allows you to create a cozy microclimate for your cool-weather crops, protecting them from the elements and providing you with a delicious, sustainable food source all winter long.

In this post, we'll walk you through the steps of building your own hoop house, from planning and materials to planting and maintenance. Get ready to say goodbye to bland, store-bought produce and hello to a winter garden filled with fresh, flavorful vegetables!
What is a Hoop House and Why Build One?
A hoop house, also known as a polytunnel, is essentially a simple, unheated greenhouse structure. Think of it as a tunnel made of hoops covered with plastic. The key is the way it works: sunlight passes through the clear plastic covering, trapping solar energy inside. This creates a warmer microclimate than the outside air, sheltering plants from frost, snow, and wind.
Why build one? The benefits are numerous:
- Extended Growing Season: This is the biggest advantage! Hoop houses allow you to grow cool-weather crops much later into the fall and even throughout the winter months in many climates.
- Protection from the Elements: Frost, snow, hail, and strong winds can wreak havoc on your garden. A hoop house provides a protective barrier, preventing damage and ensuring your plants thrive.
- Improved Yields: By creating a more controlled environment, hoop houses can lead to increased yields and better-quality produce. Plants are less stressed and more likely to flourish.
- Earlier Spring Starts: Not just for winter! You can also use a hoop house to get a head start on your spring planting, giving your seedlings a protected environment to grow before the last frost.
- Affordable and Accessible: Unlike expensive, permanent greenhouses, hoop houses can be built relatively cheaply using readily available materials and require no specialized skills. This makes them an ideal choice for beginner gardeners and homesteaders on a budget.
Compared to a fully heated greenhouse, a hoop house relies entirely on solar energy and passive heating, which makes it a more sustainable and cost-effective option for extending your garden season.
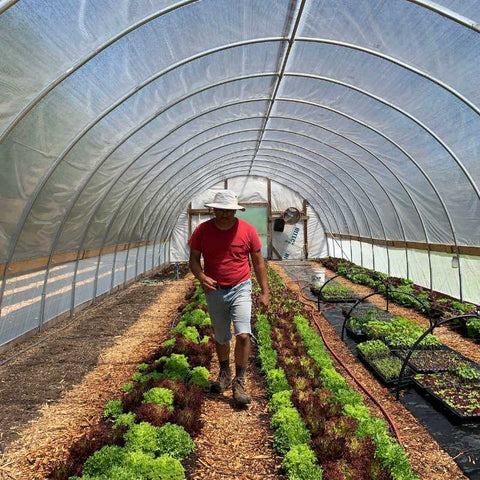
Planning Your Hoop House: Location, Size, and Materials
Before you start bending pipes and stretching plastic, careful planning is essential. Here's what to consider:
Location:
- Sunlight: Choose a south-facing location that receives maximum sunlight exposure, especially during the short days of winter.
- Drainage: Avoid areas prone to flooding or standing water, as this can damage your plants and the hoop house structure.
- Water Source: Ensure easy access to a water source for watering your crops, especially during dry spells.
- Wind Protection: If your garden is exposed to strong winds, consider building a windbreak (e.g., a fence, hedgerow) or locating the hoop house in a sheltered spot.
Size:
- Available Space: Consider how much space you have available in your garden.
- Desired Yield: How much produce do you want to grow? This will influence the size of your hoop house.
- Budget: A larger hoop house will require more materials and potentially more labor.
- Beginner Recommendation: If you're new to hoop houses, start small. An 8ft x 12ft structure is a good size for learning the ropes and growing a decent amount of vegetables.
Materials:
- Frame:
- PVC Pipes: The most affordable and easiest option for beginners.
- Metal Conduit: Stronger than PVC, but requires more specialized tools for bending.
- Repurposed Materials: Salvaged wood, metal poles, or even old trampoline frames can be used creatively to build a hoop house frame.
- Covering:
- Greenhouse Plastic: UV-resistant polyethylene film designed specifically for greenhouses. Choose a thicker mil for longer-lasting durability.
- Polyethylene Film: A cheaper alternative to greenhouse plastic, but it may not last as long and may not be UV-resistant.
- Baseboard: Lumber, such as 2x4s or 4x4s, for creating a solid base around the perimeter of the hoop house.
- Fasteners: Stakes, clamps, screws, or zip ties for securing the frame and covering.
- Door: Hinges, lumber, and hardware for building a simple door.
- Frame:
By carefully considering these factors, you'll be well on your way to building a hoop house that meets your specific needs and helps you enjoy a bountiful winter harvest.
Building Your Hoop House: A Step-by-Step Guide
Now for the fun part! Here's a step-by-step guide to building a simple hoop house using PVC pipes:
Prepare the Site:
- Clear the area of any vegetation, rocks, or debris.
- Level the ground to create a flat surface for the hoop house.
- Mark the dimensions of your hoop house with stakes and string.
Build the Base:
- Construct a simple wooden frame using lumber (e.g., 2x4s). This will provide a solid foundation for the hoop house and help to keep the plastic covering in place.
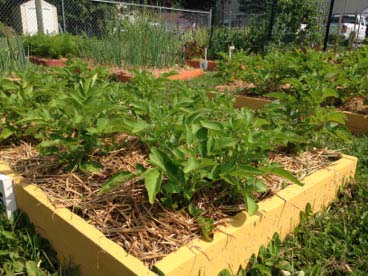
- Alternatively, you can build the hoop house directly on top of existing raised beds, which can simplify the construction process and improve drainage.
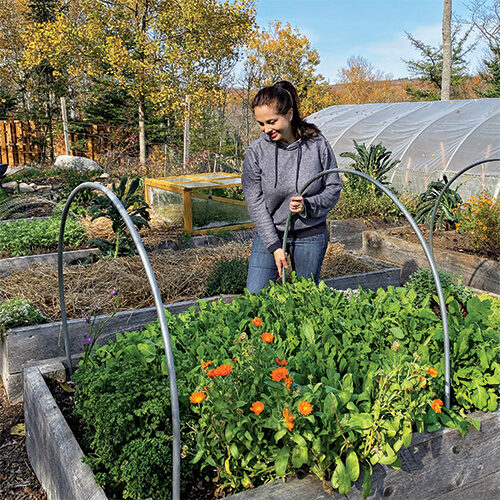
Create the Arches:
- Measure and cut the PVC pipes to the desired length. The length will depend on the desired height and width of your hoop house.
- Bend the PVC pipes into arches. You can use a pipe bender or simply bend them by hand.
- Secure the arches to the base frame using clamps or screws. Space the arches evenly along the length of the hoop house (e.g., every 2-3 feet).
Attach the Covering:
- Carefully stretch the greenhouse plastic over the frame. It’s best to do this on a calm day to prevent the plastic from being blown around.
- Secure the plastic to the frame using clamps, zip ties, or staples. Ensure the plastic is taut to prevent sagging and maximize sunlight penetration. Leave some overlap on the ends to create a door.
Build a Door:
- Construct a simple hinged door using lumber and hardware.
- Attach the door to one end of the hoop house, ensuring it fits snugly to prevent drafts. You can also create a simple roll-up entrance by securing the plastic to a wooden batten that can be rolled up and down.
Secure the Structure:
- Use stakes to anchor the hoop house to the ground, especially in windy areas.
- Attach ropes or wires to the top of the hoop house and secure them to the stakes for added stability.
Important Tip: When attaching the plastic covering, be sure to pull it tight to prevent sagging. Sagging plastic can collect rainwater and snow, which can damage the frame and reduce sunlight penetration.
What to Grow in Your Hoop House (and When to Plant)
Now that your hoop house is built, it's time to start planting! Here are some of the best cool-weather crops to grow in a hoop house:
- Leafy Greens: Spinach, lettuce, kale, arugula, mustard greens, and Swiss chard thrive in the cooler temperatures of a hoop house.
- Root Vegetables: Carrots, radishes, beets, and turnips can be grown successfully in a hoop house, providing a fresh source of vitamins and minerals throughout the winter.
- Brassicas: Broccoli, cauliflower, cabbage, and Brussels sprouts can also be grown in a hoop house, although they may require more space than leafy greens or root vegetables.
- Herbs: Parsley, cilantro, chives, and other herbs can be grown year-round in a hoop house, adding flavor to your winter meals.
Planting Schedule:
- Late Summer/Early Fall: Plant seeds or transplants of cool-weather crops in late summer or early fall, allowing them to establish themselves before the weather turns cold.
- Succession Planting: Plant new crops every few weeks to ensure a continuous harvest throughout the winter. For example, plant a row of lettuce one week, then another row a few weeks later.
Benefits of Regenerative Gardening: Remember that enriching the soil within your hoop house with compost and practicing no-till methods will greatly enhance the health and productivity of your plants, ensuring a continuous cycle of growth and vitality.
Maintaining Your Hoop House for a Bountiful Harvest
Once your crops are growing, regular maintenance is essential for a healthy and productive hoop house:
- Ventilation: On sunny days, open the door or vents of the hoop house to prevent overheating and humidity buildup. Excessive heat and humidity can create conditions that promote disease.
- Watering: Monitor soil moisture regularly and water as needed, especially during dry periods. Use a watering can or drip irrigation system to water plants at the base, avoiding wetting the foliage.
- Pest and Disease Control: Inspect plants regularly for signs of pests or diseases. Take appropriate action using organic methods, such as handpicking pests, using insecticidal soap, or applying neem oil.
- Temperature Monitoring: Use a thermometer to track temperatures inside the hoop house. This will help you determine when to ventilate and when to provide additional protection from the cold.
- Winterizing: Prepare the hoop house for winter by reinforcing the structure, patching any holes in the plastic, and adding insulation if necessary. You can use bubble wrap or blankets to insulate the hoop house on very cold nights.
Extending the Season, Expanding the Table
Building a simple hoop house is a rewarding project that can transform your garden and your table. By extending the harvest season, you can enjoy fresh, homegrown vegetables throughout the fall and into winter, reducing your reliance on store-bought produce and savoring the delicious flavors of your own garden.
As the days grow shorter and the nights grow colder, take the time to plan and build your own hoop house. Get started in late summer or early fall to prepare for a bountiful winter harvest. Imagine the satisfaction of harvesting fresh spinach, lettuce, and carrots from your own garden, even as snow falls outside!
What are your favorite cool-weather crops to grow in a hoop house? Share your tips and experiences in the comments below! Or, tell us about your biggest challenge in building or maintaining a hoop house – we’re here to help!
