Cozy Compost: Simple Steps to Building a Year-Round Hot Composting System for a Thriving Garden
Imagine the earthy aroma of rich, dark soil, teeming with life. Picture your garden, vibrant and flourishing even as the leaves begin to fall, thanks to the incredible power of compost. But the thought of composting can feel overwhelming, conjuring images of complicated systems and smelly messes. Fear not! This guide will show you how to create a simple, year-round hot composting system that transforms kitchen scraps and yard waste into garden gold, even in the chilliest months, ensuring a thriving garden season after season.

Why Hot Composting?
Hot composting, unlike its slower cold composting cousin, is a method of rapidly decomposing organic matter by maintaining optimal conditions for beneficial microorganisms. These microorganisms thrive in a heated environment, breaking down materials much faster – often in weeks rather than months. The high temperatures also kill off weed seeds and plant pathogens, giving you a cleaner, more potent compost. Here's why you should embrace hot composting:
- Faster Results: Enjoy nutrient-rich compost in a fraction of the time.
- Weed Control: Eliminate pesky weed seeds that can wreak havoc in your garden.
- Disease Prevention: Reduce the risk of spreading plant diseases through your compost.
- Year-Round Composting: Keep the composting process going strong, even when temperatures drop.
- Sustainable Home: Reducing landfill waste with composting.
Gathering Your Materials: The Foundation of Your System
Before diving in, gather the necessary ingredients and tools. Remember the secret to a successful hot composting system lies in the balance of "greens" (nitrogen-rich materials) and "browns" (carbon-rich materials).
- Greens: These provide nitrogen and moisture. Think kitchen scraps (vegetable peelings, coffee grounds, fruit cores), fresh grass clippings, and manure.
- Browns: These provide carbon and bulk, creating air pockets. Examples include dried leaves, shredded paper, straw, and wood chips.
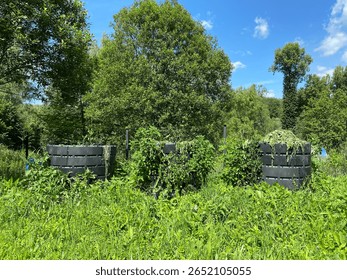
- Compost Bin or Enclosure: A bin helps contain the pile and retain heat. You can use a purchased compost bin, build your own from wood pallets, or even create a simple pile in a designated area of your yard.
- Water Source: A hose or watering can is essential for maintaining moisture levels.
- Pitchfork or Shovel: For turning and mixing the compost.
- Compost Thermometer (Optional but Recommended): To monitor the temperature of your pile.
Actionable Tip: Aim for a 1:1 or 1:2 ratio of greens to browns. A good rule of thumb is to add a layer of browns each time you add a layer of greens.
Building Your Hot Compost Pile: Layer by Layer
Now for the fun part! Building your compost pile is like making a lasagna – layer by layer. Follow these steps for success:
- Base Layer: Start with a thick layer of browns (6-12 inches) at the bottom of your bin. This provides aeration and drainage.

- Greens Layer: Add a layer of greens (3-6 inches) on top of the browns. Moisten the greens thoroughly.
- Browns Layer: Cover the greens with another layer of browns (3-6 inches).
- Repeat: Continue alternating layers of greens and browns, moistening each layer as you go.
- Mix It Up: After each layer, or every few layers, give the pile a good mix with your pitchfork or shovel. This helps distribute moisture and microorganisms.
- Maintain Moisture: The compost pile should be as damp as a wrung-out sponge. Add water as needed to maintain this moisture level.

Personal Anecdote: I remember my first attempt at composting resulted in a soggy, smelly mess. I had added too many greens and not enough browns. Learning to balance the ratio was key! Now, my compost pile is a thriving ecosystem.
Maintaining the Heat: The Heart of Hot Composting
The key to hot composting is maintaining a consistent temperature range of 130-160°F (54-71°C). This is where your compost thermometer comes in handy.
- Turning: Turn your compost pile every 2-3 days. This aerates the pile, providing oxygen for the microorganisms to thrive. When turning, move the outer layers to the center, and the inner layers to the outside.

Actionable Tip: If your pile is not heating up, it likely needs more greens (nitrogen) or moisture. If it smells like ammonia, it has too much nitrogen; add more browns. If it smells rotten, it’s too wet; add more browns and turn it more frequently.
Winter Composting: Keeping the Heat Alive
Even in the depths of winter, you can keep your hot composting system running strong.
- Insulation: Insulate your compost bin with straw bales, old blankets, or tarps. This helps retain heat.
- Location: Place your compost bin in a sunny location, if possible, to take advantage of any solar heat.
- Browns Stockpile: Stockpile a generous supply of browns before winter arrives. Dried leaves, shredded paper, and straw are excellent options.
- Smaller Additions: Add materials to your compost pile in smaller quantities during the winter to avoid cooling it down too much.
Personal Anecdote: I once forgot to insulate my compost bin before a hard freeze. The pile froze solid! I learned my lesson and now wrap it in old blankets as soon as the temperatures start to drop.
Troubleshooting Common Problems: A Guide to Success
Even with the best intentions, composting can sometimes present challenges. Here are some common problems and their solutions:
- Smelly Compost: Too much nitrogen (greens) or not enough aeration. Add more browns and turn the pile frequently.
- Slow Decomposition: Not enough moisture, nitrogen, or aeration. Add water, greens, and turn the pile.
- Pests: Avoid composting meat, dairy, and oily foods, which can attract pests. Bury food scraps deep within the pile.
- Dry Compost: Not enough moisture. Add water as needed.
Actionable Tip: Chopping or shredding materials before adding them to the compost pile speeds up the decomposition process.
Harvesting Your Compost: Garden Gold Awaits
After several weeks of diligent maintenance, your compost will be ready to harvest. It should be dark brown, crumbly, and have a pleasant earthy smell.
- Screening: Use a compost sifter to remove any large, undecomposed materials.
- Using Your Compost: Mix your finished compost into your garden beds, use it as a top dressing for your plants, or add it to potting mixes.
Creating a year-round hot composting system is an investment in the health of your garden and the sustainability of your home. It requires a bit of effort and attention, but the rewards are well worth it. Imagine the satisfaction of feeding your plants with nutrient-rich compost made from your own kitchen scraps and yard waste, knowing that you are contributing to a healthier planet. This fall, embrace the "cozy compost" and watch your garden thrive!
What are your favorite composting tips? Share them in the comments below!