Cozy Autumn Kitchen: Preserving Your Late Summer Harvest with Farmhouse Charm
Imagine waking up on a crisp autumn morning. The scent of woodsmoke drifts in from the stove, mingling with the sweet aroma of apples baking in the oven. Golden sunlight streams through the kitchen window, illuminating dust motes dancing in the air. A cool breeze whispers through the open window, carrying the earthy scent of fallen leaves. It’s a time of year that calls for cozying up indoors, reflecting on the bounty of the garden, and preparing for the long winter ahead. One of the most rewarding ways to embrace this season is by preserving the last of your late-summer harvest. It's a tangible connection to the land, a way to savor the flavors of summer long after the garden has gone to sleep, and a truly satisfying act of self-sufficiency. With these simple methods, you'll not only enjoy the fruits (and vegetables!) of your labor all winter long but also transform your kitchen into a haven of warmth and autumnal beauty.
Dehydrating Delights (Tomatoes, Herbs, Apple Slices)
Dehydrating is a fantastic way to preserve the concentrated flavors of your late-summer garden. Cherry tomatoes transform into sweet, chewy candies, herbs retain their potent aroma, and apple slices become crispy, healthy snacks.
Tomatoes:
- Wash and dry your cherry tomatoes.
- Cut them in half. For larger tomatoes, slice them into ¼-inch thick rounds.
- Arrange the tomatoes on dehydrator trays, cut-side up, leaving a little space between each one.
- Dehydrate at 135°F (57°C) for 8-12 hours, or until they are leathery and no longer sticky.
Herbs (Rosemary, Sage, Thyme):
- Wash and dry your herbs thoroughly.
- Remove the leaves from the stems (optional, but speeds up drying time).
- Spread the leaves in a single layer on dehydrator trays.
- Dehydrate at 95-115°F (35-46°C) for 2-4 hours, or until the leaves are brittle and crumble easily.
Apple Slices:
- Wash, core, and slice apples into ¼-inch thick rounds.
- Dip the slices in a mixture of lemon juice and water (this prevents browning).
- Arrange the slices on dehydrator trays, leaving a little space between each one.
- Dehydrate at 135°F (57°C) for 6-10 hours, or until they are leathery but still pliable.
Oven Dehydrating: If you don’t have a dehydrator, you can use your oven. Set it to the lowest possible temperature (ideally below 200°F) and crack the door slightly to allow moisture to escape. Place the items on a baking sheet lined with parchment paper and check them frequently. The drying time will be longer than with a dehydrator.

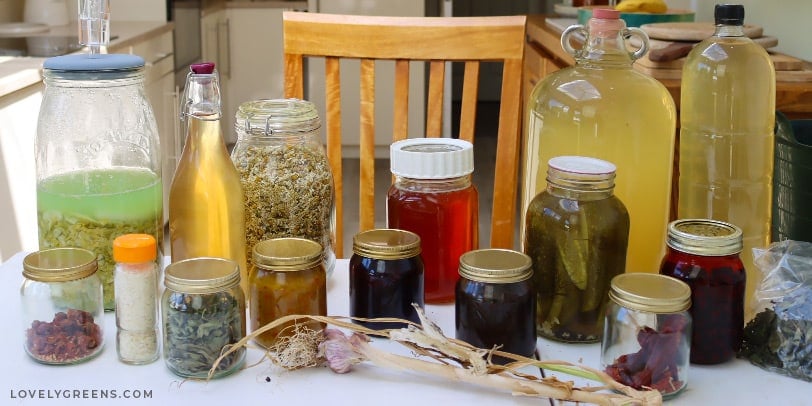
Storage: Once cooled completely, store your dehydrated delights in airtight mason jars. For an extra touch of farmhouse charm, create hand-written labels using brown paper and twine. These jars not only keep your food fresh but also add a rustic aesthetic to your kitchen shelves.
Quick & Easy Freezer Jam (Berry Bliss)
Freezer jam is a fantastic option for preserving the vibrant flavors of late-season berries without the fuss of traditional canning. It's quick, easy, and retains a wonderfully fresh, uncooked taste.
Recipe (Raspberry or Blackberry):
- 4 cups crushed raspberries or blackberries
- 1 ¾ cups sugar
- ¾ cup water
- 3 tablespoons powdered pectin
Instructions:
- In a large bowl, combine the crushed berries and sugar. Let it stand for 10 minutes, stirring occasionally, to allow the sugar to dissolve.
- In a small saucepan, whisk together the water and powdered pectin. Bring to a full rolling boil over high heat, stirring constantly. Boil for 1 minute, stirring continuously.
- Pour the pectin mixture into the berry mixture and stir vigorously for 3 minutes.
- Immediately pour the jam into clean freezer-safe jars or containers, leaving ½-inch headspace.
- Let the jam stand at room temperature for 30 minutes to set slightly.
- Place lids on the jars and freeze for up to 1 year.

Serving Suggestion: Spread this berry bliss on freshly baked homemade biscuits for the ultimate comfort food experience. The combination of warm, fluffy biscuits and sweet, fruity jam is simply irresistible.
Pickled Perfection (Cucumbers & Onions)
Quick-pickled cucumbers and onions are a tangy and refreshing way to preserve the crispness of your late-summer vegetables. They're incredibly versatile and add a delightful zing to sandwiches, salads, and snacks.
Recipe:
- 1 large cucumber, thinly sliced
- 1 medium red onion, thinly sliced
- 1 cup white vinegar
- ½ cup water
- 2 tablespoons sugar
- 1 tablespoon salt
- 1 teaspoon mustard seeds
- A few sprigs of fresh dill
Instructions:
- In a large bowl, combine the sliced cucumbers and onions.
- In a saucepan, combine the vinegar, water, sugar, salt, and mustard seeds. Bring to a boil over medium heat, stirring until the sugar and salt are dissolved.
- Pour the hot brine over the cucumbers and onions. Add the fresh dill.
- Let the mixture cool to room temperature, then transfer it to a clean glass jar.
- Refrigerate for at least 2 hours before serving. The pickles will taste even better after a few days! They'll last for several weeks in the refrigerator.

Personal Anecdote: The first time I tried making pickles, I forgot the salt! Let me tell you, it made for a very bland experience. Now, I double-check the recipe every time and even add a pinch extra for good measure. That little mistake taught me that attention to detail is key when preserving food.
Actionable Tips:
- Essential Preserving Supplies Checklist: Mason jars (various sizes), lids and rings, canning funnel, jar lifter, dehydrator or oven, freezer-safe containers, vinegar, sugar, salt, pectin, spices, and labels.
- Affordable Mason Jars: Check your local thrift stores, estate sales, and online marketplaces for affordable mason jars. You can often find them at a fraction of the price of new ones.
- Upcycling Jars: Don't throw away old glass jars from store-bought items! Clean them thoroughly and remove the labels. They're perfect for storing dehydrated herbs and spices.
- Food Safety: Always follow reputable food safety guidelines when preserving food. The National Center for Home Food Preservation is an excellent resource: https://nchfp.uga.edu/
Preserving your late-summer harvest is more than just a way to stock your pantry for the winter. It’s a celebration of the seasons, a connection to the land, and a deeply satisfying act of self-sufficiency. As you fill your jars with colorful produce and aromatic herbs, you're not just preserving food; you're preserving memories, traditions, and a little piece of summer sunshine. So, embrace the cozy atmosphere of your autumn kitchen, gather your supplies, and embark on a preserving adventure.
What's your favorite thing to preserve in the autumn? Share your preserving tips and photos on social media using the hashtag #BetterHomesHarvestPreserves. And don't forget to subscribe to the Better Homes and Harvests newsletter for more seasonal recipes and tips!