Coop Dreams: Building a Beginner-Friendly Chicken Palace on a Budget
There’s nothing quite like the satisfaction of collecting your own fresh eggs, still warm from the hen. For me, that dream felt a bit distant until last spring. We'd been talking about raising chickens since we moved onto our little homestead, but the expense and the thought of buying some flimsy, mass-produced coop always held us back. Finally, I decided – enough was enough! It was time to stop dreaming and start building. This is the story of our DIY chicken coop, a project that not only brought fresh eggs to our table but also boosted our homestead's self-sufficiency and connected us even deeper to the land. This project truly embodies beginner homesteading.

Why a DIY Chicken Coop?
Let’s be honest: store-bought coops can be pricey, and often, the quality leaves something to be desired. We wanted something sturdy, predator-proof (raccoons are a serious issue here!), and easy to clean. Plus, as dedicated homesteaders, the idea of building something ourselves, tailored to our specific needs and space, was incredibly appealing. This journey contributes to our homesteading skills immensely.
The "why" was simple: self-reliance, better quality, and a more fulfilling connection to our food source. It also allowed us to build a budget chicken coop exactly to our specifications. Plus, a well designed DIY chicken coop is incredibly satisfying.
Phase 1: Planning & Gathering (aka "Avoiding Analysis Paralysis")
Before diving in, I spent weeks researching chicken coop plans. The internet is overflowing with options, from elaborate mansions for chickens to simple, functional designs. I ultimately settled on a modified A-frame design. It was relatively simple to build, offered good ventilation, and looked aesthetically pleasing.
Crucial Tip: Don't get overwhelmed! Choose a plan that resonates with your skill level and available materials. Start with DIY chicken coop plans for small backyards if space is an issue.

Next came the materials. We aimed to build our cheap chicken coop primarily from reclaimed lumber, saving money and reducing waste. We sourced wood from old pallets (carefully checking for chemical treatments!), Craigslist postings, and even a neighbor who was tearing down an old shed.
Cost-Saving Hacks:
- Pallet Power: Pallets are a goldmine! Just be sure they’re heat-treated (HT stamp) and not chemically treated (look for an "IPPC" stamp).
- Salvage Sales: Check local salvage yards and building material auctions.
- Freecycle/Craigslist: People are often giving away lumber, fencing, and other materials for free.
Our final materials list included:
- Reclaimed lumber (various sizes)
- Plywood sheeting (for the roof and floor)
- Chicken wire (plenty of it!)
- Hardware cloth (for added predator protection)
- Hinges, latches, screws, nails
- Roofing material (we used leftover asphalt shingles)
- Paint (optional, but recommended for weather protection)
Tools of the Trade:
- Circular saw
- Drill/driver
- Hammer
- Staple gun
- Level
- Measuring tape
- Safety glasses and gloves
Phase 2: Building the Frame (and a Few Headaches)
With our plans and materials in hand, it was time to get building! We started by constructing the A-frame itself. This involved cutting the lumber to size and assembling the frame pieces using screws and nails. This is where a good level comes in handy!
My First Mistake: I initially underestimated the importance of a square and level frame. The first A-frame was slightly wonky, and it caused problems later on when attaching the roof and walls. Don't skip this step! Use a speed square and double-check everything.

Once the frame was complete, we attached the plywood floor and began cladding the sides with reclaimed lumber. We left openings for windows and a door.
Predator-Proofing is Paramount:
This is crucial. We lined the bottom of the coop with hardware cloth, burying it a foot deep around the perimeter to prevent digging predators. We also used hardware cloth for the windows and reinforced all seams and corners. Building a predator-proof chicken coop is a must.
Phase 3: Roofing, Roosting, and a Touch of Flair
Next, we tackled the roof. We used plywood sheeting covered with asphalt shingles for weather protection. It wasn’t pretty, but it was functional. We also built a small door for the chickens to enter and exit the coop.
Inside, we installed roosting bars made from sturdy branches. Chickens love to roost high up at night! We also added nesting boxes lined with straw for egg-laying.
Adding Personality:
While function is key, don’t be afraid to add a personal touch! We painted our coop a cheerful yellow color and added some decorative trim. It made the whole project feel even more rewarding. It's worth the time and investment to make your DIY Homestead Projects your own.
Phase 4: The Chicken Run – Freedom to Roam (Safely)
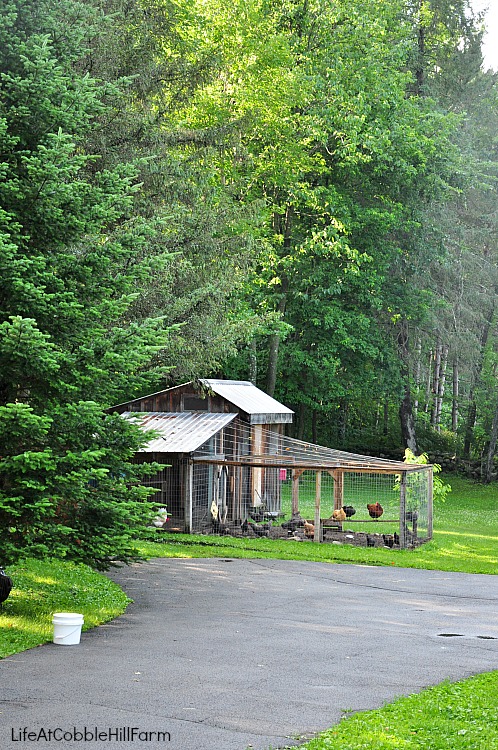
The chicken run is where the chickens spend most of their day, so it needs to be spacious and secure. We built a simple rectangular run using wooden posts and chicken wire. Again, we buried hardware cloth around the perimeter to prevent digging.
Chicken Tractor Option: If you have limited space or want to move your chickens around your yard, consider building a chicken tractor. This is a movable coop and run that allows you to graze your chickens in different areas.
The Big Reveal (and Fresh Eggs!)
After weeks of hard work (and a few minor setbacks), our DIY chicken coop was finally complete! It wasn’t perfect, but it was sturdy, functional, and built with our own two hands.
The best part? Watching our chickens explore their new home and start laying those delicious, fresh eggs. There’s nothing quite like it!

The Takeaway: Building Self-Sufficiency, One Coop at a Time
Building our own chicken coop was more than just a DIY project. It was an empowering experience that connected us even deeper to our homestead and instilled a sense of self-sufficiency. It taught us new skills, saved us money, and provided us with a sustainable source of fresh eggs. It was the epitome of Homesteading for Beginners, and now we want to share what we learned.
Your Turn:
Ready to build your own chicken coop? Start small, choose a simple plan, and don't be afraid to make mistakes. The journey is just as rewarding as the destination. And remember: fresh eggs are always worth the effort!
Actionable Step: Download a free chicken coop plan online today and start gathering your materials. What are you waiting for? Let's make that chicken coop design a reality! Share your experiences and questions in the comments below – we’re all in this together! Raising chickens is a true investment.