Coastal Homesteading: Smoked Salmon Chowder, Bee-Friendly Havens, and Rainwater Harvest
Picture a homestead nestled between the whispering pines and the crashing waves, where the scent of saltwater mingles with the earthy aroma of freshly turned soil. The sun glistens on the smoked salmon curing in the backyard smoker, its alder-smoked aroma a promise of the deliciousness to come, while the gentle hum of mason bees fills the air as they flit from apple blossom to creeping thyme. Today we embrace a blend of coastal bounty and homesteading ingenuity. After a morning spent foraging for wild nettles along the forest's edge, we're creating a hearty Smoked Salmon Chowder, a dish that celebrates the fruits of our labor and the bounty of the sea. And to further enhance our homestead, we're constructing a charming bee house from reclaimed wood pallets to support our precious pollinators and a rainwater harvesting system using upcycled oak barrels to nourish our herb garden with nature's precious gift. It's a symphony of flavors and sustainable practices, all woven together into the fabric of our coastal homesteading life.

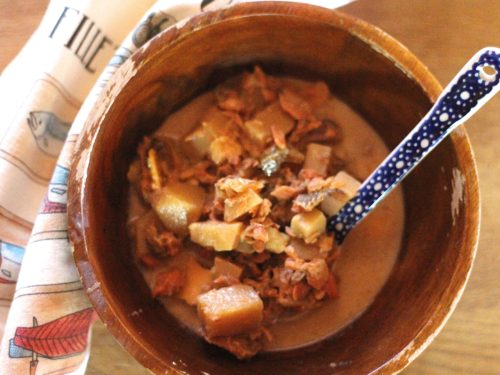
Foraging the Coast: Smoked Salmon Chowder with Dill and Potatoes
The heart of coastal homesteading is connecting with your surroundings. We start with the star of our chowder: smoked salmon. Smoking your own salmon not only adds a unique flavor to your meal but also aligns with the self-sufficient spirit of homesteading.
Smoking Your Own Salmon:
Whether you prefer cold or hot smoking, the process begins with a brine.
Brining: Submerge your salmon fillets in a brine for 4-6 hours (or overnight in the fridge). A good brine consists of:
- 1 gallon water
- 1 cup kosher salt
- 1/2 cup brown sugar
- 2 tbsp black peppercorns
- 2 bay leaves
Cold Smoking: Aim for a smoker temperature of 80-90°F (27-32°C) for 8-12 hours. Use alder wood chips for a classic smoky flavor. A digital thermometer is crucial for maintaining a consistent temperature.
Hot Smoking: Set your smoker to 225°F (107°C) for 3-4 hours, until the internal temperature of the salmon reaches 145°F (63°C). Applewood chips offer a sweeter, more subtle smoke.
If smoking isn't an option, source responsibly from a local fishmonger. Look for salmon that's sustainably caught and smoked with natural wood.
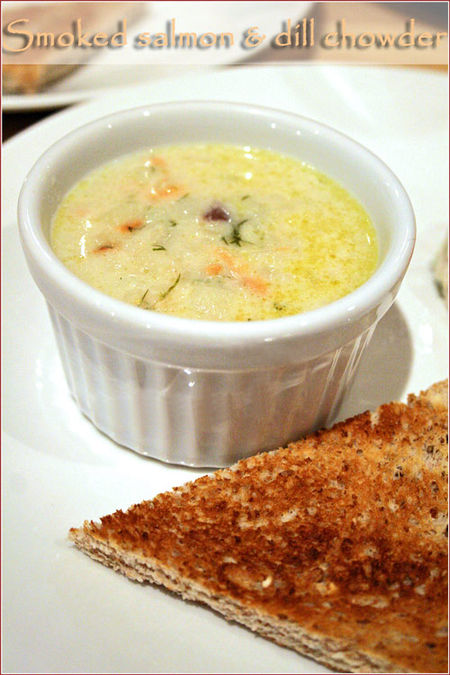
Smoked Salmon Chowder Recipe:
Foraged nettles (or spinach) add a unique, seasonal twist to this comforting dish. Yukon Gold potatoes lend a creamy texture, while red potatoes offer a slightly firmer bite. Feel free to experiment with foraged mushrooms as well!
Ingredients:
- 1.5 lbs smoked salmon (skinned and flaked)
- 4 tbsp butter
- 1 large yellow onion (diced)
- 2 cloves garlic (minced)
- 4 cups chicken broth (or fish stock)
- 2 cups Yukon Gold potatoes (diced)
- 1 cup heavy cream
- 1/2 cup fresh dill (chopped)
- 1/4 cup fresh parsley (chopped)
- 1 cup fresh spinach (or nettles)
- Salt and pepper to taste
Instructions:
- Melt butter in a 6-quart Dutch oven over medium heat. Sauté onion and garlic until softened, about 5 minutes.
- Add chicken broth and potatoes. Bring to a simmer and cook until potatoes are tender, about 15 minutes.
- Stir in smoked salmon, spinach (or nettles), dill, and parsley. Simmer for another 5 minutes, until heated through.
- Stir in heavy cream. Season with salt and pepper to taste.
- Serve hot, garnished with extra dill and a drizzle of olive oil.
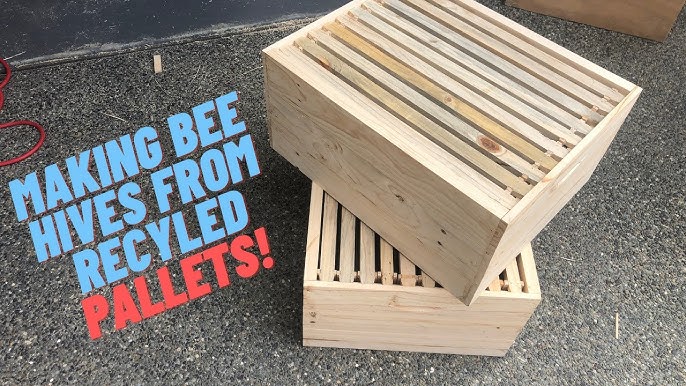
DIY Bee House: Building a Haven for Pollinators from Reclaimed Wood Pallets
Supporting solitary bees like mason bees and leafcutter bees is crucial for a thriving coastal garden. Unlike honeybees, solitary bees don't live in hives and are gentle, making them perfect for backyard homesteads. They are also super pollinators!
Materials:
- Reclaimed wood pallets (at least one standard pallet)
- Bamboo tubes (various diameters - 1/4 inch to 1/2 inch)
- Drill with assorted drill bits (1/4 inch, 3/8 inch, 1/2 inch)
- Saw (hand saw or power saw)
- Sandpaper (120-grit and 220-grit)
- Non-toxic exterior paint (optional)
- Wood glue (optional)
- Measuring tape
- Safety glasses
- Work gloves
- Screws or nails (1 1/2 inch exterior screws)
Instructions:
- Prepare the Pallet Wood: Disassemble the reclaimed wood pallets carefully using a pry bar and hammer, removing nails and staples. Select sound pieces of wood and discard any that are rotten or severely damaged. Sand the wood with 120-grit sandpaper to remove rough edges, then finish with 220-grit sandpaper for a smooth surface. This will create a safe and comfortable surface for the bees.
- Construct the Frame: Cut the pallet wood into pieces to build a rectangular frame for the bee house. Cut two pieces to 24 inches for the sides and two pieces to 18 inches for the top and bottom. Assemble the frame using wood glue and 1 1/2 inch exterior screws.
- Create Nesting Compartments: Cut additional pieces of pallet wood to create internal dividers within the frame. These dividers will create separate nesting compartments for the bees. Vary the size of the compartments to accommodate different species of solitary bees. Divide the space into three vertical sections.
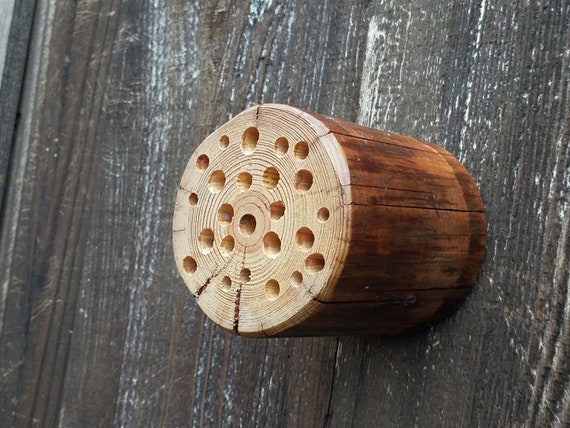
- Drill Nesting Holes: Drill holes into the end grain of the pallet wood to create nesting tubes for the bees. Use drill bits of various sizes (1/4 inch, 3/8 inch, 1/2 inch) to accommodate different bee species. Make sure the holes are smooth and free of splinters. The depth of the holes should be approximately 4-6 inches.
- Insert Bamboo Tubes: Cut bamboo tubes to the appropriate length (approximately 6 inches) and insert them into the nesting holes. The bamboo tubes provide a natural and comfortable nesting material for the bees. Ensure the tubes are snug and secure.
- Assemble the Bee House: Assemble the bee house by attaching the frame, dividers, and backing (using remaining pallet wood) using wood glue and screws. Make sure the structure is sturdy and well-constructed.
- Paint and Decorate (Optional): Paint and decorate the bee house using non-toxic exterior paint. Use earthy tones like greens and browns to blend with the natural surroundings.
- Mount the Bee House: Mount the bee house in a sunny location, preferably facing south or southeast, at a height of approximately 4-6 feet. Secure it to a tree, fence, or post using screws or nails. Place the bee house near a source of pollen and nectar, such as a garden or wildflower meadow, to provide the bees with food. Avoid locations that are exposed to strong winds or heavy rain.
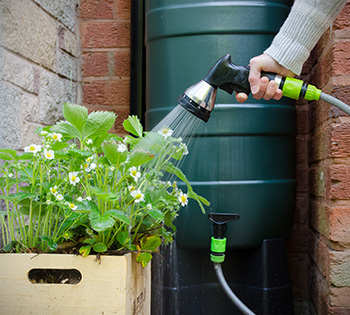
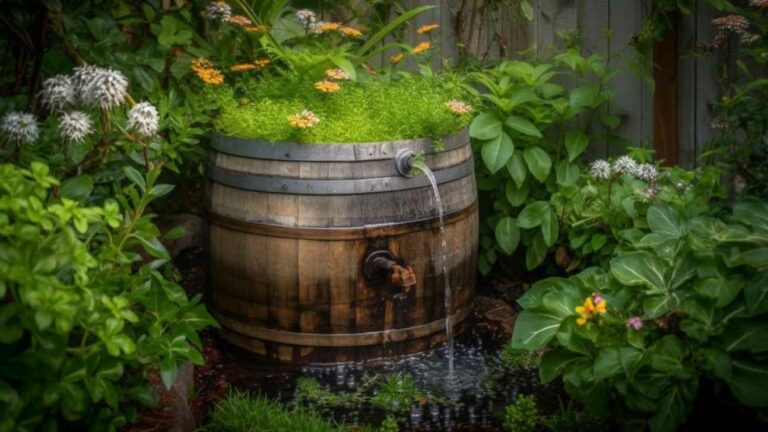
Rain Barrel System: Watering Your Herbs Sustainably
Rainwater harvesting is a simple yet effective way to conserve water, reduce your water bill, and provide your herbs with naturally soft water, free of chemicals.
Materials:
- Two food-grade oak barrels (55-gallon capacity)
- PVC pipes (2-inch diameter, approximately 3 feet total)
- Spigot (3/4-inch brass spigot)
- Mosquito netting (fine mesh)
- Drill with hole saw attachment (2-inch and 3/4-inch)
- Silicone sealant (exterior grade)
- Downspout adapter (to fit standard 3x4 inch downspout)
- Adjustable wrench
- Measuring tape
- Decorative exterior paint and stencils (optional)
Instructions:
- Prepare the Barrels: Thoroughly clean the food-grade oak barrels with soap and water to remove any residue or contaminants. Rinse them well and allow them to dry completely.
- Drill Overflow Holes: Drill a 2-inch overflow hole near the top of each barrel, approximately 4 inches from the top rim, to allow excess water to escape. The overflow hole should be large enough to prevent the barrel from overflowing and causing damage.
- Connect the Barrels: Connect the barrels using PVC pipes and fittings. Drill 2-inch holes in the sides of the barrels near the top and insert the PVC pipes, creating a bridge between the two barrels. Use silicone sealant to create a watertight seal. Make sure the barrels are level to ensure that the water flows evenly between them. If the system is too high you may need to use a small water pump to create the proper water pressure.
- Install the Spigot: Install a 3/4-inch brass spigot near the bottom of the first barrel, approximately 6 inches from the bottom, to allow easy access to the collected rainwater. Drill a 3/4-inch hole in the barrel and insert the spigot. Use silicone sealant to create a watertight seal.
- Attach Mosquito Netting: Cover all openings of the barrels, including the top opening and the overflow holes, with mosquito netting to prevent mosquitoes from breeding. Secure the netting with rubber bands or zip ties.
- Connect Downspout: Connect the downspout from your roof to the first barrel using a downspout adapter that fits a standard 3x4 inch downspout. This will direct rainwater into the barrels. Make sure the connection is secure to prevent leaks.
Aesthetic Touches:
Consider painting your barrels with colorful designs or stencils to match your garden's aesthetic. Plant trailing herbs like creeping thyme and rosemary around the base to soften the look and attract pollinators.
Closing Reflection
As the sun sets over our coastal homestead, casting a warm golden glow upon the flourishing herb garden, the gentle buzzing emanating from the bee house, and the soft lapping of rainwater in the oak barrel collection system, we are filled with a sense of deep satisfaction. We invite you to embark on your own journey of coastal homesteading, starting with a comforting bowl of Smoked Salmon Chowder, a charming bee house for your pollinator friends, and a simple rainwater harvesting system to nourish your plants. For it is in these small acts of self-reliance and connection with nature that we find true fulfillment.
What are your favorite ways to celebrate and care for the environment? We'd love to hear from you! Share your experiences in the comments below!
Keywords: Smoked Salmon Chowder, DIY Bee House, Rain Barrel System, Coastal Homesteading, Pollinator Gardens, Urban Homesteading, Water Conservation, Woodworking Projects, Foraged Nettles, Reclaimed Wood Pallets, Solitary Bees (Mason Bees), Rainwater Harvesting, Coastal Garden Design, Sustainable Coastal Living, Smoked Salmon Chowder Ingredients, Attract Bees to Coastal Garden, Rainwater Collection System for Home, Coastal Homesteading Skills, Pollinator Garden Coastal, Easy smoked salmon chowder recipe, Best plants for a bee-friendly coastal garden, Rainwater harvesting for irrigation coastal, How to build a coastal bee-friendly garden, Where to buy smoked salmon near me, Affordable rainwater harvesting system for home, Coastal homesteading beginners guide, Best time to plant bee-friendly flowers coastally, Smoked salmon chowder with fresh dill, Coastal garden design for small spaces, DIY rainwater barrel coastal, Rainwater harvesting benefits for coastal homes, Permaculture, Aquaculture, Sustainability, Pollinators, Watershed, Conservation, Coastal erosion, Marine ecosystem. How do I start coastal homesteading? What are the best plants for a bee-friendly coastal garden? How much does a rainwater harvesting system cost? What ingredients are in smoked salmon chowder? Why is coastal homesteading important?