Building a DIY Smoked Meat Shelter: A Homesteading Guide to Cold Smoking & Curing
On the homestead, self-sufficiency is more than just a philosophy – it's a way of life. And nothing embodies that spirit quite like preserving your own food. While canning and pickling have their place, smoking meat takes preservation to a whole new level, imbuing your harvest with incredible flavor and extending its shelf life for months. Imagine enjoying succulent smoked chicken in the dead of winter, or sharing a perfectly cured pork shoulder with friends at a summer barbecue. But to achieve that, you need the right equipment. Forget expensive store-bought smokers – we're going to build a DIY smoked meat shelter using reclaimed materials, a cost-effective and sustainable solution for cold smoking whole chickens and pork shoulders. Cold smoking, unlike hot smoking, keeps the temperature low, preserving the meat without cooking it, resulting in a longer shelf life and unique flavor profile. Let's get started on this journey to delicious, homegrown preservation!

Materials List: Your Reclaimed Treasure Hunt
Before we begin, gather your materials. This is where the "reclaimed" aspect really shines, allowing you to upcycle and save money.
- Reclaimed corrugated metal roofing/siding (enough to cover all walls and roof - approximately 8ft x 12ft total). Important: If the metal is very old, check carefully for lead paint. If present, consider sealing it with a suitable paint or sourcing a different material.
- Reclaimed barn wood (4x4 posts for the frame, 2x4s for internal supports) - approximately 100 linear feet. Barn wood can vary in species (oak, pine, maple, etc.). Hardwoods like oak are more durable for the frame, while softer woods are fine for supports. Carefully inspect old wood for rot, insect damage, or splinters. Treat with a wood preservative if necessary.
- Concrete blocks or gravel for leveling the base. This is optional, depending on how permanent you want the smoker to be.
- Hardware cloth (1/4 inch mesh) for creating a secure barrier against pests (approximately 4ft x 10ft).
- Wood screws (various lengths) and nails.
- Hinges and latch for the door.
- Thermometer with a probe to monitor internal smoker temperature (range: 30-90°F). A wireless digital thermometer with a probe is highly recommended for easy monitoring.
- Optional: Wood stove pipe (4-inch diameter) for controlled smoke ventilation.
- Optional: Sheet metal for directing the smoke flow, if needed.
Tools Required: Getting Equipped
Make sure you have these common tools on hand before starting construction:
- Circular saw or handsaw
- Drill with various drill bits
- Hammer
- Tape measure
- Level
- Safety glasses and gloves
- Tin snips (for cutting corrugated metal)
- Wrench (for bolts and nuts, if used)
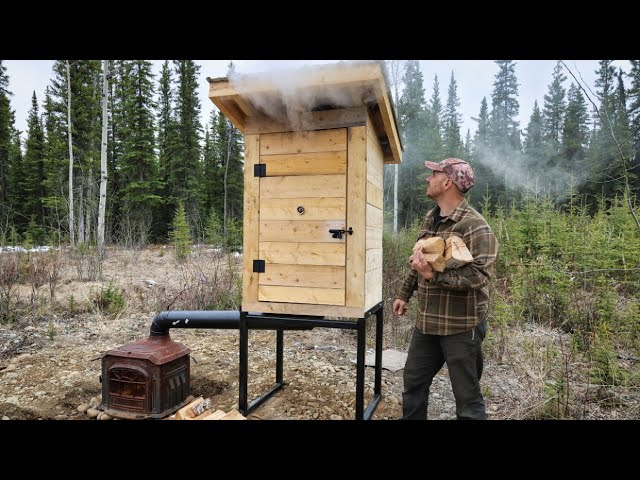
Step-by-Step Construction Guide: Building Your Smoked Meat Haven
Foundation (1 hour): Choose a well-ventilated location for your smoker. Clear the ground of any vegetation and debris. Level the area, ensuring it's approximately 4ft x 3ft. For a more stable and permanent structure, create a gravel or concrete block foundation.
Frame Construction (4 hours): This is the backbone of your smoker. Cut the 4x4 barn wood posts to the desired height (approximately 6 feet). Assemble a rectangular frame using the posts as corners and 2x4s for the top and bottom rails. Use screws for a stronger connection. Use a level on all sides to ensure the frame is perfectly plumb – a level frame is crucial for a stable structure.
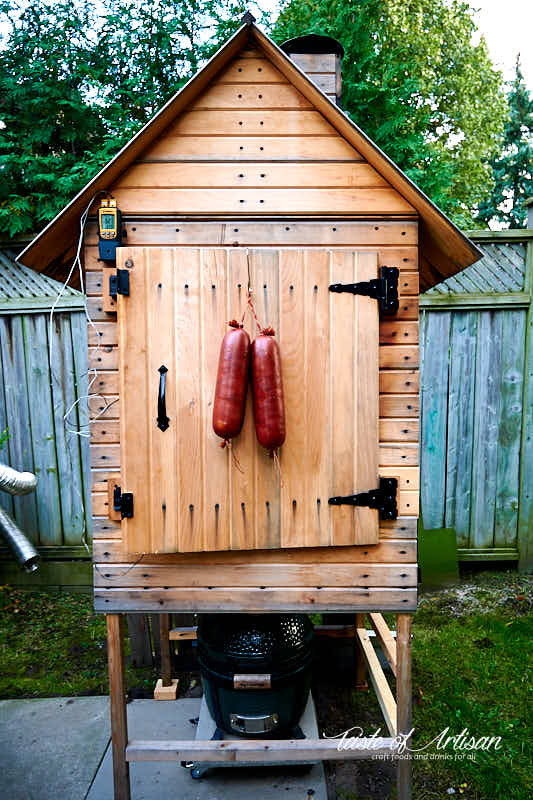
Wall Construction (6 hours): Now for the fun part! Attach the reclaimed corrugated metal to the frame, overlapping each piece by a few inches to prevent leaks. Use roofing screws with a rubber washer to create a watertight seal. Cut the metal to fit using tin snips, and always wear gloves to protect your hands from sharp edges.

Roof Construction (4 hours): Similar to the walls, attach corrugated metal to the roof frame. Ensure a slight slope to allow rainwater to run off easily. Overlap the metal generously for a watertight seal.
Door Construction (3 hours): Build a simple door frame using reclaimed barn wood that fits snugly within the front opening. Attach hardware cloth to the inside of the door to prevent pests from entering while still allowing airflow. Install hinges and a latch to secure the door.

Ventilation (1 hour): Create a ventilation opening near the top of the shelter – this is crucial for controlling the smoke and preventing the meat from becoming bitter. The size will depend on your climate. If you have a lot of humidity in your area you should include a larger vent. For more controlled ventilation, install a wood stove pipe.

Pest Control (1 hour): Attach hardware cloth around the base of the shelter to prevent rodents and other pests from gaining access to your precious smoked meat. Burying the hardware cloth a few inches into the ground provides an extra layer of protection.
Temperature Monitoring Placement (30 minutes): Add a shelf near the center to hold chickens and pork shoulders. Install the probe for the thermometer in the area where the meat will hang. The ideal placement will give you an accurate reading of the temperature where your meat is.
Cold Smoking Techniques: Low and Slow is the Way to Go
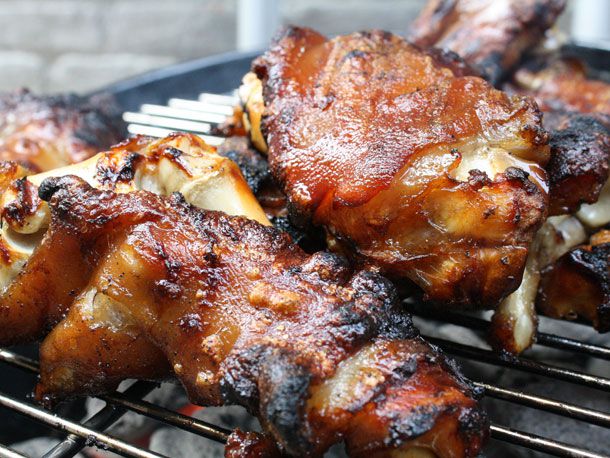
Cold smoking is all about preserving and flavoring, not cooking. Unlike hot smoking, where temperatures reach 200°F or higher, cold smoking takes place below 90°F. This prevents the meat from cooking, allowing it to absorb the smoky flavor over a longer period while the curing process inhibits bacterial growth.
The type of wood you use is critical. Hardwoods like hickory, apple, cherry, and alder are excellent choices for cold smoking, imparting a delicious, subtle flavor. Avoid resinous woods like pine, which can create a harsh, unpleasant taste.
Generating cold smoke requires a bit of ingenuity. You can use a separate smoke generator (available commercially or DIY) or create a small, controlled fire in a cast iron skillet or a dedicated metal box. The key is to keep the fire small and smoldering, not blazing. Place the smoke source outside the shelter and pipe the smoke in using a metal pipe.
Monitoring the temperature inside the shelter is crucial. Use a thermometer with a probe placed near the meat to ensure it remains below 90°F. Adjust the smoke source and ventilation as needed to maintain the correct temperature.
Controlling humidity and airflow is equally important. For drier climates, consider using a humidifier inside the smoker to prevent the meat from drying out too quickly. Adjust the ventilation to regulate airflow and prevent condensation.
Meat Curing and Preservation: The Science of Safe Smoking
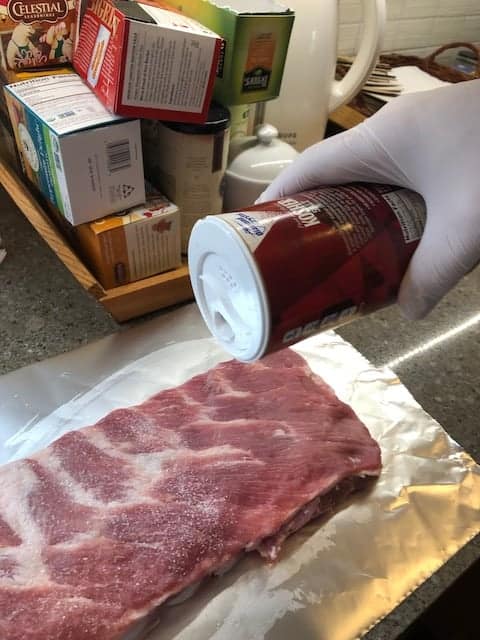
Curing is an essential step before cold smoking. It inhibits bacterial growth, removes moisture, and enhances the flavor of the meat. There are two primary methods:
- Dry Curing: This involves rubbing the meat with a mixture of salt, sugar, and spices. A typical ratio is 3% salt by weight of the meat, along with sugar and spices like paprika, garlic powder, and black pepper to taste.
- Wet Curing (Brining): This involves submerging the meat in a brine solution of salt, sugar, and spices. A basic brine recipe includes salt, sugar, water, and your choice of spices.
After curing, it's crucial to dry the meat thoroughly before smoking. This allows the smoke to adhere better and creates a pellicle, a sticky surface that helps protect the meat.
Once smoked, store the meat properly to ensure long-term preservation. Wrap it tightly in butcher paper or vacuum seal it to prevent freezer burn. Smoked meat can be stored in the refrigerator for several weeks or in the freezer for several months. Safe handling of the meat and consistent cleaning of the shelter is key to preventing harmful bacteria from affecting your food.
Safety Precautions: Smoke Smart, Stay Safe
Food safety is paramount. Always follow proper food handling practices to prevent foodborne illness. Ensure proper ventilation to avoid carbon monoxide poisoning. Use caution when working with reclaimed materials, especially corrugated metal, to avoid cuts and injuries. Wear safety glasses and gloves during construction. Use fire-resistant materials near the smoke source and properly dispose of ashes.
Conclusion: Your Homestead Smokehouse Awaits
Building a DIY smoked meat shelter is a rewarding project for any homesteader. It provides a sustainable and cost-effective way to preserve your harvest, enhance its flavor, and enjoy delicious, homegrown meat year-round. Don't be afraid to adapt the design to your specific needs and resources. Experiment with different wood types and curing techniques to create your signature smoked flavors. Now, go forth and build your smoked meat haven! And be sure to share your own experiences with meat smoking and curing in the comments below. You could expand the smoker and add additional features as you refine your smoking process with each project. Happy smoking!