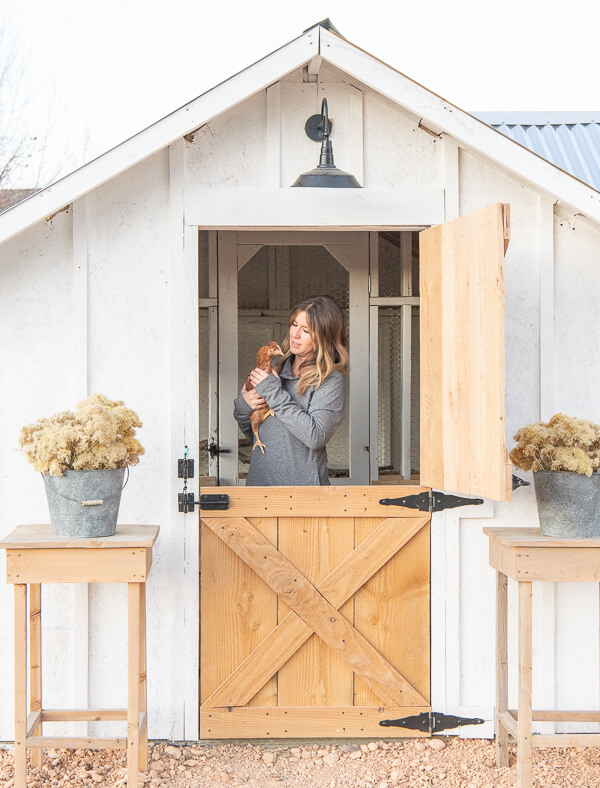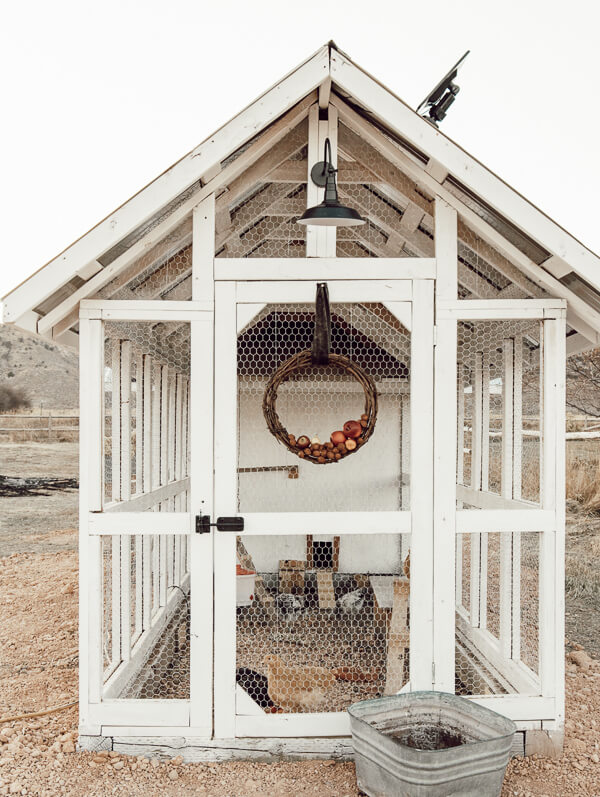
Build a Dream Chicken Coop Without Breaking the Bank: A DIY Guide
Dreaming of fresh eggs from your own backyard chickens? The thought of building a coop might seem daunting, especially when you see the hefty price tags on pre-built models. But what if I told you that you could create a functional and attractive chicken coop without emptying your wallet? It’s absolutely possible! With a little planning, resourcefulness, and some elbow grease, you can provide a safe and comfortable home for your feathered friends while staying on budget. Are you ready to roll up your sleeves and build a chicken coop that's both practical and pleasing to the eye?
Backyard chickens are becoming increasingly popular, and for good reason. They offer fresh, delicious eggs, help control pests in the garden, and even provide valuable composting material. However, the cost of a ready-made chicken coop can be a significant barrier for many aspiring homesteaders. This guide will show you how to build a sturdy and charming chicken coop using repurposed materials and smart planning, turning your backyard chicken dreams into reality without breaking the bank.

Planning Your Budget-Friendly Coop: Size, Location, & Materials
The foundation of any successful DIY project is careful planning, and building a budget chicken coop is no exception. Before you start swinging a hammer, take the time to consider these essential factors:
- Determining Coop Size: The size of your coop will depend on the number of chickens you plan to keep. A general rule of thumb is to provide at least 4 square feet of space per chicken inside the coop and 8 square feet per chicken in the outdoor run. Remember, happy chickens are productive chickens, so don't skimp on space!
- Choosing the Right Location: Selecting the perfect spot for your coop is crucial for your chickens' well-being. Look for a location that receives plenty of sunlight (especially during the winter months), has good drainage to prevent muddy conditions, and is relatively close to your house for easy access. Consider wind protection, using existing structures like fences or sheds to your advantage.
- Material Sourcing (Focus on Budget): This is where your creativity and resourcefulness come into play! The key to building a budget chicken coop is to prioritize repurposed and upcycled materials. Check out local salvage yards, lumber mills, and online marketplaces like Craigslist or Facebook Marketplace for affordable options. Don't be afraid to ask friends, neighbors, or local businesses if they have any scrap wood, pallets, or old doors/windows that they're willing to part with. The thrill of the hunt is half the fun!
- Essential Design Requirements: Ventilation is vital to avoid humidity buildup and health issues in your chickens. Protection from predators is also key - consider hardware cloth around the base and roof.
Careful planning and smart material sourcing are the foundation of a truly budget-friendly coop. Spend the time to design your coop thoroughly, keeping in mind the needs of your chickens and the limitations of your budget.
Gathering Your Tools & Materials (Without Breaking the Bank)
Once you've finalized your coop design and secured a location, it's time to gather the necessary tools and materials. Again, the goal is to minimize costs while ensuring you have everything you need to complete the project safely and effectively.
- Essential Tools: A basic toolkit is all you need for most DIY chicken coops. A hammer, saw (circular or hand saw), drill, measuring tape, level, safety glasses, and gloves are essential. If you don't own these tools, consider borrowing them from a neighbor or renting them from a local hardware store.
- Material Checklist (prioritized by reuse/scrap): Your material checklist will depend on your specific coop design, but some common items include pallets, scrap wood, hardware cloth (for predator protection), roofing materials (old metal sheets, asphalt shingles), hinges, latches, nails, and screws. Always prioritize materials you can find for free or at a discounted price.
- Detailed Material Scavenging Tips: Finding free pallets is a great way to save money on your coop. Check with local businesses, such as grocery stores or hardware stores, as they often have pallets they're willing to give away. Be sure to inspect the pallets carefully for any signs of chemical treatment or damage before using them. Repurposing old windows and doors is another excellent way to add character and functionality to your coop while keeping costs down. Don't hesitate to ask construction sites for any scrap wood they might be discarding.
- Cost-Cutting Considerations: Opting for simpler designs, using smaller nails, minimizing waste, and getting creative with your material choices can all help you save money on your coop build.

Resourcefulness is key! Scavenge and repurpose materials wherever possible. Not only will this save you money, but it will also give your chicken coop a unique and charming character.
Building the Foundation & Framing
With your plans in hand and your materials gathered, it's time to start building! The foundation and framing are the backbone of your chicken coop, so it's important to take your time and ensure everything is sturdy and level.
- Choosing a Foundation Type: There are several options for your chicken coop foundation, each with its own advantages and disadvantages. A dirt floor is the simplest and cheapest option, but it can be susceptible to moisture and pests. A gravel base provides better drainage and helps prevent muddy conditions. A concrete slab is the most durable option, but it's also the most expensive.
- Building the Base (Pallet Option): If you're using pallets for your coop, you can create a sturdy base by carefully disassembling them and reinforcing the frame with additional wood. Be sure to use proper safety precautions when disassembling pallets, as they can contain splinters and nails. Consider alternatives for uneven ground, such as leveling the ground with gravel or using adjustable supports.
- Framing the Coop: Building a basic frame using lumber or pallet wood involves creating a rectangular structure with corner posts and horizontal supports. Ensure that the frame is square and stable before proceeding.
- Incorporating Salvaged Windows/Doors: Framing around existing windows and doors is a great way to add natural light and ventilation to your coop. Be sure to properly seal around the windows and doors to prevent drafts and keep out pests.

A strong foundation and frame are crucial for a long-lasting coop. Take the time to ensure that these elements are well-built and structurally sound.
Walls, Roofing, & Predator Protection
Once you have a solid foundation and frame, it's time to add the walls and roofing. This is also the stage where you'll need to focus on predator protection to keep your chickens safe and secure.
- Wall Construction: Attaching the walls to the frame using wood or pallet planks is a straightforward process. Ensure proper spacing for ventilation by leaving small gaps between the planks or incorporating ventilation openings.
- Roofing Options: There are many roofing options to choose from, including reclaimed metal sheets, asphalt shingles, or even repurposed wooden planks. The key is to ensure that the roof is waterproof to protect your chickens from the elements.
- Predator-Proofing: Using hardware cloth (not chicken wire) for the run and around the base of the coop is essential for keeping out predators like foxes, raccoons, and dogs. Bury the hardware cloth several inches into the ground to prevent digging predators. Adding a roof to the run provides additional protection from aerial predators. Make sure to have safe latches and locks to ensure the chickens are safe.
- Predator Awareness: Consider what predators are common in your area and take steps to protect against them.
Protecting your chickens from the elements and predators is paramount. Invest in high-quality materials and take the time to properly predator-proof your coop.
Interior Design: Roosts, Nesting Boxes, & Easy Cleaning
With the exterior of your coop complete, it's time to focus on the interior design. Creating a comfortable and functional interior is essential for the health and happiness of your chickens.
- Roosting Bars: Provide adequate roosting space (8-10 inches per chicken) by installing roosting bars. You can use branches, ladders, or wooden bars for this purpose.
- Nesting Boxes: Building or repurposing nesting boxes (1 box per 3-4 chickens) provides a comfortable and private space for your hens to lay their eggs. Use straw or wood shavings for bedding. Make sure they are positioned above the floor and out of the draft.
- Ventilation: Ensuring adequate ventilation is crucial for preventing moisture buildup and ammonia fumes inside the coop.
- Easy Cleaning: Designing the coop for easy access for cleaning is essential for maintaining a healthy environment for your chickens. Consider including a removable litter tray under the roosting bars or a dropping board to make cleaning easier.
- Dust Baths: Chickens love dust baths! Provide a designated area with dirt or sand.
A comfortable and clean interior is essential for happy and healthy chickens. Design the coop with their needs in mind.
Adding the Finishing Touches & Introducing Your Flock
The final step in building your budget chicken coop is to add the finishing touches and introduce your flock to their new home.
- Painting/Sealing the Coop (Optional): Using non-toxic paint or sealant to protect the wood and add visual appeal is optional, but it can help extend the life of your coop. Consider milk paint recipes for a natural option.
- Creating a Chicken Run: Expanding the enclosed area with fencing (hardware cloth or chicken wire) allows your chickens to forage and exercise.
- Landscaping the Run: Adding dust baths, shade structures, and enrichment toys (logs, swings, vegetable scraps) can make the run a more stimulating and enjoyable environment for your chickens.
- Introducing Your Chickens: Gradual introduction to the new coop and run is key. Provide food and water inside to encourage them to use it.
- Chicken Friendly Garden: Consider planting a chicken-friendly garden to provide additional food and enrichment for your flock.
Make the coop a comfortable and inviting home for your chickens. After all, they'll be living there!
Building a Sustainable Chicken Haven
Building your own chicken coop on a budget is a rewarding and empowering experience. Not only will you save money, but you'll also gain a deeper connection to nature and a greater appreciation for the food you eat. As you gather those first fresh eggs, you'll feel a sense of accomplishment knowing you created this sustainable haven from scrap and hard work. Remember that the most important aspects of raising chickens is providing for their health and safety. As the seasons change, adapt your coop to meet their needs, adding insulation for winter, or extra shade in summer.
Have you built your own chicken coop? Share your tips and photos in the comments below! We’d love to hear from you.
Get our free Chicken Coop Plans Download HERE.
Read more about seasonal egg recipes HERE.