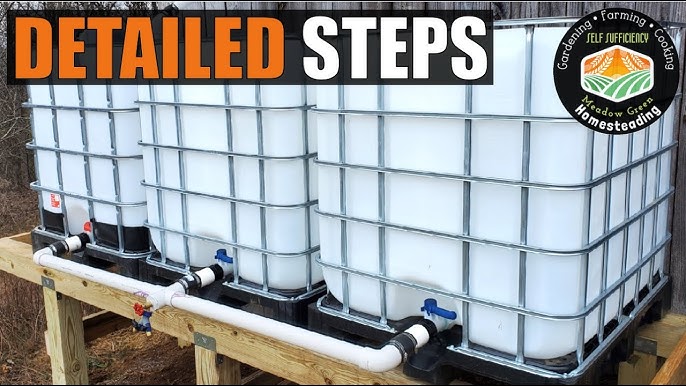
Bring Your Homestead Closer to Paradise: DIY Rainwater Harvesting for a Thriving Garden (Step-by-Step)
Better Homes and Harvests readers, are you dreaming of a lush, self-sufficient garden that thrives, even during the driest summer months? Do you crave a deeper connection with nature and the satisfaction of harnessing its bounty? In this post, we'll walk you through a practical, budget-friendly DIY project that not only saves water but also brings you one step closer to a truly resilient homestead: building a simple rainwater harvesting system for your garden using repurposed materials.
Imagine the satisfaction of knowing you're reducing your reliance on municipal water, conserving a precious resource, and providing your plants with the best possible hydration – all thanks to the power of rain!
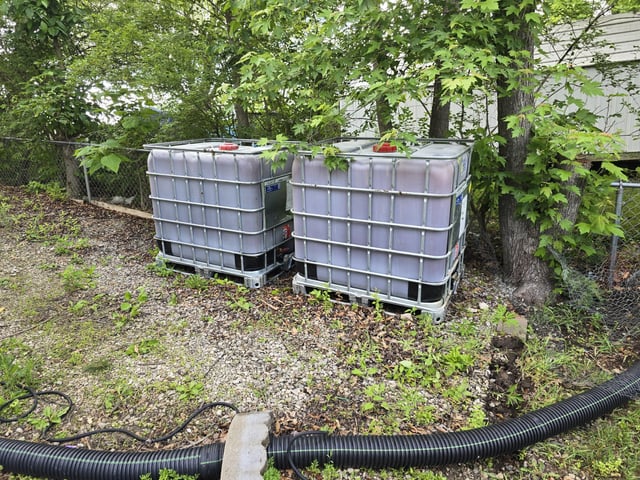
The Project: Your Own 50-Gallon Rainwater Oasis
We'll focus on building a 50-gallon rainwater collection system from a recycled IBC (Intermediate Bulk Container) tote. This project is achievable in a weekend, even for beginner DIYers, and will provide enough water to significantly reduce your reliance on municipal water for watering your garden beds. This system is ideal for small to medium-sized gardens and can easily be expanded upon as your needs grow. We'll show you how to source the necessary materials, prepare your tote, connect it to your downspout, and effectively use the collected water in your garden.
Why IBC Totes?
IBC totes are fantastic for rainwater harvesting because they are durable, readily available (often recycled), and hold a significant amount of water in a relatively small footprint. They're also designed for easy transport and handling, making them ideal for a DIY project.
Step-by-Step Guide: Building Your Rainwater Harvesting System
Here's a detailed, numbered guide to help you build your own 50-gallon rainwater harvesting system.
1. Sourcing Your Materials:
This is where the "budget-friendly" aspect really shines. Here's what you'll need and where to find it:
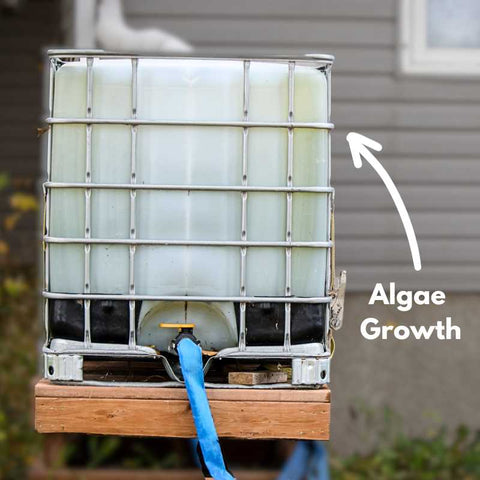
- IBC Tote (Intermediate Bulk Container): Look for recycled or used IBC totes. Check local classifieds (Craigslist, Facebook Marketplace), agricultural supply stores, and industrial businesses. Food-grade totes are preferable, but if you can't find one, thoroughly clean the tote with a bleach solution (1 part bleach to 9 parts water) and rinse well multiple times. Be aware that previously stored materials may leach into the plastic and affect water quality, even after cleaning. Avoid totes that contained harsh chemicals. Cost: $25-$100, or even free if you're lucky!
- Downspout Adapter: This connects your downspout to the IBC tote. You'll need to measure your downspout's diameter to ensure a proper fit. Look for a flexible downspout extension or a pre-made rainwater diverter kit. Cost: $10-$30
- Hose Bib/Spigot: For easy access to the water. Choose a brass or PVC spigot that fits the outlet on your tote (usually a standard thread size). Cost: $5-$15
- Thread Sealant Tape (Teflon tape): To ensure watertight connections. Cost: $2-$5
- Leaf Screen/Gutter Guard: To prevent debris from entering the tote. You can buy a pre-made screen or create one from hardware cloth. Cost: $5-$20
- PVC Pipe & Fittings (Optional): For creating a custom connection between the downspout and the tote, or for extending the spigot for easier access. Cost: Varies
- Tools: Drill, hole saw (sized for your spigot), utility knife, measuring tape, adjustable wrench, screwdriver.
Tip: Call local businesses that use IBC totes (car washes, agricultural suppliers, etc.) and ask if they have any they're willing to give away or sell at a discount.
2. Preparing the IBC Tote:
- Cleaning: Thoroughly clean the tote inside and out. Use a power washer if available. If you suspect it contained non-food-grade materials, use a bleach solution as mentioned above.
- Cutting the Inlet: Decide where you want the water to enter the tote. Typically, this is on the top. Use a utility knife or hole saw to cut an opening large enough to accommodate your downspout adapter.
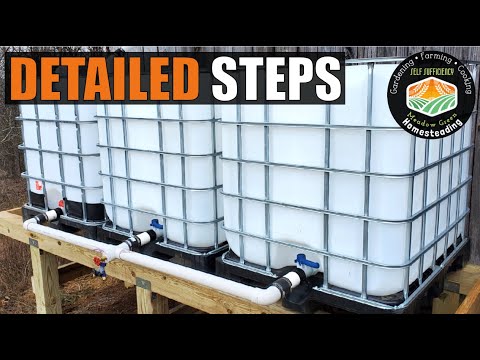
- Installing the Spigot: Locate the existing outlet on the IBC tote. If it doesn't have a spigot, you'll need to install one. Remove the existing cap and apply thread sealant tape to the threads of your new spigot. Screw the spigot into the outlet tightly.
- Installing the Leaf Screen: Cover the inlet opening with a leaf screen or gutter guard to prevent leaves, twigs, and other debris from entering the tote. Secure it with zip ties or waterproof tape. This is crucial for preventing clogs and keeping your water clean.
3. Building a Stable Base:
Raising the tote off the ground provides gravity-fed watering and makes it easier to access the spigot. Here are a few options:
- Concrete Blocks: A simple and affordable option. Stack concrete blocks to create a level platform for the tote.
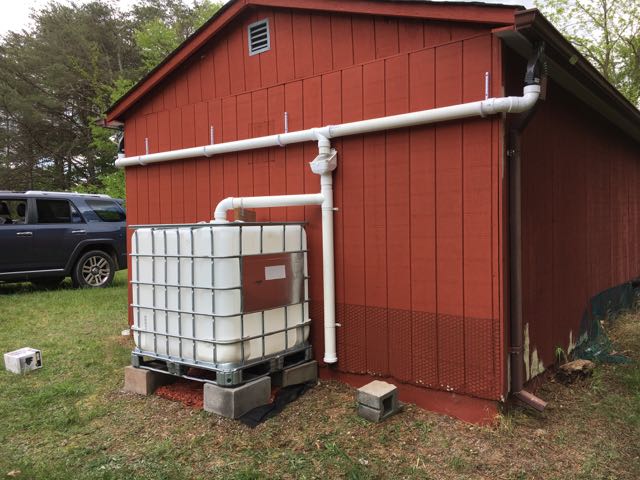
- Wooden Pallet: A readily available (often free!) option. Make sure the pallet is sturdy and level.
- Custom-Built Platform: For a more permanent and aesthetically pleasing solution, build a wooden platform from lumber.
Important: Ensure the base is strong enough to support the weight of the full tote (50 gallons of water weighs over 400 pounds!). Level the base to prevent the tote from tipping.
4. Connecting to a Downspout:
- Positioning: Place the IBC tote near a downspout.
- Downspout Diverter: Install a downspout diverter to redirect rainwater into the tote. These diverters often include a filter to remove debris.
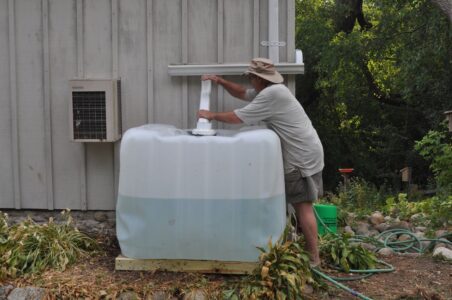
- Connecting: Connect the diverter to the inlet opening on the tote using a flexible hose or PVC pipe. Secure the connection with clamps.
- First Flush Diverter (Optional but Recommended): A first flush diverter captures the initial runoff from the roof, which contains the most contaminants (bird droppings, dust, etc.). This ensures that only cleaner water enters your tote. You can buy pre-made diverters or build one yourself.
5. Watering Considerations:
- Watering Can/Hose: Fill watering cans directly from the spigot or connect a hose for easier watering.
- Watering Techniques: Water deeply and less frequently to encourage strong root growth. Avoid watering the foliage of plants, especially tomatoes, to prevent disease.
- Watering Needs: Different plants have different watering needs. Research the specific requirements of your plants.
- Is Rainwater Safe? Rainwater is generally safe for watering gardens, but it is not potable (safe for drinking) without proper filtration and treatment. Avoid using rainwater on leafy greens or root vegetables that are eaten raw shortly before harvest. For these crops, use municipal water or well water.
- Testing Water Quality: You can test your collected rainwater periodically to check its pH and levels of any potential contaminants.
6. Winterizing Your System:
Protecting your system from freezing temperatures is crucial to prevent damage.
- Empty the Tote: The easiest way to winterize your system is to completely empty the tote before the first frost.
- Disconnect the Downspout: Disconnect the downspout to prevent water from entering the tote and freezing.
- Insulate (If Leaving Full): If you choose to leave water in the tote, insulate it with blankets or insulation foam to prevent freezing. This is less effective and not recommended in areas with prolonged freezing temperatures.
- Protect Spigot: Wrap the spigot with insulation to prevent it from freezing and cracking.
Why This Matters: Benefits of Rainwater Harvesting
Rainwater harvesting is more than just a way to save money on your water bill. It's an act of self-reliance, a connection to the natural water cycle, and a contribution to a more sustainable future for your homestead and the planet. Imagine the satisfaction of watering your thriving tomato plants with the pure, naturally filtered water you've collected yourself!
Here's why it matters:
- Water Conservation: Reduces your reliance on municipal water, conserving a precious resource.
- Cost Savings: Lowers your water bill.
- Plant Health: Rainwater is naturally soft and free of chlorine and other chemicals found in tap water, making it ideal for plant growth.
- Self-Sufficiency: Increases your self-reliance and reduces your dependence on external resources.
- Environmental Benefits: Reduces the strain on municipal water systems and helps conserve water in your community.
Call to Action:
Ready to embark on this rewarding project? Scroll back up to the step-by-step guide, and be sure to share your progress and photos in the comments below. Let's build a more resilient and bountiful homestead, together! We can’t wait to see how you customize your system and the impact it has on your garden. Share your modifications, challenges, and successes – your experiences can inspire others! Let’s all contribute to building a more sustainable future, one rain barrel at a time. Happy harvesting!
Remember to check your local regulations regarding rainwater harvesting. Some areas may have restrictions or require permits.