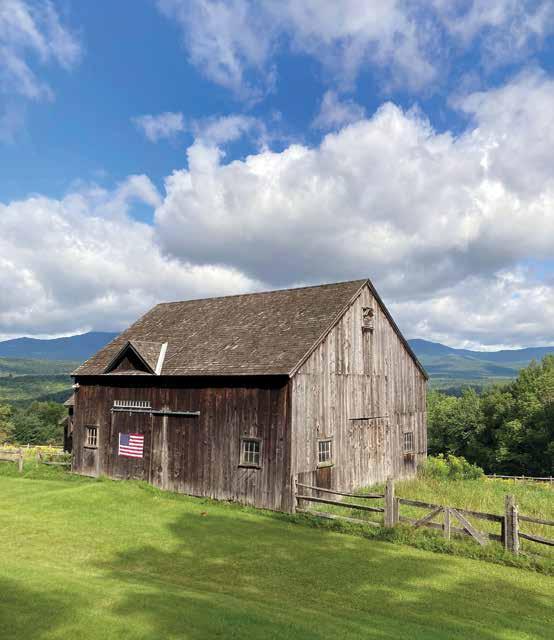
Breathing New Life into an Old Barn: A Homestead Transformation Story
Fellow homesteaders, gather ‘round! Today, I want to share a project that was equal parts daunting and deeply rewarding: restoring our dilapidated barn. It wasn’t just about fixing a building; it was about reclaiming a piece of our homestead’s history and unlocking its potential to boost our self-sufficiency.
For years, the barn sat as a silent testament to neglect. The roof leaked, the siding was rotting, and the whole structure seemed to groan under the weight of its disrepair. It was more of an eyesore and a hazard than an asset. We dreamed of a vibrant space for animal housing, equipment storage, and maybe even a workshop, but the "before" situation felt overwhelming. Every time we looked at it, we saw dollar signs and endless hours of hard labor. But we knew that if we tackled it strategically, we could transform it into a valuable resource for our homestead.

So, we took a deep breath, rolled up our sleeves, and started chipping away at the problem. Here’s how we breathed new life into our old barn, step by painstaking step.
The "How": Barn Restoration, One Step at a Time
This project wasn't a weekend warrior endeavor. It spanned several months, working in manageable chunks whenever time and weather permitted. Safety was paramount, so we invested in good quality safety glasses, gloves, and sturdy work boots.
Step 1: Assessment and Planning
Before lifting a hammer, we thoroughly assessed the barn's structural integrity. We looked for signs of rot, insect damage, and foundation issues. This stage is crucial for determining the scope of the project and avoiding costly surprises later on. We consulted with a local contractor who specialized in barn restoration to get an expert opinion on the barn's condition. His advice was invaluable in helping us prioritize repairs and estimate costs.
- Materials: Notebook, pencil, measuring tape, flashlight, camera
- Tools: None (for now!)

Step 2: Roof Repair (Phase 1)
The leaking roof was our top priority. We decided to replace the most damaged sections of the roofing material and reinforce the underlying structure. This involved removing old shingles, replacing rotted boards, and installing new roofing felt.
- Materials: Roofing shingles, roofing felt, nails, replacement boards (dimensional lumber), flashing
- Tools: Hammer, pry bar, utility knife, measuring tape, nail gun (optional), ladder
Pro-tip: Rent a dumpster for easy disposal of old roofing materials. It's worth the cost to avoid multiple trips to the landfill.
Step 3: Siding Replacement
Next, we tackled the rotting siding. We carefully removed the damaged boards, being mindful of any potential nesting critters. We replaced them with new, weather-resistant siding, making sure to properly seal the seams to prevent water intrusion.
- Materials: Siding boards (we used locally sourced cedar), nails, caulk, wood sealant
- Tools: Hammer, pry bar, measuring tape, saw, caulk gun

Step 4: Structural Reinforcement
In several areas, the barn's framing was weakened by rot and age. We sistered new lumber to the existing beams and posts to provide additional support. This involved carefully measuring and cutting the new lumber to fit snugly alongside the old, and then securing them with heavy-duty bolts.
- Materials: Dimensional lumber (matching existing framing), bolts, washers, nuts
- Tools: Measuring tape, saw, drill, wrench
Safety First: When working with structural elements, always consult with a professional if you have any doubts about your ability to safely complete the task.
Step 5: New Doors and Windows
The original barn doors were beyond repair, and the windows were cracked and drafty. We built new barn doors from scratch using reclaimed lumber, giving them a rustic and authentic look. We also installed new, energy-efficient windows to improve insulation and natural light.
- Materials: Reclaimed lumber (for doors), hinges, latches, window frames, glass panes, caulk
- Tools: Saw, drill, hammer, measuring tape, level, glazing putty
Step 6: Interior Clean-Up and Organization
With the exterior stabilized, we turned our attention to the interior. We cleared out years of accumulated debris, swept the floor, and organized the space. We added shelving and workbenches to create a functional and efficient workspace.
- Materials: Cleaning supplies, shelving units, workbenches (DIY or purchased)
- Tools: Broom, shovel, wheelbarrow, measuring tape, drill
Step 7: Roof Repair (Phase 2): The Metal Roof
After a year, we had saved enough to take on the final phase of the roof: a metal roof. While more expensive upfront, the longevity and durability of metal made it a worthwhile investment. We hired a professional crew for this stage to ensure it was done correctly and efficiently.
- Materials: Metal roofing panels, screws, sealant (professional installation)
- Tools: (Professional crew provided)

The "Real Talk": Challenges and Lessons Learned
This barn restoration project was far from easy. We encountered several unexpected challenges along the way.
- Unexpected Rot: We uncovered more rot than we initially anticipated, which added to the cost and time of the project.
- Weather Delays: Inclement weather frequently interrupted our progress, forcing us to adjust our schedule.
- Budget Overruns: We underestimated the cost of materials, especially lumber.
- Critters: Dealing with wasp nests and the occasional family of mice made some days less fun than others.
Looking back, here's what we learned:
- Plan for Contingencies: Add a buffer to your budget and timeline to account for unexpected issues.
- Don't Be Afraid to Ask for Help: Seek advice from experienced professionals when needed.
- Prioritize Safety: Always wear appropriate safety gear and follow safe work practices.
- Break the Project into Manageable Chunks: Tackle one task at a time to avoid feeling overwhelmed.
- Celebrate Small Victories: Acknowledge your progress and reward yourself for your hard work.

The "Payoff": A Resilient and Efficient Homestead
The barn restoration project was a significant investment of time and money, but the payoff has been immense.
- Increased Storage Capacity: We now have ample space to store our tools, equipment, and harvested crops, reducing clutter and improving organization.
- Animal Housing: The barn provides a safe and comfortable shelter for our chickens, goats, and pigs. This increases their well-being and reduces our reliance on external resources.
- Workshop Space: The barn's interior has been transformed into a functional workshop, allowing us to tackle DIY projects and repairs more efficiently.
- Improved Aesthetics: The restored barn has significantly enhanced the appearance of our homestead, adding to its overall charm and value.
- Financial Savings: By restoring the barn ourselves, we saved a significant amount of money compared to hiring a contractor to build a new structure.
Cost/Benefit Analysis (Approximate):
- Materials: $5,000 (over multiple years)
- Professional Labor (Metal Roof): $3,000
- Total Cost: $8,000
- Estimated Value Added to Property: $20,000+ (based on local real estate values)
- Annual Savings (Storage, Animal Housing): $500+ (reduced rental fees, healthier animals)
The "Inspiration": Your Turn to Transform
Fellow homesteaders, I hope this story inspires you to tackle your own homestead improvement projects, no matter how daunting they may seem. Remember, every journey starts with a single step. Don't be afraid to start small, learn as you go, and celebrate your accomplishments along the way.
Here are a few tips for adapting this project to your own situation:
- Start with a Smaller Project: If a full barn restoration seems too overwhelming, consider focusing on a smaller area, such as repairing a single wall or replacing a door.
- Use Reclaimed Materials: Save money and reduce waste by using reclaimed lumber, salvaged windows, and recycled materials.
- Barter with Neighbors: Exchange your skills and labor with neighbors to get help with tasks you can't handle on your own.
- Focus on Functionality: Prioritize the aspects of the barn that will provide the most benefit to your homestead, such as animal housing or storage space.
- Document Your Progress: Take photos and videos of your progress to track your accomplishments and share your journey with others.
The journey of homesteading is a rewarding one filled with challenges and triumphs. Embrace the process, learn from your mistakes, and never give up on your dreams. With hard work, dedication, and a little bit of ingenuity, you can transform your homestead into a thriving haven of self-sufficiency. Now, go forth and create!