Home Improvement
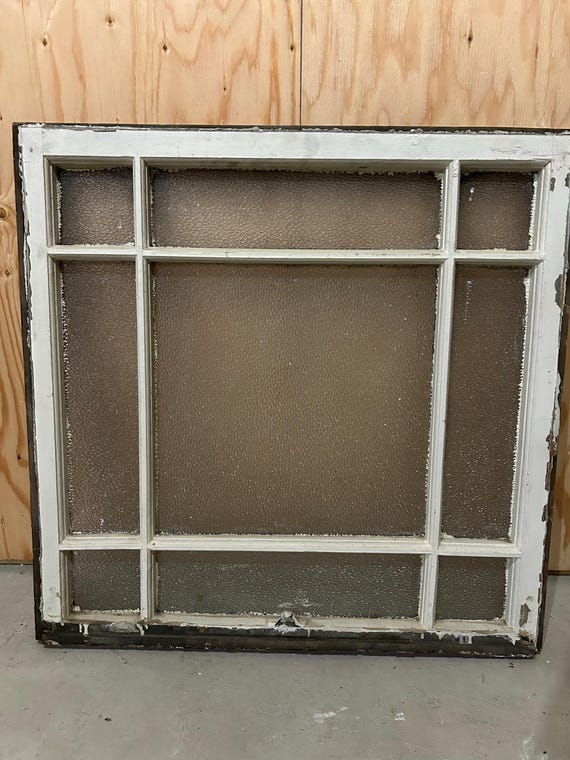
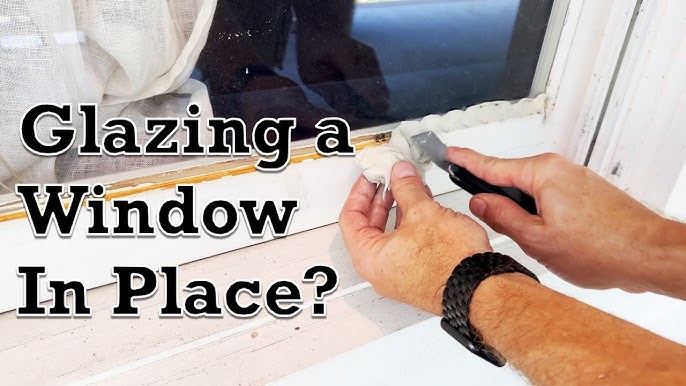
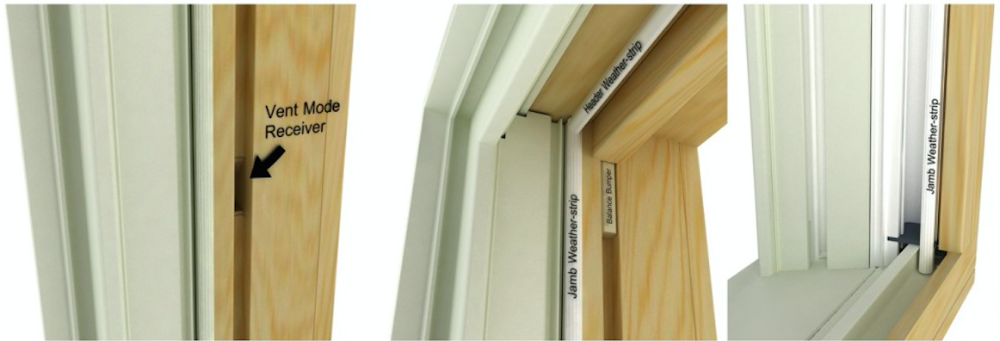
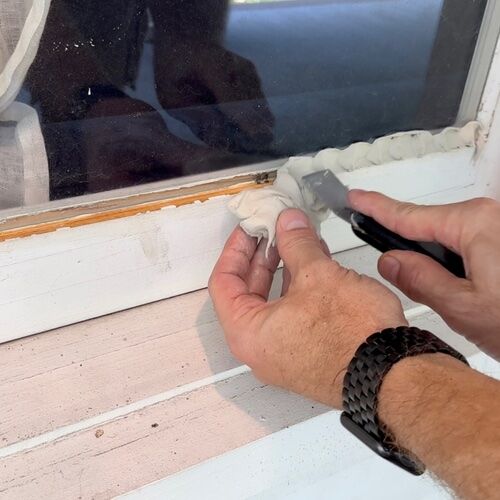
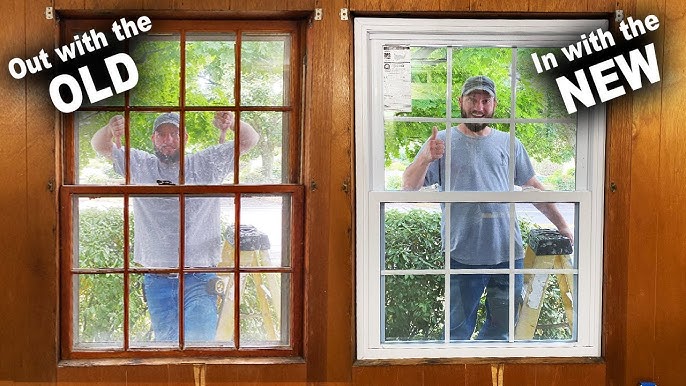
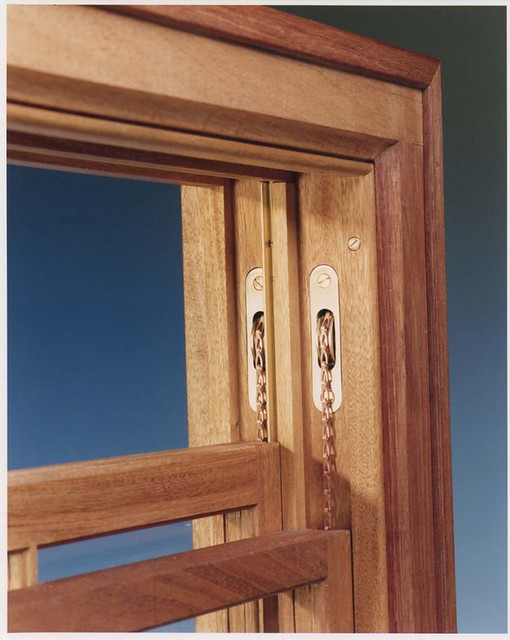
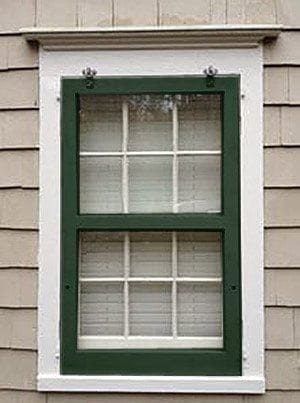
Breathe New Life into Your Homestead: Restoring an Old Farmhouse Window for Beauty and Efficiency Old farmhouses exude a certain charm, a tangible connection to history. One of the most captivating features of these homes is often their original windows – those character-rich, double-hung beauties that have weathered decades of storms. But age takes its toll. Peeling paint, rattling sashes, and wood rot can compromise their beauty and, more importantly, their energy efficiency. Before you consider replacing them with modern, soulless versions, consider this: restoring your original farmhouse windows is not only possible, but it's also a rewarding way to preserve your home's history, boost its energy efficiency, and add lasting value. Let's dive into a step-by-step guide to breathing new life into these historic gems. ## Step 1: Assess and Document The first step is understanding the extent of the restoration needed. A thorough assessment will guide your decisions and prevent surprises down the road. Visually inspect each window, paying close attention to the frame and sash. Look for signs of damage such as peeling paint, cracks in the wood, and any evidence of rot. Use a flathead screwdriver to gently probe any suspicious areas, especially at the bottom of the lower sash and along the sill – these are prime spots for moisture damage. !(https://auth.promptmarketer.com/storage/v1/object/public/generated-content/images/af6e4e54-5d3c-494e-9ed9-78723fad2f4e/retrieved_image_1_2025-09-19T15-00-52-196Z_vy77qgct1.jpg) Take detailed photographs of each window, capturing close-ups of any problem areas. This documentation will be invaluable as you work and will also serve as a "before" and "after" record of your restoration efforts. ## Step 2: Remove the Sash Carefully remove the window sash from the frame. This step requires a bit of finesse to avoid damaging the surrounding trim. Start by scoring the paint along the edges of the sash with a utility knife. This prevents the paint from peeling away with the sash and damaging the trim. !(https://auth.promptmarketer.com/storage/v1/object/public/generated-content/images/af6e4e54-5d3c-494e-9ed9-78723fad2f4e/retrieved_image_2_2025-09-19T15-00-52-473Z_42c5w63dc.jpg) If your windows have sash cords or chains, detach them from the sash. Gently lift the sash out of the window frame. It's crucial to label each sash (top and bottom) to ensure proper reinstallation later. A simple piece of masking tape with "Top" or "Bottom" written on it will do the trick. ## Step 3: Strip Old Paint With the sash removed, it's time to tackle the old paint. Years of accumulated paint layers not only obscure the wood's beauty but can also contain lead, especially in older homes. It is often best to contact a professional to determine the presence of lead. Working in a well-ventilated area, use a heat gun (on a low setting) and a pull scraper to carefully remove the layers of old paint from both the window frame and sash. Wear appropriate safety gear: a respirator, gloves, and eye protection are essential. !(https://auth.promptmarketer.com/storage/v1/object/public/generated-content/images/af6e4e54-5d3c-494e-9ed9-78723fad2f4e/retrieved_image_3_2025-09-19T15-00-52-821Z_ky3f5ywlz.png) Work slowly and methodically, applying heat evenly to soften the paint before scraping. For stubborn areas, a card scraper can be used to achieve a smoother surface. Be careful not to gouge or damage the wood. If you suspect lead paint, follow EPA guidelines for safe removal and disposal or contact a professional lead abatement service. ## Step 4: Repair Wood Rot Unfortunately, many old farmhouse windows suffer from wood rot, particularly in areas exposed to moisture. Carefully remove the damaged wood using a chisel and wood carving knife. Work slowly and deliberately, removing only the rotted wood and leaving as much of the sound wood as possible. !(https://auth.promptmarketer.com/storage/v1/object/public/generated-content/images/af6e4e54-5d3c-494e-9ed9-78723fad2f4e/retrieved_image_4_2025-09-19T15-00-53-136Z_hqsnxsxe3.jpg) Treat the area with a wood consolidant to prevent further decay. Once the consolidant has dried, patch the damaged areas with epoxy wood filler. Epoxy wood filler is durable, water-resistant, and can be easily shaped to match the original profile of the wood. Carefully shape the filler to match the surrounding wood, paying attention to details and contours. For larger sections of rot, consider replacing with shaped pieces of heart pine or cypress. Let the filler cure completely according to the manufacturer's instructions before sanding smooth. ## Step 5: Re-glaze the Window Old, cracked, or missing glazing compound compromises the window's seal and allows drafts to penetrate. Remove any remaining old glazing compound with a heat gun and putty knife. !(https://auth.promptmarketer.com/storage/v1/object/public/generated-content/images/af6e4e54-5d3c-494e-9ed9-78723fad2f4e/retrieved_image_5_2025-09-19T15-00-53-275Z_somvnpieu.jpg) Apply a thin bead of fresh linseed oil putty around the perimeter of the window pane. Gently press the glass into the putty, ensuring a tight seal. Use a glazing knife to create a smooth, angled surface on the putty, removing any excess. The angle helps to shed water and protect the seal. Allow the putty to cure completely before painting – this can take several days or even weeks, depending on the weather. ## Step 6: Sand and Prime Once the putty is cured, lightly sand the entire window frame and sash with fine-grit sandpaper (220-grit) to create a smooth surface for painting. Sanding also helps to remove any imperfections and create a better bond for the primer. !(https://auth.promptmarketer.com/storage/v1/object/public/generated-content/images/af6e4e54-5d3c-494e-9ed9-78723fad2f4e/retrieved_image_6_2025-09-19T15-00-53-775Z_uztnbadnd.jpg) Apply a high-quality exterior primer, ensuring even coverage. Primer helps to seal the wood, prevent moisture absorption, and provide a good base for the paint. ## Step 7: Paint and Finish With the primer dry, it's time to apply the finish coats of paint. Apply two coats of high-quality exterior paint, allowing each coat to dry completely before applying the next. !(https://auth.promptmarketer.com/storage/v1/object/public/generated-content/images/af6e4e54-5d3c-494e-9ed9-78723fad2f4e/retrieved_image_7_2025-09-19T15-00-54-015Z_6u64v4xkm.jpg) Choose a paint color that complements the style of your farmhouse. For best results, use a brush designed for exterior painting. A high-quality brush will help you achieve a smooth, even finish. ## Step 8: Install Weather Stripping To improve the energy efficiency of your restored windows, install new weather stripping around the window frame and sash. Weather stripping creates a tight seal, preventing drafts and reducing heat loss. !(https://auth.promptmarketer.com/storage/v1/object/public/generated-content/images/af6e4e54-5d3c-494e-9ed9-78723fad2f4e/retrieved_image_8_2025-09-19T15-00-54-261Z_cm7oofc36.jpg) Choose a weather stripping material that is appropriate for old windows, such as bronze or felt. Ensure the weather stripping is properly installed and functioning correctly. ## Step 9: Reinstall the Sash and Test Carefully reinstall the window sash into the frame, reattaching the sash cords or chains (if present). Test the window to ensure it opens and closes smoothly and that the weather stripping is providing a tight seal. !(https://auth.promptmarketer.com/storage/v1/object/public/generated-content/images/af6e4e54-5d3c-494e-9ed9-78723fad2f4e/retrieved_image_9_2025-09-19T15-00-54-853Z_svl0imj50.jpg) Adjust as needed to ensure proper operation. If the sash cords are broken or frayed, now is the time to replace them. ## Step 10: Install a Storm Window (Optional) For added insulation and protection from the elements, consider installing a custom-fit storm window. Storm windows create an additional barrier against cold air and moisture, further improving energy efficiency and protecting your restored windows. ## The Enduring Benefits Restoring old farmhouse windows is a labor of love, but the rewards are well worth the effort. By preserving these historic features, you not only maintain your home's unique character but also increase its energy efficiency and overall value. Regular maintenance, such as cleaning and repainting as needed, will ensure their longevity for generations to come. By following these steps, you can breathe new life into your homestead, one window at a time. For advanced restoration services, see companies specializing in historic wood window preservation: (https://www.woodwindowrescue.com/). !(https://auth.promptmarketer.com/storage/v1/object/public/generated-content/images/af6e4e54-5d3c-494e-9ed9-78723fad2f4e/retrieved_image_1_2025-09-19T15-00-55-104Z_m1x7i8744.jpg)
Related Topics
bhh auto-generated breathe life into