Black Gold on a Budget: Vermicomposting for the Modern Homesteader
Have you ever felt the sting of disappointment when your carefully nurtured seedlings fail to thrive, despite your best efforts? I certainly have. For years, I battled with our farm's stubborn, clay-heavy soil, endlessly amending it with store-bought compost that seemed to offer more promises than actual results. Then, I discovered the transformative power of vermicomposting, and my garden hasn't been the same since. Vermicomposting, simply put, is using worms to turn your kitchen scraps into gardening gold.

It’s a simple, effective, and surprisingly space-saving way to create a potent, nutrient-rich fertilizer – worm castings – that will have your plants singing with joy. Forget those expensive, store-bought fertilizers and composting methods that can be cumbersome. This guide will walk you through everything you need to know to set up and maintain your own worm composting system, transforming your kitchen waste into a valuable resource for your garden. You’ll be amazed at how easy and rewarding it is! And don’t worry about the smell; with the right approach, vermicomposting is surprisingly odorless.
Why Vermicompost? The Garden Goldmine
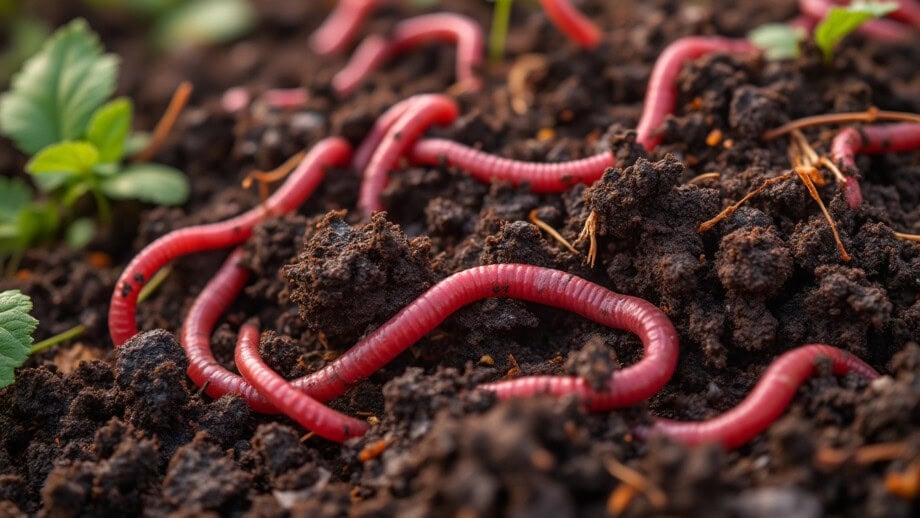
Vermicompost, or worm castings, isn’t just compost; it's super compost. The magic lies in the digestive systems of the worms. As they munch their way through your food scraps, they break down organic matter and enrich it with beneficial microbes and enzymes. The result? A fertilizer that's far superior to traditional compost in several key ways.
![Comparison photo: one plant grown with regular compost, one with vermicompost, clearly showing vermicompost's superior results.]
- Nutrient-Rich Fertilizer: Worm castings are packed with essential nutrients like nitrogen, phosphorus, and potassium (NPK), vital for healthy plant growth. Studies have shown that worm castings often contain higher concentrations of these nutrients compared to traditional compost, making them a more potent fertilizer. Worm castings contain easily absorbed nutrients and minerals that the plant can intake quickly, so plants are not spending extra energy breaking down the nutrients. This helps give them a boost and stay healthy.
- Improved Soil Structure: Worm castings act like a natural soil conditioner, improving drainage and aeration in heavy clay soils and enhancing water retention in sandy soils. They create a crumbly, loamy texture that's ideal for root growth.
- Natural Pest Resistance: The beneficial microbes in worm castings help suppress soilborne diseases and pests, reducing the need for chemical pesticides. They create a healthier soil ecosystem that supports strong, resilient plants.
- Waste Reduction: Vermicomposting is a fantastic way to reduce your household waste and embrace a more sustainable lifestyle. Instead of tossing those food scraps into the trash, you're turning them into a valuable resource for your garden.
- Safe for all Plants: Because of their gentle nature, worm castings can be used safely for starting seeds, transplanting delicate seedlings, and for established plants without the risk of burning or damaging them.
Vermicomposting offers a significant upgrade over traditional composting, providing a superior fertilizer and soil amendment while dramatically reducing waste. It’s a win-win!
Setting Up Your Vermicomposting System: Indoors or Out
Setting up a vermicomposting system is easier than you might think. You have several options, from DIY bins to pre-made systems, so you can choose what works best for your space and budget.

- Choosing the Right Bin:
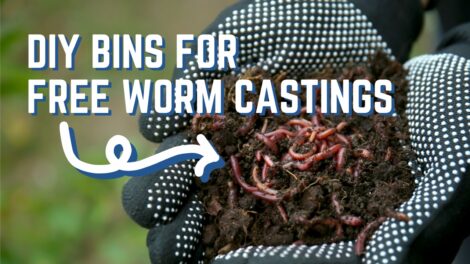
- DIY Bins: A simple and affordable option involves using two or more plastic totes. One tote serves as the worm bin, while the other can be used as a collection tray for "worm tea" (more on that later!).
- Pre-made Bins: Several commercial vermicomposting bins are available, often featuring tiered systems that make harvesting castings easier. Flow-through systems are another popular choice, allowing you to harvest castings from the bottom of the bin.
- DIY Bin Option: Here's how to build a basic worm bin using two plastic totes:
- Drill drainage holes in the bottom of one tote (the worm bin).
- Drill air holes in the sides and lid of the worm bin.
- Place the worm bin inside the second tote (the collection tray).
- Ideal Bedding: Worms need a comfortable and moist environment to thrive. Good bedding materials include:
- Shredded newspaper (avoid glossy inserts)
- Coconut coir (available at garden centers)
- Shredded cardboard
- Mix the bedding materials well and moisten them until they feel like a wrung-out sponge.
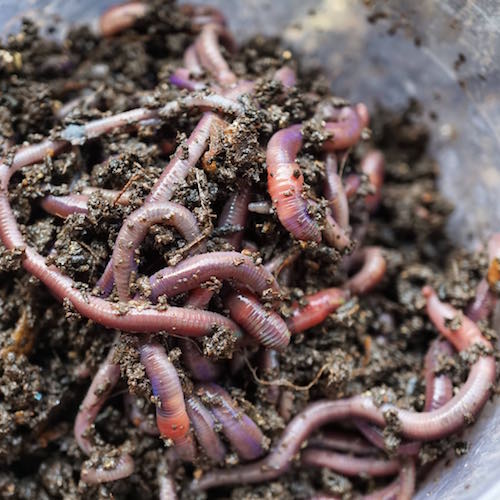
- Worm Selection: Red wigglers (Eisenia fetida) are the best choice for vermicomposting. They're voracious eaters and thrive in a bin environment. You can purchase them online or from local bait shops or composting suppliers. Start with about 1,000 worms (about 1 pound) for a small bin.
Setting up a vermicomposting system is a straightforward process with various options to suit different budgets and spaces.
Feeding Your Worms: What to Give & What to Avoid

Your worms will happily feast on a variety of kitchen scraps, but it's important to know what to feed them and what to avoid.
- Worm Food Dos:
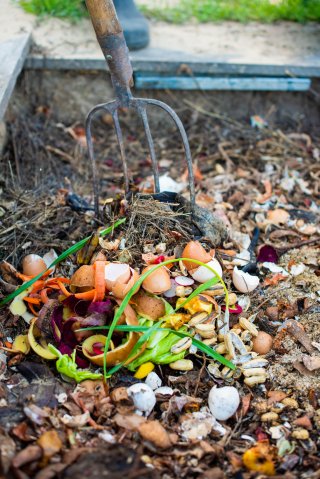
- Fruit and vegetable scraps (peels, cores, trimmings)
- Coffee grounds (with paper filters)
- Tea bags (remove staples)
- Crushed eggshells (provide calcium)
- Worm Food Don'ts:
- Meat
- Dairy products
- Oily foods
- Citrus (in large quantities – small amounts are fine)
- Onions and garlic (can be too pungent)
- Prepping Food: Cut food scraps into small pieces to help the worms decompose them more quickly.
- Feeding Schedule: Start by feeding your worms a small amount of food (about a handful) every few days. Observe how quickly they consume the food and adjust the amount accordingly. It’s best to bury food scraps in different sections of the bin so it distributes evenly.
- Burying Food: Bury the food scraps under a layer of bedding to prevent fruit flies and odors.
Understanding what to feed your worms (and what to avoid) is crucial for a healthy and productive vermicomposting system.
Maintaining a Healthy Worm Bin: Troubleshooting Common Issues
Maintaining a healthy worm bin requires a little attention, but it's mostly a hands-off process. Keep an eye out for these common issues:

- Moisture Levels: The bedding should be moist but not soggy, like a wrung-out sponge. If the bin is too dry, add water. If it's too wet, add dry bedding.
- Odor Control: A properly maintained worm bin shouldn't smell. If you notice an ammonia smell, it could be a sign of overfeeding or poor aeration. Reduce the amount of food you're adding and gently turn the bedding to improve airflow.
- Pest Control: Fruit flies are a common nuisance. Prevent them by burying food scraps and covering the bin with a layer of bedding. Sticky traps can help catch any flies that do make their way into the bin. Diatomaceous earth is a natural way to prevent mites.
- Temperature: Keep your bin in a cool, dark place, ideally between 55°F and 85°F. Avoid exposing it to extreme temperatures.
- Harvesting Worm Castings: There are several methods for harvesting worm castings:
- Migration Method: Stop feeding the worms in one section of the bin. They will migrate to the other section in search of food. Once most of the worms have migrated, you can harvest the castings from the empty section.
- Dumping Method: Dump the contents of the bin onto a tarp and create small piles. The worms will burrow into the piles to escape the light. Scrape off the top layer of castings, allowing the worms to burrow further down. Repeat this process until you're left with mostly worms.
Regular maintenance and troubleshooting will ensure a thriving vermicomposting system and a consistent supply of nutrient-rich worm castings.
Using Worm Castings: Boosting Your Garden's Growth
Now for the best part: putting your worm castings to use in the garden!
- Application Methods:
- Top Dressing: Sprinkle worm castings around the base of plants.
- Mixing into Potting Soil: Mix worm castings with potting soil when planting seedlings or repotting plants (about 1 part castings to 3 parts soil).
- Worm Tea: Steep worm castings in water to make a nutrient-rich "worm tea" that can be used as a foliar spray or soil drench.
- Dosage: A little goes a long way! A few handfuls of worm castings are usually sufficient for most plants.
- Worm Tea Recipe:
- Fill a 5-gallon bucket with water.
- Place 1-2 cups of worm castings in a muslin bag or old sock.
- Submerge the bag in the water and let it steep for 24-48 hours, stirring occasionally.
- Dilute the worm tea with water (1 part tea to 1 part water) before using.
- Seed Starting: Worm castings make a great medium for seed starting or mixing into your current seed starting mix.
Learning how to effectively apply worm castings is the final step in harnessing the power of vermicomposting for a thriving garden.
Embrace the Power of Worms!
Vermicomposting is more than just a way to recycle kitchen scraps; it's a sustainable and rewarding practice that connects you to the natural cycles of life. It's a simple yet powerful way to improve your soil, nourish your plants, and reduce your environmental footprint. As the days get shorter and autumn leaves begin to fall, now is the perfect time to begin collecting those leaves and food scraps and to start vermicomposting, preparing your system to provide rich nutrients for a vibrant spring garden.
Ready to unlock the secrets of worm power?
What are your favorite ways to use worm castings in your garden? Share your experiences and tips in the comments below!