Beyond the Compost Bin: Unlock the Power of Vermicomposting for a Thriving Homestead
As the reality of a overflowing compost bin hits, even the most ardent homesteader can feel a pang of guilt. We strive for self-sufficiency, yet the amount of kitchen scraps destined for the landfill can be disheartening. But what if there was a way to not only drastically reduce that waste but also create an incredibly valuable soil amendment for your garden? Enter vermicomposting – the power of worms!
This post dives into the world of vermicomposting, offering a comprehensive guide for beginner homesteaders and urban gardeners alike. We'll explore how these amazing creatures can transform your kitchen waste into "black gold," enriching your garden and promoting sustainable living, no matter how small your space.

What is Vermicomposting and Why is it Right for You?
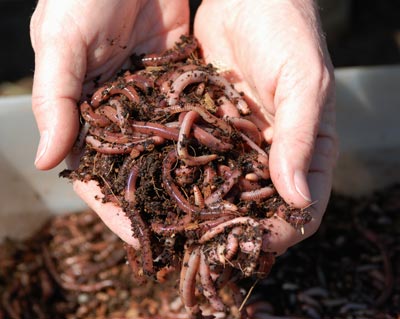
Vermicomposting, simply put, is using worms to decompose organic matter. Unlike traditional composting, which relies on heat and a variety of microorganisms, vermicomposting is driven by the digestive processes of worms, primarily red wigglers (Eisenia fetida). These amazing creatures consume food scraps, coffee grounds, and other organic materials, and excrete nutrient-rich castings, a fantastic soil amendment.
The benefits of vermicomposting extend far beyond just reducing waste and enriching your garden. Vermicomposting reduces the need for chemical fertilizers, as worm castings provide a slow-release source of essential nutrients. It also improves soil structure, increasing water retention and aeration. Furthermore, worm castings are teeming with beneficial microbes, which help to suppress plant diseases and promote healthy root growth.
One of the biggest misconceptions about vermicomposting is that it's smelly or complicated. In reality, a well-maintained vermicomposting bin is virtually odorless and requires very little effort. It’s a simple and effective way to create a closed-loop system, turning waste into a valuable resource. Vermicomposting is sustainable and regenerative, even for beginners.
Getting Started: Setting Up Your Vermicomposting Bin
Setting up your own vermicomposting bin is easier than you might think. Here's what you need to know:
Choosing the Right Bin
You have several options for your vermicomposting bin:
- DIY Bins: Plastic totes or wooden boxes are popular and affordable choices. Make sure your bin is opaque to protect the worms from light. Drainage holes are essential to prevent the bin from becoming waterlogged, as is ventilation.
- Commercially Available Systems: These systems are designed specifically for vermicomposting and often include features such as tiered trays for easy harvesting and built-in drainage.
Consider your space, budget, and aesthetic preferences when choosing a bin.
Bedding is Key
The bedding provides a habitat for your worms and helps to retain moisture. Suitable bedding materials include:
- Shredded newspaper (black and white only, avoid glossy inserts)
- Shredded cardboard
- Coconut coir
- Peat moss
Avoid using glossy paper or treated materials, as these can be harmful to the worms. The bedding should be damp, like a wrung-out sponge. Too wet, and it becomes anaerobic; too dry, and the worms won't thrive.
To prepare the bedding, shred the material and moisten it thoroughly. Then, fluff it up to create air pockets. Place the bedding in your vermicomposting bin, filling it about two-thirds full.

Acquiring Your Worms
It's crucial to use red wigglers (Eisenia fetida), not earthworms, for vermicomposting. Red wigglers are surface dwellers and are adapted to decomposing organic matter quickly. You can purchase them online, at local nurseries, or from other vermicomposters.
The number of worms you need depends on the size of your bin and the amount of waste you generate. A good rule of thumb is 1 pound of worms per square foot of surface area.
When you receive your worms, gently introduce them to their new home. Spread them over the bedding and cover them with a layer of moist newspaper. They will quickly burrow into the bedding.
Feeding Your Worms: What to Feed and What to Avoid
Proper feeding is essential for healthy worms. Here's a guide to what to feed and what to avoid:
The Worm Menu
Acceptable food scraps include:
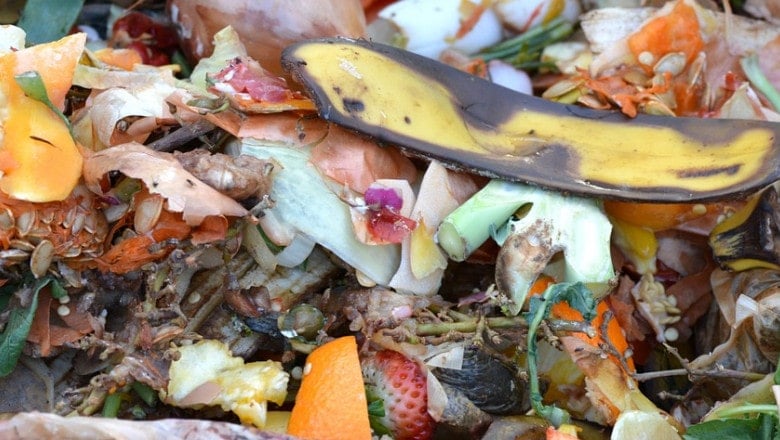
- Fruit and vegetable peels
- Coffee grounds
- Tea bags (remove staples)
- Crushed eggshells
Chop the food scraps into small pieces to help them decompose more quickly. Bury the food scraps under the bedding to prevent fruit flies.

Foods to Avoid
Avoid feeding your worms:
- Meat
- Dairy
- Oily foods
- Citrus rinds (in large quantities)
- Onions
- Garlic
These foods can cause odors, attract pests, and disrupt the pH balance of the bin.
Feeding Schedule
The frequency of feeding depends on the worm population and the rate of decomposition. Start by feeding your worms a small amount of food every few days. Monitor their consumption and adjust the feeding schedule accordingly.
Maintaining Your Vermicomposting Bin: Troubleshooting and Best Practices
Regular maintenance is crucial for a healthy and productive vermicomposting system.
Moisture Management
Maintain optimal moisture levels (damp sponge consistency). Add water by spraying and adjust bedding as needed. You can check if the bedding is too wet by squeezing a handful. If water drips out easily, it's too wet. If it crumbles, add more moisture.
Temperature Control
Red wigglers thrive in temperatures between 55°F and 77°F. Protect the bin from extreme heat or cold by placing it in a shady location or bringing it indoors.
Pest Control
Prevent fruit flies, gnats, and other common pests by burying food scraps, using diatomaceous earth (food grade), and ensuring proper ventilation.
Troubleshooting Common Issues
- Foul Odors: This usually indicates that the bin is too wet or that there's too much food. Add dry bedding and reduce feeding.
- Slow Decomposition: This could be due to low temperatures, dry bedding, or a lack of food. Adjust accordingly.
- Worm Die-Off: This could be caused by extreme temperatures, toxic materials, or improper pH. Remove any potential toxins and ensure the bin is properly maintained.
Harvesting Your Black Gold: Separating Castings from Worms
After several months, your vermicomposting bin will be full of rich, dark worm castings. Here are a couple of methods for harvesting the black gold:
- Dump and Sort: Spread the contents of the bin onto a tarp and sort through it, separating the worms from the castings. This method is time-consuming but effective.
- Migration Method: Place fresh bedding and food in one side of the bin. The worms will migrate to the new food source, leaving the castings behind. This method takes several weeks but requires less effort.
Once you've harvested the castings, spread them out to dry slightly before storing them in airtight containers in a cool, dark place.
Using Your Worm Castings: Unleashing the Power of Black Gold
Worm castings can be used in a variety of ways in the garden:
- Soil Amendment: Mix worm castings into your garden soil to improve its structure and fertility.
- Potting Mix Ingredient: Add worm castings to your potting mix to provide essential nutrients for your plants.
- Side Dressing: Sprinkle worm castings around the base of your plants to provide a slow-release source of nutrients.
- Compost Tea: Soak the castings in water to make worm tea and use this as fertilizer
Worm castings improve water retention, nutrient availability, and disease resistance for plant growth.
From Scraps to Success: Embracing the Worm Life
Vermicomposting is a rewarding and accessible practice for anyone interested in sustainable living. It's a simple way to reduce waste, enrich your garden, and connect with nature. As you prepare your garden for spring planting, consider starting your own vermicomposting system. It's a small step that can make a big difference.
Now it's your turn! What are your favorite tips for vermicomposting success? Share them with the Better Homes and Harvests community in the comments below!