
Battling Winter's Dryness: A Homesteader's Guide to Wood Furniture Care
Winter on the homestead is a season of cozy warmth, crackling wood stoves, and…surprisingly dry air. While we humans might bundle up in sweaters and slather on lotion, our beloved wooden furniture and surfaces often suffer in silence. The combination of low humidity and direct heat from wood stoves can wreak havoc, leading to dryness, cracking, and a generally unhappy home for your cherished wooden possessions. That’s why this post dives deep into winter wood furniture care, focusing on natural, homemade solutions that are gentler on your furniture and better for the environment than many store-bought alternatives. Because on the homestead, we believe in crafting solutions as much as we cherish the items they protect.
This scene showcases the heart of winter wood care: applying homemade beeswax polish to a wooden coffee table in a cozy homestead setting.
The Homemade Advantage: Why Natural Wood Care Matters
Why opt for homemade wood care products when you can simply grab a bottle from the store? For homesteaders, the answer is multi-faceted.
- Control over Ingredients: You know exactly what's going into your polish. No hidden chemicals or mystery ingredients that could potentially damage your furniture over time.
- Cost-Effectiveness: Making your own polish is significantly cheaper than buying commercial brands, especially when you source ingredients in bulk.
- Sustainability: Ditch the plastic bottles and embrace sustainable ingredients like beeswax from local beekeepers and olive oil, reducing your environmental impact.
- Gentler on Wood: Many commercial polishes contain harsh chemicals that can strip the natural oils from wood, leading to further dryness. Natural alternatives nourish and protect without the damaging effects.
Beeswax Wood Polish Recipe: A Homestead Staple
This simple beeswax wood polish recipe is a cornerstone of winter wood furniture care on the homestead. It's easy to make, smells divine, and effectively protects and nourishes your wooden surfaces.
Ingredients:
- 1/2 cup beeswax pastilles
- 1 cup olive oil
- 10 drops cedarwood essential oil
- 5 drops sweet orange essential oil

Essential ingredients laid out, ready to be transformed into nourishing wood polish.
Instructions:
- Melt the Beeswax: The best method for melting beeswax is using a double boiler. If you don't have a double boiler, you can create one by placing a heat-safe glass bowl over a pot of simmering water. Ensure the bottom of the bowl doesn't touch the water. Add the beeswax pastilles to the bowl and heat gently, stirring occasionally, until completely melted. Safety First: Never leave melting beeswax unattended. Beeswax is flammable, so always use low heat and proper ventilation.
- Combine Ingredients: Once the beeswax is fully melted, remove the bowl from the heat. Slowly pour in the olive oil, stirring constantly to ensure it's well combined with the beeswax.
- Add Essential Oils: Add the cedarwood and sweet orange essential oils to the mixture. These oils not only provide a pleasant scent but also offer additional benefits – cedarwood is known for its insect-repelling properties, and sweet orange provides a cheerful, uplifting aroma. Stir well to distribute the oils evenly.
- Cool and Solidify: Pour the mixture into an airtight glass jar. A wide-mouth jar is ideal for easy access. Let the polish cool completely at room temperature. As it cools, it will solidify into a creamy consistency. The time it takes to solidify depends on the temperature of your room, but it usually takes several hours.
This detail showcases the texture of the polish and the process of applying it to enhance the wood's natural beauty.
Creating a Winter Wood Care Kit: Your Arsenal Against Dryness
Having a dedicated wood care kit readily available makes maintaining your furniture throughout the winter months a breeze. Assemble the following:
- Soft, Lint-Free Cotton Cloths (5-7): Opt for cloths made from 100% cotton flannel or microfiber. These are gentle on wood and won't leave behind any lint.
- Small, Natural-Bristle Brush: This is perfect for cleaning crevices and intricate details on your furniture. A toothbrush also works great for this purpose.
- Airtight Glass Jar (4-8 oz): Store your homemade beeswax polish in a jar that seals tightly to prevent it from drying out. A mason jar works perfectly.
- Small Spray Bottle: Fill this with water for lightly dampening your cloths before polishing.
A neatly arranged wood care kit with all the essentials for combating winter dryness.
Storage: Keep your wood care kit in a readily accessible location, such as a woven basket near the wood stove or a repurposed wooden box in your central living area. This ensures that you can quickly and easily address any dryness or minor damage as needed.
Application and Maintenance Tips: Nurturing Your Wooden Treasures
Now that you have your homemade polish and wood care kit ready, here’s how to use them effectively:
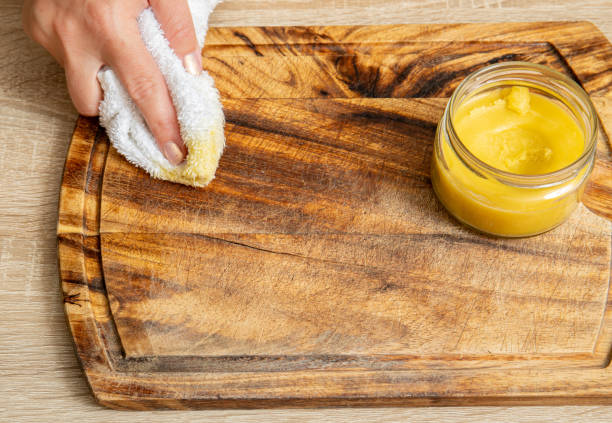
Application: Before polishing, dust your furniture thoroughly with a clean, dry cloth. Then, using a soft cloth, apply a small amount of the beeswax polish to the wood in a circular motion. Allow the polish to sit for 15-20 minutes to penetrate the wood. Finally, buff the surface with a clean, dry cloth until it shines.
Preventing Water Rings: Always use coasters made from natural materials like cork or felt to protect your wooden surfaces from water rings and condensation. These materials absorb moisture effectively, preventing damage to the wood.
Natural coasters in action, safeguarding wood surfaces from moisture damage.
Addressing Minor Scratches: For minor scratches, apply a small amount of the beeswax polish directly to the scratch and gently rub it in with a soft cloth. The polish will help to camouflage the scratch and protect the underlying wood. For deeper scratches, you may need to consider more extensive repairs.
Frequency: In the dry winter months, aim to polish your furniture every 2-3 months, or as needed. Keep an eye on your wooden surfaces and address any signs of dryness, such as a dull appearance or the development of small cracks.
A homesteader diligently caring for her wood furniture with homemade polish.
Additional Tips:
- Humidify: Consider using a humidifier to increase the humidity level in your home, especially during the winter months. Aim for a humidity level between 40-50% to prevent wood from drying out and cracking. This can be especially helpful if you rely heavily on a wood stove.
- Placement: Keep wooden furniture away from direct heat sources, such as wood stoves and radiators. The intense heat can cause the wood to dry out and crack.
- Dust Regularly: Dust your furniture regularly to prevent the buildup of dirt and grime, which can further dry out the wood.
Conclusion: A Homestead Approach to Lasting Beauty
Protecting your wooden furniture during the harsh winter months doesn't require harsh chemicals or expensive store-bought products. By embracing natural, homemade solutions like beeswax polish and creating a simple wood care kit, you can effectively combat dryness and maintain the beauty of your cherished wooden pieces for years to come. Taking a proactive approach to winter wood furniture care, especially for items near a wood stove, will help with preventing wood furniture cracks in winter months. Choose an affordable winter wood furniture care routine that will ensure your homestead wood surface maintenance is a success. Remember, on the homestead, we believe in working with nature, not against it, and that philosophy extends to the care of our homes and possessions. So, gather your ingredients, assemble your kit, and get ready to nurture your wooden treasures through the winter!
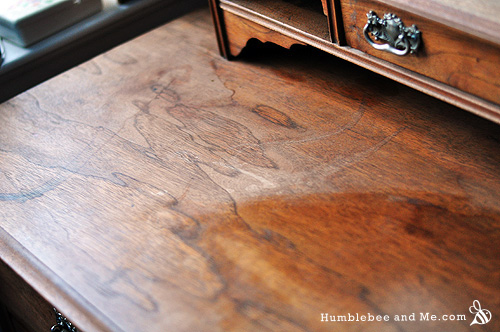
The rewarding result: a beautifully polished wood surface, showcasing its natural beauty and protected from winter's harshness.
The warm, inviting glow of a homestead living room, showcasing the beauty and care of natural wood furniture.