Battling the Winter Chill: DIY Reclaimed Barn Wood Shutters for a Cozy Homestead
Howdy, folks! Elsie here, back again from my little slice of heaven to share another homesteading trick I’ve learned over the years. This time, we're tackling a challenge near and dear to every homesteader’s heart (and wallet): reducing those sky-high winter heating costs. I remember one particularly brutal winter a few years back, when the wind howled relentlessly and my heating bill looked more like a mortgage payment! That’s when I decided enough was enough. I needed a better solution than just plastic sheeting on my windows. And so, my journey into the world of DIY window insulation began, culminating in the project I’m thrilled to share with you today: custom-fit interior window shutters made from reclaimed barn wood. These aren't just practical; they're beautiful and add a touch of rustic charm to any room, keeping your homestead warm and cozy all winter long.
Why should homesteaders care about DIY window insulation? Well, for starters, it's about financial independence. Every dollar saved on heating is a dollar that can be invested back into your homestead, whether it's expanding your garden, improving your livestock pens, or simply having a little extra breathing room. Secondly, it's about environmental responsibility. By reducing our energy consumption, we lessen our impact on the planet and contribute to a more sustainable way of life. And finally, let's not forget the sheer comfort of a warm and cozy home during those long winter months. Imagine snuggling up by the fire with a cup of hot cocoa, knowing that your hard work has created a sanctuary of warmth and peace. That's the homesteading dream, isn't it?
Gathering Your Supplies: The Homesteading Treasure Hunt
Now, let's get down to brass tacks. To build these beauties, you'll need the following materials:
- Reclaimed Barn Wood: This is the star of the show! Look for wood that's relatively straight and free of major rot. Local salvage yards are your best bet, but online marketplaces like Facebook Marketplace or Craigslist can also be goldmines. Don’t be afraid of a little character – knots and imperfections add to the rustic charm!
- Insulation: Rigid foam insulation board (like polystyrene or polyisocyanurate) is ideal. Choose a thickness that fits comfortably within the frame you'll be building. You can find this at most home improvement stores.
- Hinges: Choose hinges that complement your aesthetic. Black iron hinges give a rustic look, while brass hinges add a touch of elegance. Two hinges per shutter should suffice for smaller windows; use three for larger ones.
- Latches or Catches: To keep the shutters closed. Again, choose a style that suits your taste. Magnetic catches are simple and effective, while decorative latches add a touch of charm.
- Screws: Ensure you have screws of appropriate length for attaching the hinges and latches to the wood.
- Wood Glue (optional): For extra strength in your frame construction.
- Sandpaper: For smoothing rough edges and preparing the wood for finishing.
- Stain, Paint, or Sealer (optional): To customize the look of your shutters.
Tools of the Trade:
- Measuring Tape: Accuracy is key!
- Saw: A circular saw or hand saw will do the trick for cutting the barn wood to size.
- Drill: For pre-drilling screw holes and attaching hinges and latches.
- Screwdriver: To drive in the screws.
- Clamps: To hold the wood in place while the glue dries (if using).
- Safety Glasses: Protect those peepers!
- Dust Mask: Reclaimed wood can be dusty – breathe easy!

Caption: Essential tools for building your reclaimed barn wood shutters.
Step-by-Step Guide to Barn Wood Shutter Bliss
Alright, let's get building!
Measure Your Windows: Carefully measure the inside dimensions of your window frame. Subtract about ¼ inch from both the width and height to ensure the shutters fit comfortably. This is crucial for a smooth operation.
Cut the Barn Wood: Cut the barn wood into pieces to create the frame for each shutter. You'll need two vertical pieces (the height of your window minus ¼ inch) and two horizontal pieces (the width of your window minus ¼ inch, minus the width of the vertical pieces).
Caption: Cutting the reclaimed barn wood to the precise measurements for the shutter frame.Assemble the Frames: Lay the pieces on a flat surface and assemble the frame. Use wood glue (optional) and screws to secure the corners. Clamps can be helpful to hold everything in place while the glue dries. Make sure the frame is square!
Cut the Insulation: Measure the inside dimensions of the shutter frame. Cut the rigid foam insulation board to fit snugly inside the frame.
Insert the Insulation: Place the insulation board inside the shutter frame. You can use a few dabs of construction adhesive to hold it in place, but it should fit snugly enough on its own.
Attach the Hinges: Position the hinges on the inside edge of the shutter frame and the window frame. Pre-drill pilot holes to prevent the wood from splitting, then attach the hinges with screws.

Caption: Securing the hinges to the reclaimed barn wood frame to allow for easy opening and closing.Install the Shutters: Carefully align the shutters with the window frame and attach the other side of the hinges to the window frame using screws.
Attach the Latches: Install the latches or catches to keep the shutters closed. Position them where they will easily engage when the shutters are closed.
Finishing Touches (Optional): Sand the shutters smooth and apply stain, paint, or sealer to protect the wood and enhance its beauty.
Troubleshooting Common Homesteading Hurdles
- Uneven Window Frames: If your window frames are uneven (and let’s face it, on a homestead, they often are!), don't panic! You can shim the shutters with thin pieces of wood to ensure they sit flush against the window frame.
- Sourcing Appropriate Insulation: If you can’t find rigid foam insulation board, you can use fiberglass insulation batting, but be sure to wrap it in plastic to prevent moisture absorption.
- Working with Warped Wood: Reclaimed wood often has a story to tell, and sometimes that story includes a bit of warping. Try to choose the straightest pieces possible. If you have some minor warping, you can use clamps to straighten the wood while you assemble the frames.
Style and Aesthetics: Rustic Charm Meets Homestead Comfort
The beauty of reclaimed barn wood is its versatility. You can leave it as is for a truly rustic look, or you can sand it smooth and apply a clear sealer to protect the wood while showcasing its natural beauty. If you prefer a more polished look, consider painting the shutters a color that complements your interior décor. Milk paint is a great option for a farmhouse-style look.

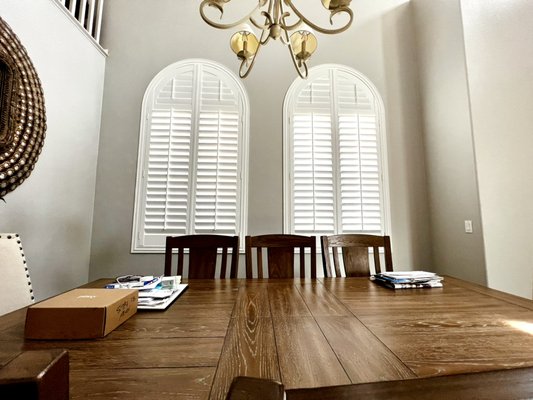

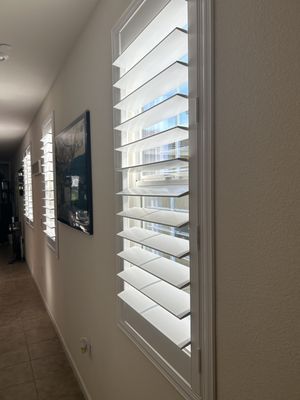

Caption: Examples of completed reclaimed barn wood shutters in various homes, showcasing different styles and finishes.
Your Homestead Awaits: A Call to Action
So, there you have it, folks! A step-by-step guide to building your own DIY reclaimed barn wood window shutters. I encourage you to give this project a try. Not only will it help you save money on your heating bills, but it will also add a touch of rustic charm to your home.
Now, I’d love to hear from you! What are your favorite window insulation strategies? Have you ever built your own shutters? Share your tips and photos in the comments below! And don’t forget to share this post on social media and tag @BetterHomesAndHarvests so we can all learn from each other.
Bonus Tip: Homesteading Responsibility
Remember to dispose of any waste material responsibly. Recycle any wood scraps that can't be used, and properly dispose of any insulation scraps according to local regulations. Let's keep our homesteads and our planet clean and green!