Banish Drafts: DIY Window Insulation That'll Save You Big This Winter
The wind howls outside, a bone-chilling reminder that winter is nipping at our heels. Inside our old farmhouse, though, it’s a different story. A warm, comforting haven, thanks in no small part to a few clever DIY window insulation tricks. The best part? We didn’t break the bank doing it, and we even managed to repurpose some forgotten treasures along the way. Imagine sinking into your favorite armchair with a good book, the fire crackling merrily, and the knowledge that you're not watching your hard-earned dollars fly out the window along with the heat. This isn’t just about comfort; it's about energy independence, reducing your carbon footprint, and embracing a more self-sufficient homesteading lifestyle. And it all starts with those drafty, old farmhouse windows. Let's dive in!

Why Insulate Your Windows? The Homesteading Perspective
Before we get our hands dirty, let's talk about why insulating windows is crucial, especially for us homesteaders. It’s more than just about staying warm and cozy.
- Reducing Energy Bills: This is the most obvious benefit. Drafty windows are a major source of heat loss, forcing your heating system to work overtime and driving up your energy bills. By insulating, you can significantly reduce your energy consumption and save money. Think of it as free money every month!
- Increasing Comfort: No one enjoys sitting near a drafty window. Insulating eliminates cold spots and creates a more comfortable and consistent temperature throughout your home. This is especially important in older farmhouses that often lack modern insulation.
- Environmental Impact: Reducing your energy consumption also reduces your environmental impact. By using less fuel (whether it's oil, gas, or electricity), you're contributing to a smaller carbon footprint and a more sustainable lifestyle. For homesteaders committed to living in harmony with nature, this is a huge win.
- Preserving Your Home: Condensation from temperature differences can lead to moisture damage around your windows, potentially causing rot and decay. Proper insulation helps to prevent this by maintaining a more consistent temperature and reducing condensation.
Gathering Your Salvaged Materials: The Thrifty Homesteader's Delight
One of the best parts of this project is that you can do it on a budget using salvaged materials. Here’s what you’ll need:
- Clear Plastic Sheeting or Bubble Wrap: Old greenhouse plastic, shower curtain liners, or even large bubble wrap used for shipping can be repurposed for this. The key is to find something clear that will allow light to pass through. I've even seen people use discarded plastic tablecloths from parties!
- Double-Sided Tape or Magnetic Tape: Choose a tape that's strong enough to hold the plastic in place but won't damage your window frames. Magnetic tape can be especially useful if you have metal window frames. You can find affordable options at your local hardware store or online.
- Scissors or Utility Knife: For cutting the plastic sheeting to size.

- Measuring Tape: For accurate measurements of your window frames.
- Old Picture Frames (Optional): If you want a more aesthetically pleasing look, you can use old picture frames to create custom-sized insulation panels. Scour thrift stores and flea markets for these!

- Caulking or Weather Stripping (Optional): To seal any gaps around the window frame. This is especially important for older windows that may have cracks or gaps. You can find affordable options at your local hardware store or online.
- Rags or Cleaning Supplies: To clean your window frames before applying any tape or insulation.
Sustainable/Recycled Options:
- Bubble Wrap: Check with local businesses that receive a lot of shipments. They're often happy to give away their used bubble wrap.
- Plastic Sheeting: Ask local greenhouses or nurseries if they have any scrap plastic sheeting that they're willing to part with.
- Picture Frames: Thrift stores, flea markets, and garage sales are great places to find inexpensive picture frames.
- Cardboard: Use cardboard to fill empty frames for added insulation.
Step-by-Step Instructions: Insulating Your Windows the Homestead Way
Alright, let's get down to business! Here’s a step-by-step guide to insulating your drafty, old farmhouse windows:
Step 1: Prepare Your Windows
- Clean your window frames thoroughly with soap and water. Remove any dirt, dust, or debris that could prevent the tape from sticking properly. Let them dry completely.

Step 2: Measure and Cut Your Plastic Sheeting
- Carefully measure the inside of your window frame. Add a few inches to each side to ensure a good seal.
- Using your scissors or utility knife, cut the plastic sheeting to the measured size.
Step 3: Apply the Tape
- Apply double-sided tape or magnetic tape around the entire perimeter of the window frame. Make sure the tape is firmly attached to the frame.
Step 4: Attach the Plastic Sheeting
- Carefully attach the plastic sheeting to the tape, starting at the top and working your way down. Gently stretch the plastic as you go to create a tight, wrinkle-free seal.
Step 5: Seal the Edges (Optional)
- For added insulation, you can seal the edges of the plastic sheeting with clear caulk or weather stripping. This will help to prevent any drafts from sneaking through.
Using Picture Frames for a Polished Look:
- Measure the inside dimensions of your picture frame.
- Cut your plastic sheeting or cardboard to fit snugly inside the frame.
- Secure the plastic or cardboard to the frame using tape or glue.
- Hang the insulated picture frame over your window using hooks or nails.
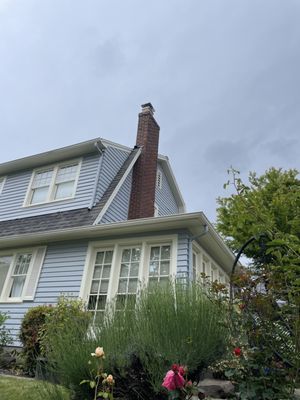
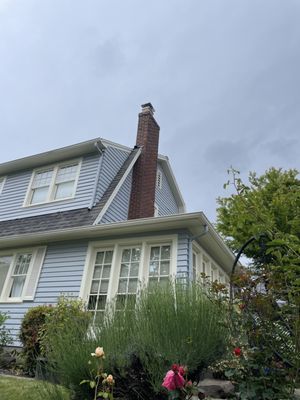
Here is what another farmhouse looks like after winterization.
Troubleshooting Tips: Tackling Common Challenges
- Tape Not Sticking? Make sure the window frame is clean and dry. You may also need to use a stronger tape.
- Plastic Sheeting Sagging? Try using a thicker plastic sheeting or adding more tape to support the weight.
- Condensation Forming? This indicates that the seal isn't airtight. Re-seal the edges of the plastic sheeting with caulk or weather stripping.
- Uneven Windows? Old farmhouses are notorious for settling. Take extra care when measuring to ensure a proper fit, even if it means making slightly asymmetrical panels. Don't worry too much about perfection – function over form is the name of the game here!
Estimated Costs: Saving Money the Homestead Way
The beauty of this project is its affordability. Here's a rough estimate of the costs involved:
- Plastic Sheeting: Free (if salvaged) to $10 (for a new roll)
- Double-Sided Tape: $5-$10
- Caulking/Weather Stripping (Optional): $5-$15
- Picture Frames (Optional): Free (if salvaged) to $20 (depending on size and condition)
Total Estimated Cost: $5 - $45 per window (depending on materials used)
More Homesteading Inspiration

Stop Window Drafts and Insulate Your Home

Let's Build Together: Share Your Window Insulation Adventures!
Now it's your turn! I encourage you to try this DIY window insulation project and experience the warmth, comfort, and cost savings for yourself. Remember, homesteading is all about resourcefulness and self-sufficiency. By using salvaged materials and a little bit of elbow grease, you can create a more energy-efficient and sustainable home.
What are your favorite window insulation tricks? Share your experiences and tips in the comments below! Let’s learn from each other and build a stronger, more resilient homesteading community, one window at a time. We're all in this together, working towards a warmer, greener, and more independent future.
