Bake Off-Grid: Build Your Own Backyard Earth Oven
[VISUAL: family smiling around a completed earth oven with pizzas baking inside]
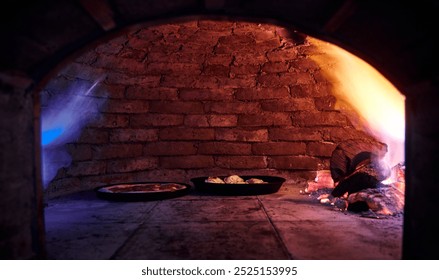
Imagine the tantalizing aroma of wood smoke mingling with the savory scent of freshly baked pizza, all enjoyed under the stars on a crisp evening. This isn’t just a dream – it’s the reality of owning a backyard earth oven. While modern electric ovens offer unparalleled convenience, there’s something deeply satisfying about connecting with the ancient tradition of cooking with earth, fire, and skill. This isn’t just about baking; it’s about experiencing a more sustainable, self-sufficient, and flavorful way of life on your homestead.
An earth oven, a time-honored cooking method spanning continents and centuries, offers a unique alternative to conventional ovens. From rustic Italian loaves to succulent roasted meats, an earth oven imparts a distinctive smoky flavor and crispy texture that's simply unmatched. And the best part? Building your own earth oven is a surprisingly simple and low-cost DIY project, perfect for homesteaders seeking to reduce their reliance on electricity or gas and embrace a more sustainable lifestyle.
In this step-by-step guide, we'll walk you through the entire process of constructing your own backyard earth oven, from planning and gathering materials to mastering the art of earth oven cooking. Get ready to unlock a world of culinary possibilities and embrace the ancient tradition of baking with fire!
Planning and Preparation: Laying the Foundation for Success
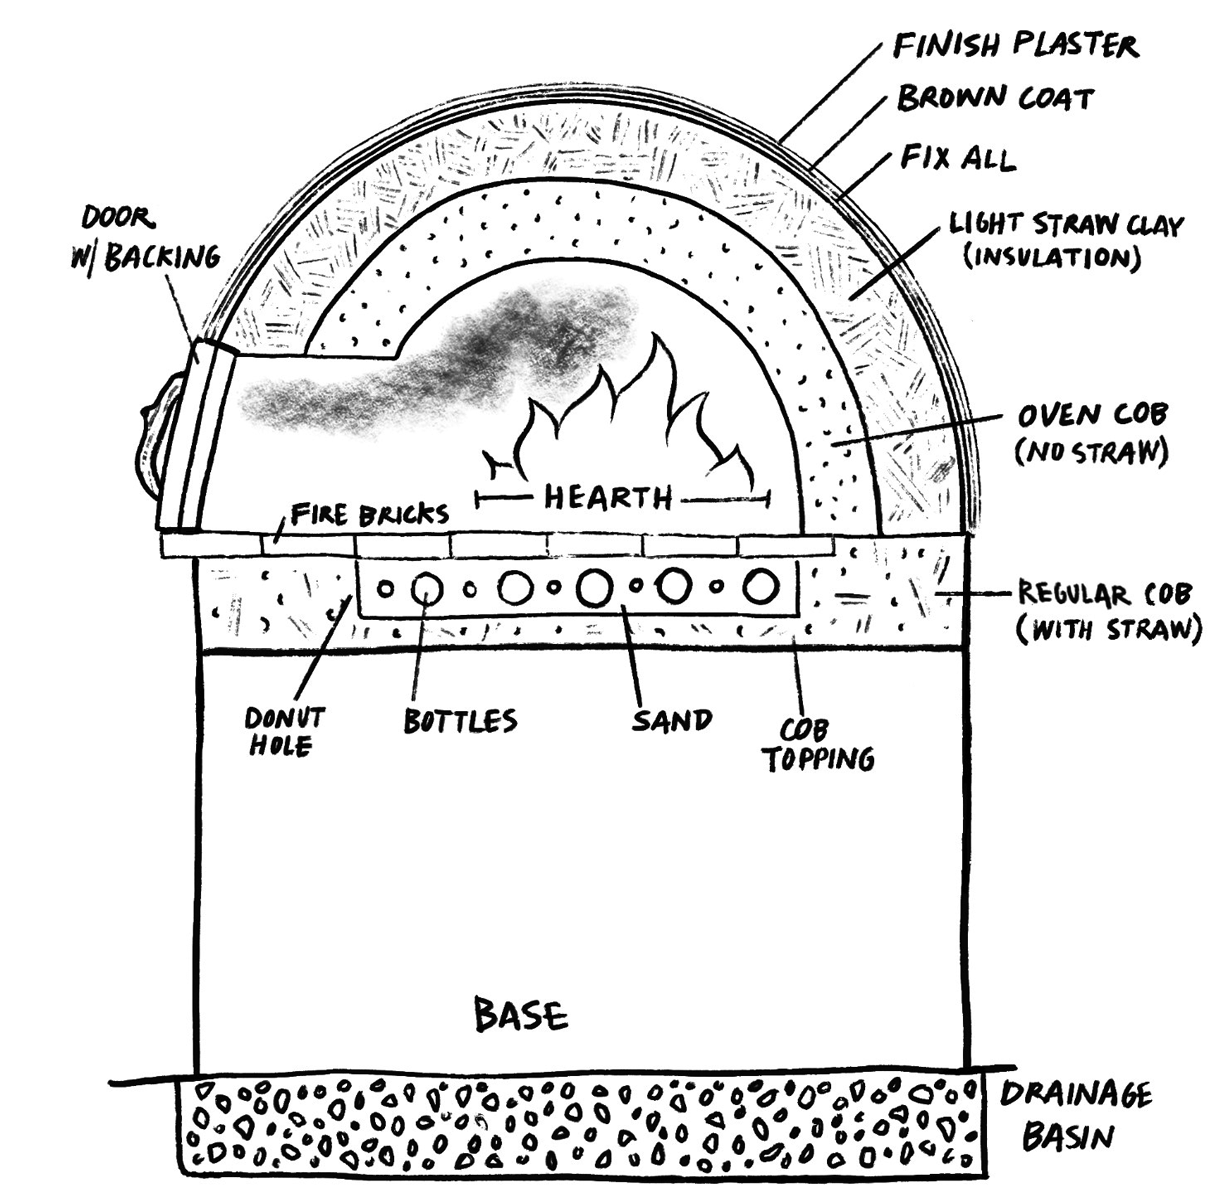
[VISUAL: hand-drawn sketch of an earth oven design with dimensions]
Before you start mixing mud and stacking bricks, careful planning is essential. A well-thought-out plan ensures a smooth and successful earth oven build. Here are the key considerations:
Choosing the Right Location: The ideal location for your earth oven should be a well-drained area that receives plenty of sunlight, which aids in drying the clay. Consider proximity to your house or garden for easy access, but also keep fire safety in mind. Avoid placing the oven too close to flammable structures, and consider the prevailing winds in your area to minimize smoke nuisance. Avoid low-lying areas where water can collect.
Gathering Materials: One of the greatest advantages of an earth oven is its reliance on readily available, often free or recycled materials. The primary ingredients are clay, sand, and straw, which can often be sourced locally. Consider using recycled bricks, stones, or concrete for the base. You might also need wood for a door or metal sheeting to control airflow.
Tools You'll Need: The tools required are generally basic and found in most homesteaders' sheds. You'll need a shovel for digging and mixing, a wheelbarrow for transporting materials, buckets for measuring and mixing, a trowel for applying the cob, a level for ensuring a stable base, and a measuring tape for accurate dimensions. You'll also need to build some kind of form for the inner dome during construction. Sand is common, but wood or other material are viable, too.
Design Considerations: Earth ovens come in various designs, but the dome shape is the most common and easiest to construct for beginners. Consider the size of the oven based on your cooking needs. A smaller oven heats up faster and uses less fuel, while a larger oven can accommodate larger roasts or multiple pizzas.
Safety First: Fire safety is paramount. Clear a wide area around the oven of any flammable materials, and always have a water source nearby. Never leave a fire unattended, and be mindful of wind conditions that could spread embers.
Building the Base and Thermal Mass Layer
[VISUAL: construction of earth oven base with stone and mortar]
The base provides a stable foundation for your earth oven and elevates it to a comfortable working height. The thermal mass layer acts as the oven's heat battery, absorbing and radiating heat for efficient cooking.
The Base: Construct a sturdy base using stone, brick, or concrete. Aim for a height that allows you to comfortably reach inside the oven without bending over excessively – typically waist-high. Adding insulation beneath the base, such as compacted gravel or recycled glass, can further improve heat retention.
Thermal Mass Layer: This layer is made from a mixture of clay, sand, and straw, known as cob. Experiment to determine the proper ratio. It is usually around 1 part clay, 2-3 parts sand, and enough straw to bind it together. Too much clay will cause cracking, while too much sand will make the mixture weak. Test the mixture by forming a small ball; it should hold its shape without crumbling or cracking.
Creating a Sand Form: The easiest way to create the dome shape of the oven is to build a sand form. Pile damp sand into a dome shape, ensuring it’s firm and compact. You can use a template or simply eyeball the shape, aiming for a smooth, even curve. Cover it with damp newspaper to help the cob release later.
Applying the Cob Layer: Apply the cob mixture to the sand form, working from the bottom up. Aim for an even thickness of 4-6 inches. Compact the cob firmly to eliminate air pockets and ensure good thermal mass. Leave an opening for the door.
Constructing the Insulation Layer
[VISUAL: close-up of a hand applying a straw and clay insulation layer to the oven]
The insulation layer is crucial for retaining heat and improving the oven's efficiency.
Purpose of Insulation: The insulation layer reduces heat loss from the oven, allowing it to reach higher temperatures and maintain them for longer periods. This means you'll use less fuel and achieve more consistent cooking results.
The Insulation Mix: The insulation mix is similar to the thermal mass mix, but with a higher proportion of straw. Aim for a mixture of approximately 1 part clay, 1-2 parts sand, and a generous amount of straw. The straw creates air pockets that act as insulation.
Applying the Insulation Layer: Apply a thick layer of the insulation mix over the thermal mass layer, ensuring complete coverage. Aim for a thickness of 4-6 inches.
Drying Time: Allow each layer to dry thoroughly before proceeding to the next. This can take several days or even weeks, depending on the weather conditions. Protect the oven from rain during the drying process.
Building the Door and Chimney (Optional)
[VISUAL: earth oven with a custom-made wooden door and a small brick chimney]
The door controls airflow and heat retention, while a chimney (though optional) can improve draft and reduce smoke.
Door Design: The door should fit snugly in the opening to minimize heat loss. You can use a wooden door, a metal sheet, or even a clay plug.
Creating the Door Arch: Build a strong arch above the door opening using bricks, stones, or cob. This arch supports the weight of the oven structure.
Building a Chimney (Optional): A chimney improves the oven's draft, making it easier to light and maintain a fire. It also helps to direct smoke away from the cook. You can build a simple chimney from bricks or clay.
The Final Clay Plaster and Decorative Touches
[VISUAL: a finished earth oven with a smooth clay plaster, decorative carvings, and colorful tiles]
The final clay plaster protects the oven from the elements and provides a smooth, aesthetically pleasing finish.
The Clay Plaster: The final plaster is made from a mixture of fine clay and sand.
Applying the Plaster: Apply the plaster with a trowel, creating a smooth and even finish.
Decorative Options: Get creative and personalize your earth oven with decorative elements. You can add tiles, carvings, paint, or other natural materials.
Waterproofing Considerations: In rainy climates, adding lime to the plaster can improve its waterproofing properties.
Curing and First Firing
[VISUAL: a small fire burning inside the earth oven during the curing process]
Curing is essential for preventing cracks and ensuring the oven's longevity.
The Curing Process: Allow the oven to dry slowly to prevent cracking.
Initial Small Fires: Build small fires inside the oven to gradually dry the clay.
Monitoring for Cracks: Monitor the oven for cracks and repair them as needed with a mixture of clay and straw.
Increasing Fire Size Gradually: Gradually increase the size of the fires over several days.
Cooking in Your Earth Oven: Tips and Techniques
[VISUAL: close-up of a pizza being pulled out of a glowing earth oven]
Mastering earth oven cooking takes practice, but the results are well worth the effort.
Fuel Options: Use seasoned hardwood for best results.
Heating the Oven: Heat the oven to the desired temperature, typically around 500-700°F for pizza.
Cooking Techniques: Experiment with different cooking techniques, such as baking bread, roasting meats, or cooking vegetables.
Heat Control: Control the heat by adjusting the airflow and using the door.
Recipes: Pizza is often the first thing people try, but it's also good for breads, roasts, and even slow cooking stews or beans in a dutch oven!
Embrace Sustainable Cooking and Delicious Flavors
From the satisfaction of building with your own hands to the unparalleled flavor of wood-fired cuisine, an earth oven offers a truly rewarding homesteading experience. It allows you to reduce your reliance on conventional energy sources, connect with traditional cooking methods, and create delicious, nourishing meals for yourself and your family. So, gather your materials, embrace the mud, and embark on this fulfilling DIY project. You might just find that the simple act of baking in an earth oven transforms your relationship with food and the world around you. There's truly nothing more satisfying than baking food in an oven you've built yourself, from local materials.
Ready to build your own backyard earth oven? Share your questions, experiences, and photos in the comments below! And don't forget to subscribe to the Better Homes and Harvests newsletter for more homesteading tips and project ideas!