Backyard Oasis: Creating a Wildlife Pond on Your Homestead
Do you remember a time when your backyard buzzed with life? When the air hummed with the sound of bees, and the evening chorus was filled with the croaking of frogs? In many modern landscapes, that vibrant symphony has faded, replaced by manicured lawns and sterile environments. But what if you could bring back the magic, create a haven for wildlife right outside your door? Building a backyard wildlife pond is an incredibly rewarding project, one that transforms an empty space into a thriving ecosystem, attracting a diverse array of creatures and enhancing the overall health of your homestead. Even if you have limited space or experience, a small, thoughtfully designed pond can make a world of difference. This guide will provide a step-by-step process, empowering you to build your own backyard oasis.

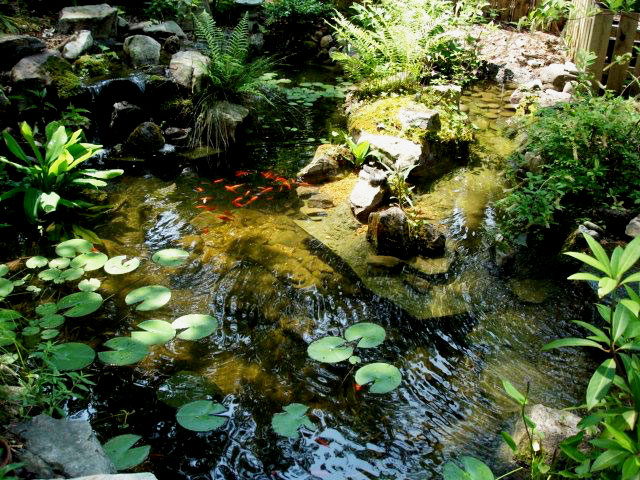
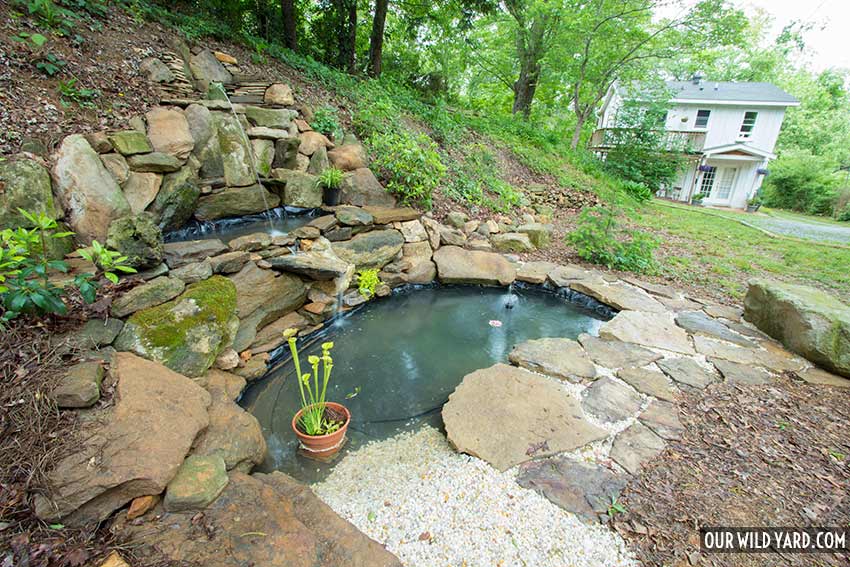
A vibrant backyard pond is a great homesteading backyard project that can support local wildlife.
Section 1: Planning Your Pond: Location, Size, and Depth
Careful planning is the cornerstone of a successful and sustainable wildlife pond. Rushing into the digging phase without considering key factors can lead to problems down the road. By thoughtfully selecting the location, size, and depth of your pond, you'll maximize its benefits for wildlife and minimize maintenance challenges.
Location, Location, Location:
The placement of your pond significantly impacts its success. Consider these factors:
- Sunlight: Aim for at least six hours of direct sunlight per day. Sunlight is essential for aquatic plants to thrive, providing food and oxygen for pond life.
- Proximity to Trees: While a bit of shade is beneficial, avoid locating the pond directly under deciduous trees. Falling leaves can decompose and create excess nutrients, leading to algae blooms and water quality issues.
- Accessibility: Choose a location that's easily accessible for observation and maintenance. You'll want to be able to easily clean the pond, remove debris, and enjoy the wildlife it attracts.
- Underground Utilities: Before you start digging, contact your local utility companies to locate any underground cables or pipes. This is a crucial safety precaution.
- Slope: If your yard has a natural slope, you can use it to your advantage by building a pond that flows downhill.
Size Matters (But Not Too Much):
It’s tempting to dream big, but starting small is often the best approach. A manageable size for a first-time pond builder is around 6ft x 8ft. Remember, even a small pond can be incredibly beneficial for wildlife!
- Scaling Up: Once you’re comfortable with maintaining a small pond, you can always expand it later.
- Yard Size: Consider the size of your yard when determining the pond’s dimensions. A large pond can overwhelm a small yard, while a tiny pond might get lost in a sprawling landscape.
- Water Volume: A larger pond will hold more water, making it less susceptible to temperature fluctuations and water quality problems.
Depth is Key:
Varying depths within the pond are crucial for accommodating different wildlife needs.
- Shallow Areas (6-12 inches): These areas are ideal for frogs, toads, and other amphibians to breed and bask in the sun. Shallow areas also provide habitat for emergent plants.
- Deeper Areas (18-24 inches): A deeper area allows fish and other aquatic life to overwinter in colder climates.
- Safety First: Avoid making the pond too deep. Small animals, such as hedgehogs or squirrels, can easily drown if they fall into a pond that is too deep for them to climb out of. A sloping side or strategically placed rocks can provide an escape route.
Permitting:
Always check with your local municipality or homeowners association to determine if any permits are required for pond construction. Regulations can vary depending on your location.

Planning a backyard pond with proper design and dimensions is a crucial step in the success of your build.
Section 2: Digging and Lining: Building the Foundation
With your planning complete, it’s time to get your hands dirty! Digging and lining are the foundational steps in building a stable and watertight pond.
DIY vs. Professional Help:
- DIY: Digging by hand is a great workout and allows you to customize the pond's shape and depth to your exact specifications. However, it can be time-consuming and physically demanding.
- Professional Help: Hiring a professional excavator can save time and effort, especially for larger ponds. However, it will also increase the overall cost.
Step-by-Step Digging:
- Mark the Perimeter: Use spray paint or rope to mark the outline of your pond.
- Dig the Shallow Areas: Start by digging the shallow areas of the pond, creating gentle slopes.
- Dig the Deeper Areas: Next, dig the deeper areas of the pond, maintaining the desired depth.
- Level the Sides: Use a level to ensure that the sides of the pond are even. This will help prevent the liner from slipping.
- Remove Sharp Objects: Remove any rocks, roots, or other sharp objects that could puncture the liner.
Liner Options:
Choosing the right liner is essential for preventing leaks and ensuring the longevity of your pond.
- Pre-Formed Ponds: Pre-formed ponds are made of rigid plastic and come in various shapes and sizes. They are easy to install, but can be expensive and less customizable.
- Flexible Pond Liners: Flexible pond liners are made of PVC or EPDM rubber. They are more affordable and customizable than pre-formed ponds. EPDM is generally considered the superior choice due to its durability, flexibility, and resistance to UV damage.
- Natural Clay Liners: Using clay to line a pond is a natural and environmentally friendly option, but it requires significant expertise and effort to install properly. It's also not suitable for all soil types.
- Underlayment: Regardless of the liner you choose, always use an underlayment to protect it from punctures. Underlayment can be made of geotextile fabric, old carpet, or even layers of newspaper.
Securing the Liner:
- Overlap: Extend the liner at least 1 foot beyond the edge of the pond.
- Secure with Rocks: Use rocks or paving stones to secure the liner around the perimeter of the pond.
- Bury the Edges: You can also bury the edges of the liner in a shallow trench to provide extra security.

Digging a pond requires planning, precision and a lot of elbow grease! Proper depth is vital for the creatures that will inhabit the pond.
Section 3: Planting for Life: Creating a Balanced Ecosystem
Plants are the heart of a thriving pond ecosystem. They provide food, shelter, and oxygen for aquatic life, while also helping to filter the water and prevent algae blooms.
Native Plants are Best:
Using native plants is crucial for supporting local wildlife. Native plants are adapted to the local climate and soil conditions, and they provide the best food and habitat for native insects, amphibians, and birds.
- Avoid Invasive Species: Never introduce invasive species to your pond. Invasive plants can quickly spread and outcompete native plants, disrupting the ecosystem.
Planting Zones:
Different plants thrive in different areas of the pond. Understanding the different planting zones will help you choose the right plants for your pond.
- Submerged Plants: These plants live entirely underwater and provide oxygen for aquatic life. Examples include elodea, hornwort, and eelgrass.
- Emergent Plants: These plants grow with their roots submerged and their leaves and stems above the water. Examples include cattails, bulrushes, and pickerelweed.
- Marginal Plants: These plants grow along the edges of the pond in moist soil. Examples include irises, ferns, and sedges.
- Terrestrial Plants: These plants grow on the bank of the pond. Select plants that thrive in damp conditions.
Oxygenating Plants:
Oxygenating plants are essential for maintaining water quality. They produce oxygen during photosynthesis, which helps to keep the water clear and healthy. Elodea ( Elodea canadensis ) is an easy oxygenating plant to start with [1].
Creating Shelters:
Provide shelter for wildlife by adding rocks, logs, and submerged branches to the pond. These structures will provide hiding places for frogs, fish, and other aquatic creatures.

Native plants such as the Iris are a great option when stocking a backyard pond.
Section 4: Attracting Wildlife: Making Your Pond Irresistible
Building a pond is only the first step. The real magic happens when wildlife starts to move in! Here's how to make your pond an irresistible haven for local creatures.
Gradual Introduction:
Be patient! It takes time for wildlife to discover the pond and establish themselves. Don't be discouraged if you don't see frogs and dragonflies right away.
Creating Ramps:
Provide easy access for animals that might accidentally fall into the pond. A ramp made of rocks, a piece of wood, or even a pile of gravel can help them climb out.
Avoiding Pesticides:
This is crucial! Emphasize the importance of avoiding pesticides and herbicides near the pond to protect wildlife. These chemicals can be harmful or even fatal to aquatic life.
Water Source:
Place a shallow dish of water nearby, especially during dry periods. This will provide a source of drinking water for birds and other animals.
Adding Sounds:
The sound of running water can be incredibly attractive to wildlife. Consider adding a small fountain or waterfall to your pond. This will also help to aerate the water and prevent stagnation.
Section 5: Maintaining Your Wildlife Pond: Keeping It Healthy
A little regular maintenance will keep your wildlife pond thriving for years to come.
Water Quality Monitoring:
Monitor the water quality regularly. If the water becomes cloudy or green, it may be a sign of an algae bloom.
Leaf Removal:
Remove fallen leaves and other debris from the pond regularly. Decaying organic matter can deplete oxygen levels and create excess nutrients.
Predator Control:
While a balanced ecosystem will naturally regulate predator populations, you may need to take steps to protect your pond from certain predators, such as herons or raccoons. Consider using netting or a scarecrow to deter these animals.
Seasonal Tasks:
- Spring: Prune plants, remove excess sediment, and add beneficial bacteria to the pond.
- Summer: Monitor water quality and remove algae as needed.
- Fall: Remove fallen leaves and prepare the pond for winter.
- Winter: Ensure that there is a hole in the ice to allow for gas exchange. You can use a pond heater or a floating ball to keep the ice from freezing solid.
Adding Beneficial Bacteria:
Consider adding beneficial bacteria to the pond to help break down organic matter and improve water quality.

Routine maintenance and water quality monitoring are critical to maintaining the health of your backyard pond.
Building a wildlife pond is more than just digging a hole in the ground and filling it with water. It's about creating a balanced ecosystem that supports a diverse array of life. As you watch your pond transform from an empty space into a bustling hub of activity, you'll experience the incredible rewards of connecting with nature right in your own backyard. Even small efforts can make a big difference in creating a healthier environment for wildlife. As summer winds down, now is the perfect time to start planning your pond so you can enjoy it next spring.
Call to Action:
- Share your own wildlife pond experiences in the comments below!
- What are your favorite native plants for attracting pollinators to your garden?
- Tag us in pictures of your backyard ponds on Instagram using #BetterHomesAndHarvestsPond.
- Subscribe to our newsletter for more tips on sustainable homesteading and seasonal living.
[1] "Elodea." Britannica, https://www.britannica.com/plant/Elodea