Backyard Bounty: Build a Root Cellar for Under $300

Remember that feeling of pure satisfaction after a bountiful harvest from your garden? The vibrant colors of plump tomatoes, the earthy scent of freshly dug potatoes, and the crisp crunch of newly picked apples. It’s a feeling every homesteader cherishes. But then reality sets in: How are you going to store all this bounty without resorting to expensive refrigeration and freezer space? Or, even worse, having to buy the same produce at the grocery store that you just grew! Store-bought food is only continuing to rise in price, so preserving your harvest is a critical aspect of becoming more self sufficient.
That's where the humble root cellar comes in. For centuries, root cellars have been the unsung heroes of food preservation, offering a natural, energy-efficient way to extend the life of your harvest. But in today's world of urban and suburban homesteading, the idea of a traditional, sprawling root cellar can seem daunting. Don't worry! You don't need acres of land to enjoy the benefits of cool, stable storage. This post will guide you through building a small, budget-friendly root cellar that's perfect for various homestead sizes, even those with limited space in their backyards. We'll be focusing on readily available and, better yet, repurposed materials to keep costs down and your self-sufficiency goals high. Get ready to learn how to extend your harvest and embrace a more resilient lifestyle, one root cellar at a time!
Section 1: Planning Your Mini Root Cellar

Before you even think about digging, a little planning goes a long way in ensuring your root cellar is both effective and compliant with local regulations. Here's what to consider:
Site Selection: The ideal location for a root cellar is a cool, dark, and consistently damp environment. Traditionally, a north-facing slope was preferred, as it remains shaded throughout the day. However, if you're working with a smaller urban or suburban lot, think creatively. The area under a deck, or even against a foundation wall, can provide a suitable environment. If you don't have direct contact with soil, you'll have to simulate earth with insulation materials. Consider where your property remains the coolest through out the hottest months of the year.
Size and Capacity: Determine how much storage space you realistically need based on your garden's yield and your family's consumption habits. A good starting point is to estimate how many bushels of root vegetables you typically harvest. As a rough guide, a 4'x4'x4' cellar can hold approximately 20-25 bushels of potatoes. Start small; you can always expand later!
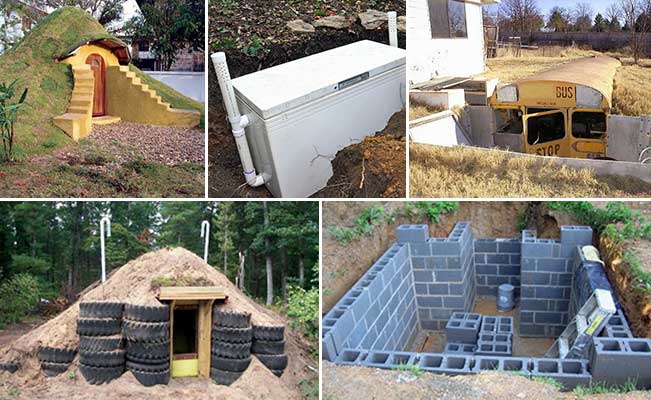
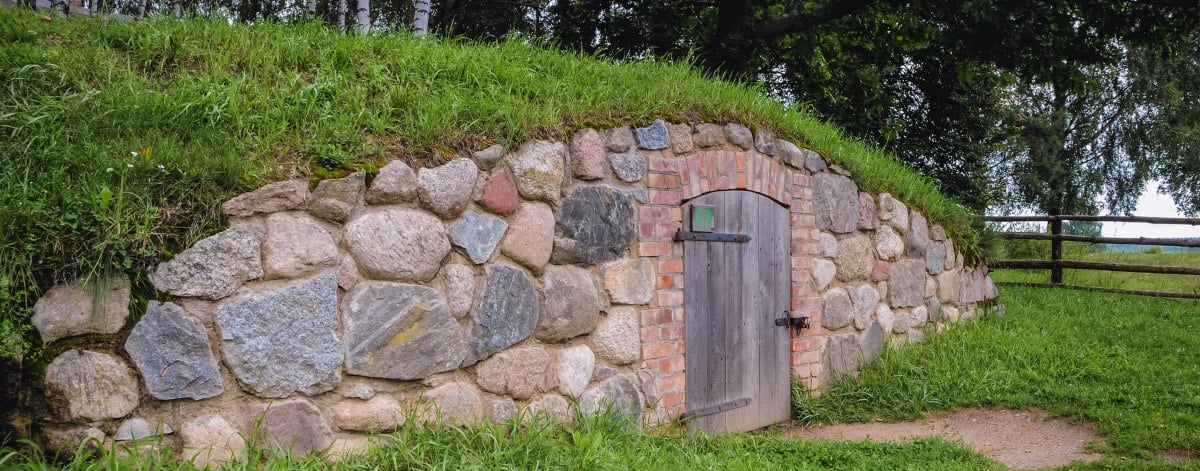
Design Considerations: There are several types of root cellars to choose from: in-ground, partially buried, and even above-ground structures with earth berming (piling soil against the walls for insulation). For beginners and those on a budget, a partially buried or even above-ground design is generally easier to construct. Our project will focus on a simple, adaptable design using readily available materials.
Permits & Regulations: This is crucial! Always check with your local zoning department and homeowner's association (HOA) before starting any excavation or construction project, especially if it involves underground structures. You don't want to invest time and money only to be forced to dismantle your hard work due to code violations. Nobody wants that!
Key Takeaway: Proper planning is essential for a successful and compliant root cellar project.
Section 2: Gathering Your Materials (Budget-Friendly Focus)

Now for the fun part: gathering your materials! Here's a list of what you'll need, with a strong emphasis on budget-friendly alternatives:
Material List:
- Lumber (for framing, shelving, and the door/hatch)
- Cinder blocks or bricks (for the walls, if opting for a partially buried or above-ground design)
- Gravel (for drainage)
- Insulation (rigid foam board, or materials for earth berming)
- Ventilation pipe (PVC pipe will work)
- Door or hatch (can be repurposed)
- Roofing material (tarps, reclaimed metal roofing, or even heavy-duty plastic sheeting)
Budget-Friendly Alternatives: The key to keeping this project under $300 is resourcefulness!
- Reclaimed Lumber: Scour construction sites (with permission!), demolition projects, and online marketplaces like Craigslist or Facebook Marketplace for free or low-cost lumber. Be cautious of nails, screws, and potentially harmful chemicals. Always wear gloves and eye protection when handling reclaimed wood. Pressure treated lumber is fine for earth contact.
- Repurposed Cinder Blocks/Bricks: Look for used cinder blocks or bricks on classified ads. Cleaning them with a wire brush and some soapy water will make them look presentable. Remember to wear gloves and a mask during cleaning.
- Free Gravel/Stone: Check with local quarries or landscaping companies; they may have leftover gravel or stone that they're willing to give away. Crushed concrete can also work.
- Old Doors/Windows: Re-purposing an old door or window for the entrance can save a lot of money. Check with local salvage yards or ask friends and neighbors if they have any lying around.
Cost Breakdown (Estimated):
- Lumber: $100 (if using reclaimed, could be significantly less)
- Cinder Blocks/Bricks: $50 (reclaimed could be free)
- Gravel: $20 (potentially free if sourced locally)
- Insulation: $50 (rigid foam board)
- Ventilation Pipe: $10 (PVC pipe)
- Door/Hatch: $50 (reclaimed)
- Roofing Material: $20 (heavy-duty plastic sheeting)
- Total: $300 (This is an estimate; your actual costs may vary depending on material sourcing.)
Key Takeaway: Saving money on your root cellar project is definitely possible with a little resourcefulness and a focus on repurposed materials.
Section 3: Step-by-Step Construction Guide
Now for the construction phase! We'll assume a partially buried root cellar design using cinder blocks or reclaimed bricks for the walls. Remember, adapt these instructions to your specific design and materials.
Step 1: Excavation:
- Dig a hole to the desired dimensions, ensuring proper drainage by sloping the bottom slightly. Add a 4-6 inch layer of gravel to the bottom for drainage. This is vital.
- Safety First: Call 811 (in the US) or your local equivalent to locate underground utilities before you dig.
- Image: Progress photos of the excavation process, showing the gravel base being laid.
Step 2: Building the Walls:
- Lay the cinder blocks or bricks, ensuring they are level. Use mortar to bind the blocks together, creating solid, weather-resistant walls. If using reclaimed bricks, clean off old mortar first!
- Apply a waterproof sealant to the exterior of the walls to prevent moisture from seeping in.
- Image: Photo of the cinder block or framed wall construction, detailing how to ensure the wall is plum.
Step 3: Adding Insulation:
- Cut rigid foam board to fit the exterior walls. Attach the insulation using construction adhesive.
- Consider earth berming around the walls for added insulation. This involves piling soil against the exterior walls to a depth of at least one foot.
- Image: Shows how insulation is applied on the walls exterior before earth berming or backfilling.
Step 4: Installing Ventilation:
- Install a PVC ventilation pipe that extends from near the floor of the cellar to above ground level. This allows for air circulation, preventing moisture buildup and mold growth.
- Ensure the pipe is angled slightly upward to prevent rainwater from entering. Cover the above-ground end with mesh to keep out insects and rodents.
- Image: Shows the ventilation pipe installed with details on where it exits above ground.
Step 5: Building the Roof/Hatch:
- Construct a simple roof or hatch using lumber. Angle the roof to allow for water runoff. Cover the roof with roofing material such as reclaimed metal roofing, heavy-duty plastic sheeting, or even a thick tarp.
- Ensure the roof/hatch is weatherproof and secure.
- Image: Roof/hatch assembly with waterproofing details.
Step 6: Finishing Touches:
- Install a door, if applicable. An old wooden door works well, but ensure it fits snugly to prevent drafts.
- Build storage shelves using lumber.
- Backfill around the structure with soil.
- Image: The completed root cellar with the door/hatch and some filled shelves.
Key Takeaway: Follow these step-by-step instructions carefully, prioritizing safety and accuracy, for a durable and functional root cellar.
Section 4: Maintaining Your Root Cellar
Maintaining your root cellar is crucial for its longevity and the preservation of your produce.
Temperature and Humidity Control: Ideally, a root cellar should maintain a temperature between 32-40°F (0-4°C) and a humidity level of 85-95%. Use a hygrometer and thermometer to monitor conditions. A dry basement will not work well. You need humidity to make the produce last longer.
Ventilation Adjustments: Adjust ventilation based on the season. In the winter, you may need to close off the ventilation pipe partially to prevent freezing. In the summer, open it to allow for air circulation.
Pest Control: Regularly inspect your cellar for signs of rodents, insects, or mold. Use natural pest control methods, such as diatomaceous earth, to deter pests. Make sure the door fits well and seal any holes.
Regular Cleaning: Periodically clean the cellar to remove any spoiled produce or debris. This helps prevent the spread of mold and bacteria.
Image: Inside view of a well-organized root cellar with proper ventilation and hygrometer showing humidity level.
Key Takeaway: Regular maintenance is crucial for extending the lifespan of your root cellar and preserving your harvest.
Section 5: Storing Your Harvest
Proper storage is just as important as building the root cellar itself!
Storage Guidelines: Different types of produce require different storage conditions.
- Potatoes: Store in a dark, cool, and humid environment.
- Carrots: Store in damp sand or sawdust to maintain moisture.
- Apples: Store separately from other produce, as they release ethylene gas, which can accelerate ripening.
- Onions & Garlic: Need to be dried/cured prior to storing. Hang in mesh bags in a cool, dry, well-ventilated area. Don't store in same area as fruits or potatoes as the odor will negatively affect the flavor.
Proper Preparation: Clean, cure (for onions and garlic), and sort your produce before storing it. Remove any damaged or bruised items, as they can spoil quickly.
Storage Methods: Layering in sand, hanging in mesh bags, and stacking on shelves are all effective storage methods.
Troubleshooting Spoiled Produce: Regularly inspect your stored produce and remove any items that show signs of spoilage. This helps prevent the spread of mold and bacteria to other items.
Image: Root cellar shelving with different vegetables stored properly using sand and other preservation methods.
Key Takeaway: Knowing how to properly store different types of produce is essential for maximizing your harvest and minimizing waste.
Conclusion: Embracing Self-Sufficiency, One Root Cellar at a Time

Building a root cellar, even a small one, is a tangible step towards greater self-sufficiency. It reduces your reliance on store-bought produce, saves energy by eliminating the need for excessive refrigeration, and provides a sense of food security.
Don't be afraid to experiment and adapt this project to your specific needs and resources. Whether you're a seasoned homesteader or just starting out, a root cellar is a valuable addition to any sustainable lifestyle. Every effort counts toward minimizing waste and increasing the benefits of each harvest.
So, roll up your sleeves, gather your materials, and embark on this rewarding DIY project. You'll be amazed at the difference a simple root cellar can make in your homesteading journey.
Call to Action:
- Share your own root cellar building experiences in the comments below!
- Subscribe to the Better Homes and Harvests newsletter for more homesteading tips and projects.
- Share photos of your own root cellar projects on social media using the hashtag #BHHRootCellar.
- Check out our other articles on homesteading, gardening, and food preservation on the Better Homes and Harvests website.
- This post contains affiliate links. As an Amazon Associate, we earn from qualifying purchases. Check out this trowel perfect for small excavation jobs.