Autumn's Palette: Crafting Hand-Dyed Ornaments from Nature's Bounty
The air is crisp, the leaves are ablaze with color, and the scent of woodsmoke hangs gently in the air. Autumn has arrived, bringing with it a slower pace and a longing for connection – a connection to the earth, to our families, and to traditions that nourish the soul. As the days grow shorter, it's tempting to succumb to the lure of pre-packaged holiday cheer, filling our homes with mass-produced decorations. But this year, let's embrace a different path – one that celebrates the beauty of the season and the joy of creating with our own hands.
This year, we’re diving into the world of natural dyes and foraged treasures to craft unique, hand-dyed ornaments that capture the essence of autumn. This isn't just a craft project; it's an invitation to slow down, reconnect with nature, and create meaningful keepsakes that will be cherished for years to come. It's a chance to trade consumerism for creativity, and plastic for the poetry of the natural world.

Foraging for Color: Gathering Your Natural Dye Materials
The first step in our autumn ornament adventure is a walk in the woods (or your backyard!). The beauty of this project lies in its inherent seasonality and adaptability. What grows abundantly in your area will dictate the colors you can create.
Here are a few ideas to get you started, keeping in mind that local regulations may apply when foraging, and proper identification of plants is crucial to avoid anything poisonous:
- Leaves: Maple leaves (reds, oranges, yellows), oak leaves (tans, browns), walnut hulls (deep browns)
- Berries: Elderberries (purples), pokeberries (reds/purples - use with extreme caution and gloves as they are toxic), blackberries (pinks/purples)
- Flowers: Marigolds (yellows, oranges), goldenrod (yellows)
- Other: Onion skins (yellows, oranges), coffee grounds (browns), tea bags (tans)
Remember, the colors you achieve will vary depending on the plant, the mordant (more on that later!), and the dyeing process. Embrace the unpredictability and enjoy the unique results!
Choosing Your Canvas: Selecting Natural Fibers
The best fabrics for natural dyeing are, unsurprisingly, natural fibers. These fibers readily absorb the dyes, creating vibrant and lasting colors.
- Cotton: An inexpensive and readily available option. Look for unbleached cotton muslin or canvas.
- Linen: A stronger and more durable option, linen adds a beautiful texture to your ornaments.
- Wool: Wool takes dye beautifully and provides a lovely, felted texture. Felt scraps are perfect for this project.
- Silk: While more delicate and expensive, silk yields incredibly rich and vibrant colors.
Cut your chosen fabric into desired ornament shapes. Simple circles, squares, stars, or even leaf shapes work well. Remember to leave a small allowance for seams if you plan to sew them closed.
The Magic of Mordants: Preparing Your Fabric
A mordant is a substance that helps the dye bind to the fabric, resulting in stronger, more colorfast results. Think of it as a bridge between the dye and the fiber.
Here are a couple of common, relatively safe mordants (always use caution and proper ventilation when working with chemicals):
- Alum (Aluminum Potassium Sulfate): A commonly used mordant that helps brighten colors. Use at a rate of 2 tablespoons per pound of fabric.
- Vinegar: A gentler option, vinegar can be used to pre-soak your fabric before dyeing. Use 1/2 cup of vinegar per gallon of water.
To mordant with alum:
- Dissolve the alum in hot water.
- Add your fabric to the mordant bath, ensuring it is fully submerged.
- Simmer for 1 hour, stirring occasionally.
- Allow the fabric to cool in the mordant bath.
- Rinse thoroughly with cool water and allow to dry.
To mordant with vinegar:
- Soak your fabric in a solution of vinegar and water for at least 1 hour, or preferably overnight.
- Wring out the excess vinegar solution. Do not rinse.
The Dyeing Process: Unleashing Nature's Colors
Now for the fun part! This is where the magic truly happens.
- Prepare your dye bath: Chop or crush your foraged materials and place them in a large pot. Add enough water to cover the materials and your fabric.
- Simmer the dye: Bring the dye bath to a simmer and let it cook for at least an hour, or even longer for a more intense color. The longer it simmers, the more pigment will be released.
- Strain the dye (optional): If you prefer a cleaner dye bath, strain the mixture through cheesecloth or a fine-mesh sieve.
- Add your fabric: Wet your mordanted fabric and gently add it to the dye bath, ensuring it is fully submerged.
- Simmer and stir: Simmer the fabric in the dye bath for at least an hour, stirring occasionally to ensure even dyeing. The longer it simmers, the deeper the color will become.
- Cool and rinse: Turn off the heat and allow the fabric to cool in the dye bath. Once cool enough to handle, rinse thoroughly with cool water until the water runs clear.
- Dry: Hang your dyed fabric to dry, away from direct sunlight.

Embellishing Your Creations: Adding Natural Touches
Once your fabric is dry, it's time to transform it into beautiful ornaments. Here are a few ideas:
- Sewing: Cut out desired shapes and sew two pieces together, leaving a small opening for stuffing. Stuff with cotton batting, wool scraps, or even dried herbs for a fragrant touch. Add a loop of twine or ribbon for hanging.
- Embroidery: Embellish your ornaments with simple embroidery stitches using natural thread.
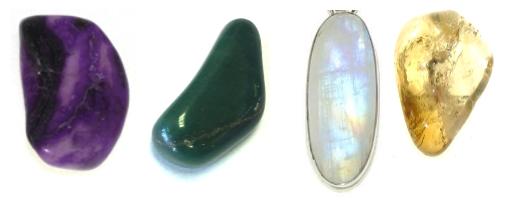
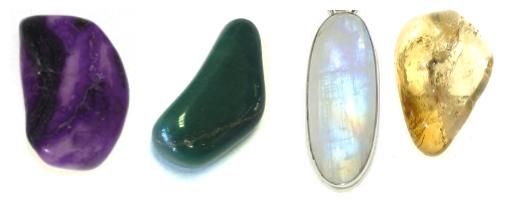
- Natural accents: Glue on dried flowers, seed pods, small twigs, or even foraged crystals for added texture and visual interest.
- Wood Burning: Carefully use a wood-burning tool to add designs or inscriptions to wooden ornaments.
- Beeswax Coating: Dip ornaments into melted beeswax to give them a rustic, waterproof finish.
A Sustainable Celebration: Adorning Your Home
Hang your handmade ornaments on your Christmas tree, string them together to create a garland, or use them to adorn wreaths and other holiday decorations. These ornaments are more than just decorations; they are a reflection of your connection to nature, your creativity, and your commitment to sustainable living. Each one holds a story, a memory of the foraging trip, the simmering dye pot, and the joy of creating something beautiful with your own hands. They are a tangible reminder that the most meaningful gifts are often those that are made with love and intention, rather than purchased from a store.

This autumn, let's embrace the spirit of slow living and sustainable crafting. Let's fill our homes with the beauty of nature and the warmth of handmade treasures. Let's create traditions that honor the earth and nourish our souls.
We'd love to see your own autumn crafting projects! Share your creations on social media using the hashtag #BHHandHarvestsAutumn, and let's inspire each other to embrace the beauty of the season and the joy of sustainable living. Happy crafting!