
Autumn's Embrace: Spiced Apple Butter Biscuits, Root Cellar Dreams, and Bokashi Magic
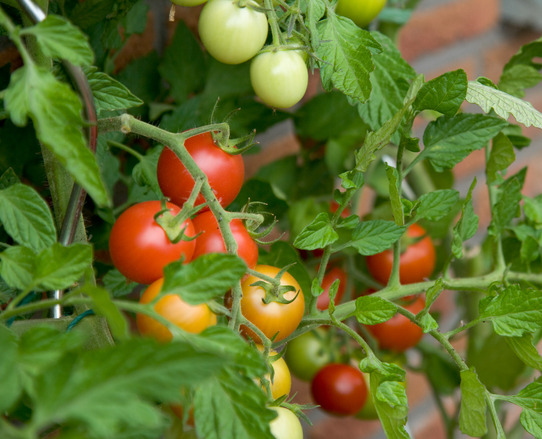
The crisp air of autumn carries a whisper of woodsmoke and the scent of fallen leaves. The vibrant tapestry of maple and oak against a cerulean sky is a breathtaking reminder of nature's fleeting beauty. There's a primal instinct that kicks in this time of year, a need to prepare our homesteads for the coming winter chill. The satisfaction of harvesting the last of the 'Honeycrisp' apples, their skins glistening with a light frost, is unmatched, followed by the even greater satisfaction of preserving the season's bounty. And what better way to celebrate the harvest than with warm, comforting Spiced Apple Butter Biscuits with Maple Glaze? These biscuits aren't just a treat; they're a taste of autumn, a little warmth for the soul. But our autumn preparations don't stop in the kitchen. We'll also delve into constructing a simple root cellar using repurposed materials, and explore the magic of Bokashi composting – practical ways to fully embrace the essence of autumn and make our homestead more sustainable.
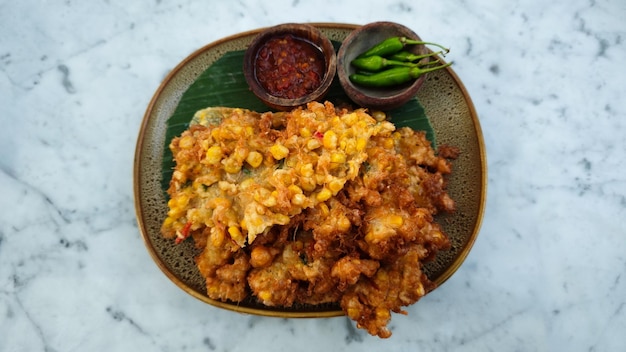
Section 1: Spiced Apple Butter Biscuits with Maple Glaze
A Taste of Autumn Warmth
I have such warm memories of making apple butter each fall with my family. We'd start with apples picked directly from our small family orchard, the air thick with the sweet, tangy aroma. We’d simmer those apples for hours, stirring in spices that filled the whole house with their comforting scent. That homemade apple butter wasn't just a spread; it was a tradition, a tangible expression of love, a jar filled with sunshine and shared around a crackling fireplace, each spoonful a memory in the making. Today, I'm sharing that legacy with you, in the form of these delectable Spiced Apple Butter Biscuits.
Ingredients
For the Spiced Apple Butter:
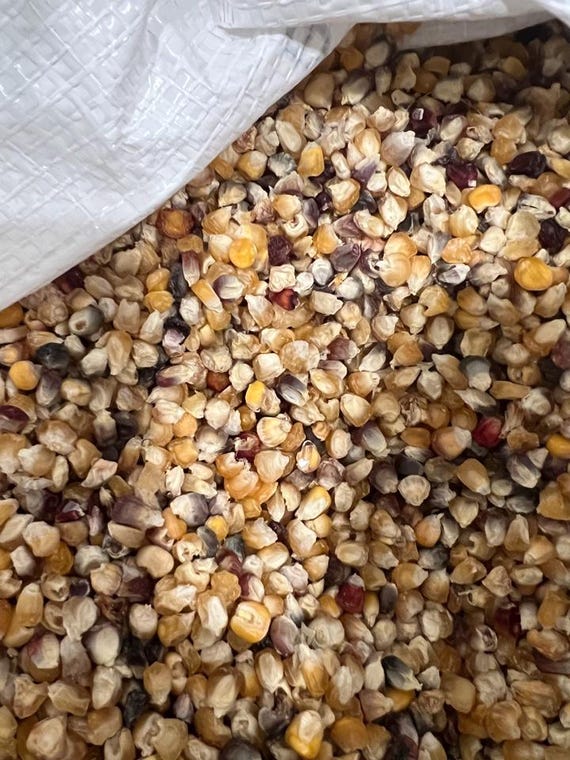
- 'Honeycrisp' Apples (6 lbs, peeled, cored, and chopped into ½-inch pieces)
- Granulated Sugar (2 cups, preferably organic cane sugar)
- Apple Cider Vinegar (1/4 cup, Bragg's brand recommended)
- Ground Cinnamon (2 tsp, Ceylon cinnamon preferred)
- Ground Nutmeg (1 tsp, freshly grated)
- Ground Cloves (1/2 tsp)
- Sea Salt (1/4 tsp, fine ground)
For the Biscuits:
- Unbleached All-Purpose Flour (2 cups, King Arthur brand recommended)
- Baking Powder (4 tsp, aluminum-free)
- Sea Salt (1/2 tsp, fine ground)
- Unsalted Cold Butter (1/2 cup, Kerrygold brand recommended, cut into ½-inch cubes)
- Spiced Apple Butter (1/2 cup, homemade)
- Whole Milk (3/4 cup, organic)
For the Maple Glaze:
- Powdered Sugar (1 cup, sifted)
- Pure Maple Syrup (2 tbsp, Grade A dark amber)
- Whole Milk (1-2 tbsp, adjust for consistency to achieve a smooth, pourable glaze)
Instructions
Make the Spiced Apple Butter: Combine all ingredients in a 6-quart slow cooker. Cook on low heat for 8-10 hours, or until the apples are very soft and the mixture has significantly thickened, stirring occasionally. Blend with an immersion blender until smooth. Alternatively, use a food mill for a chunkier texture.
Prepare the Biscuits: Preheat oven to 425°F (220°C). In a large mixing bowl, whisk together the flour, baking powder, and salt. Cut in the cold butter using a pastry blender or your fingers until the mixture resembles coarse crumbs, ensuring no large chunks of butter remain. Gently stir in the Spiced Apple Butter until evenly distributed, then gradually add the milk until the dough just comes together, being careful not to overmix.
Shape and Bake: Turn the dough out onto a lightly floured surface and pat it into a 3/4-inch thick circle. Cut out biscuits using a 2-inch fluted biscuit cutter. Place the biscuits on a baking sheet lined with parchment paper, leaving a small space between each. Bake for 12-15 minutes, or until golden brown and slightly risen.
Make the Maple Glaze: In a medium bowl, whisk together the sifted powdered sugar, pure maple syrup, and milk until smooth and free of lumps. Add more milk, one teaspoon at a time, until the desired consistency is achieved.
Glaze and Enjoy: Drizzle the warm biscuits generously with the maple glaze immediately after removing them from the oven. Serve warm and savor the taste of autumn!
Tip: Feel free to adjust the spices in the apple butter to your personal preferences. A pinch of cayenne pepper can add a delightful spicy kick! If 'Honeycrisp' apples are unavailable, 'Gala' or 'Fuji' apples make excellent substitutes.
Section 2: Building a Simple Root Cellar
Preserving the Harvest: A DIY Root Cellar
As homesteaders, we understand the importance of preserving the fruits (and vegetables!) of our labor. A root cellar is an invaluable tool for extending the shelf life of our fall harvest. It provides a naturally cool and humid environment, maintaining optimal temperature and humidity levels for long-term storage without relying on electricity. This allows us to enjoy our homegrown produce throughout the winter months, reducing our reliance on store-bought options and promoting self-sufficiency.
Materials
- Standard-sized concrete blocks (approximately 100 blocks, depending on the desired size of the root cellar)
- Reclaimed wood planks (various sizes, for the roof structure and shelving)
- Gravel (approximately 2 cubic yards, for drainage)
- Heavy-duty Plastic Sheeting or Tarps (10 mil thickness, to cover the roof and walls for waterproofing)
- Topsoil (for covering the roof for insulation)
- Solid-core Exterior Door (32 inches wide)
- Concrete Mortar Mix (for securing the concrete blocks)

Step-by-Step Instructions
- Choose the Location: Select a shady location with naturally good drainage, ideally on a slight slope.
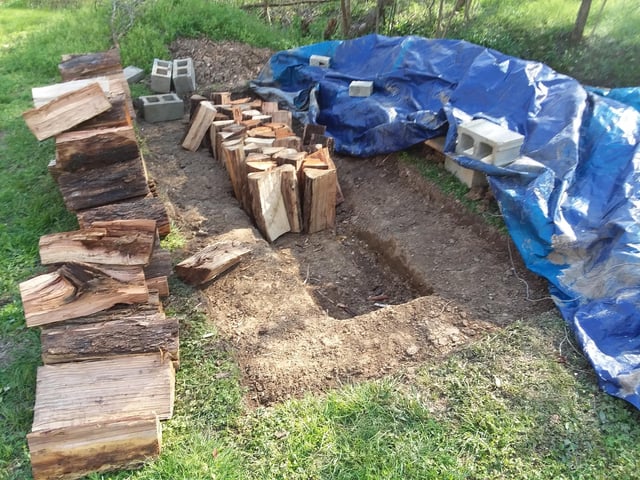
- Excavate: Excavate a hole approximately 6 feet deep, 8 feet wide, and 10 feet long.
- Drainage: Level the bottom of the excavation and add a 6-inch layer of gravel for drainage.
- Build the Walls: Construct the walls of the root cellar using the concrete blocks, laying them in a staggered pattern and securing them with concrete mortar mix. Ensure that you leave space for ventilation near the top of the walls.
- Build the Roof: Build a sloped roof using the reclaimed wood planks, ensuring it overhangs the walls to prevent water from entering.
- Waterproof: Cover the wood roof with heavy-duty plastic sheeting or tarps to provide a waterproof barrier.
- Insulate: Cover the plastic sheeting with at least 2 feet of topsoil for insulation.
- Install the Door: Install the solid-core exterior door, ensuring it is tightly sealed to prevent pest entry and maintain a stable temperature inside the root cellar.
Visual Cue: The Root Cellar should be built with a depth of at least 4 feet underground to maintain a consistent temperature range between 32°F and 40°F (0°C and 4°C), but the deeper it is, the more consistent the internal temperature will remain throughout the year.

Section 3: Bokashi Composting: Fermenting Food Waste
Composting Made Easy: Bokashi for the Homestead
Bokashi composting is a game-changer for the homestead! Unlike traditional composting, Bokashi allows you to compost all food waste, including meat, dairy products, and cooked foods, without the unpleasant odors. It's a fermentation process that preserves nutrients and produces nutrient-rich compost tea, an excellent natural fertilizer for your garden. It's a truly sustainable solution for reducing waste and enriching your soil.
Materials
- Bokashi Bran (approximately 5 lbs, purchase from a reputable supplier)
- Two Airtight Food-Grade Buckets with Lids (5-gallon capacity, one with a spigot)
- Food Scraps (all types, including meat, dairy, and cooked food)
Instructions
- Layer Food Scraps and Bran: Begin by placing food scraps into one of the airtight buckets. Sprinkle each layer of food scraps generously with Bokashi bran, using approximately 2 tablespoons of bran per cup of food scraps.
- Press and Seal: Press down firmly on the food scraps after each addition to remove any air pockets. Repeat this process until the bucket is nearly full. Seal the bucket tightly with the lid.
- Drain Compost Tea: Every few days, drain the leachate (compost tea) through the spigot and dilute it with water at a ratio of 1:100 to use as a potent fertilizer for your garden plants.
- Ferment: Once the first bucket is full, allow it to ferment for a minimum of 2 weeks in a cool, dark place.
- Bury or Compost: After the fermentation period, bury the fermented waste directly in your garden soil or add it to a traditional compost pile. The fermented waste will break down rapidly, enriching the soil and providing valuable nutrients for your plants.
Closing Reflection
As the days grow shorter and the nights grow cooler, let's embrace the slow, deliberate rhythms of homesteading. There's a deep satisfaction in preparing our homes and gardens for the approaching winter months, a sense of connection to the land that nourishes us. Remember, even small, incremental steps towards self-sufficiency, such as making spiced apple butter, building a simple root cellar, or adopting Bokashi composting, can collectively create a significant positive impact on the environment and enhance our connection to the land.
Now, I'd love to hear from you! Share your own experiences, tips, and insights regarding root cellars, Bokashi composting, and creative apple recipes in the comments section below. Let's foster a sense of community and shared learning as we journey through this beautiful autumn season together.
Keywords: organic gardening, seasonal harvest, homegrown, spiced apple butter biscuits, compost, sustainable home, cozy living, backyard projects, farmhouse life, root cellar, Bokashi composting, apple butter, maple glaze, Autumn Homesteading, Root Cellar DIY, Spiced Apple Butter Biscuits, Food Preservation Techniques, Homemade Apple Butter Recipe, Bokashi Composting for Beginners, DIY Winter Food Storage, Seasonal Fall Baking, Building a Root Cellar, Sustainable Homesteading Practices, How to Build a Cheap Root Cellar, Easy Spiced Apple Butter Biscuit Recipe, Bokashi Composting with Food Scraps, Best Apples for Homemade Apple Butter, Winter Food Storage for Small Homestead, Repurposed Root Cellar Building Materials, Simple Root Cellar Design for Beginners, Bokashi Composting Benefits for Gardens, Homemade Spiced Apple Butter with Maple Syrup, Autumn Baking Recipes for Homesteaders, Honeycrisp Apple Butter Biscuit Recipe, How to Preserve Food for Winter Without Canning, Harvest Preservation, Fermentation, Soil Enrichment, Autumn Recipes, DIY Food Storage, Homestead Skills, Seasonal Cooking, Compost Tea, How do I build a root cellar cheaply?, What are the benefits of Bokashi composting?, What is the best way to store food for winter?, How do you make spiced apple butter at home?, Can I use Bokashi compost in my garden?