Autumn's Embrace: Preparing Your Seed Starting Station Now
[VISUAL: cozy autumn homestead indoor seed starting]
A warm, inviting indoor space with autumn light filtering in, showcasing a seed starting setup. Trays of seedlings are thriving under grow lights, with fall foliage visible through the window.
As the days shorten and the leaves begin their fiery descent, our thoughts often turn to cozy evenings, warm drinks, and the promise of the holiday season. But for the avid gardener and homesteader, autumn whispers another secret: it’s time to prepare for spring. While the world outside winds down, the seeds of future bounty can be sown indoors, giving you a head start on a thriving spring garden.
We're talking about proactively setting up your seed starting station during these quieter autumn months. Forget the last-minute frenzy of spring! By getting organized now, you’ll increase your success rates, extend your growing season, and enjoy a far more relaxed and rewarding approach to spring gardening.
In this guide, we'll walk you through everything you need to do to establish your perfect seed starting sanctuary this autumn, from choosing the ideal location and lighting to creating sustainable watering systems and sourcing quality seeds. We’ll focus on resourcefulness, repurposing, and simple, actionable steps rooted in slow-living principles. Get ready to embrace the autumn embrace and sow the seeds of a flourishing spring!
Key Takeaway: Starting now means a more successful, less stressful spring.
Section 1: Finding Your Perfect Seed Starting Sanctuary
[VISUAL: sunroom full small seed trays autumn]
A bright and sunny sunroom filled with multiple seed trays, each containing various seedlings. The autumn sunlight streams through the windows, creating a warm and inviting atmosphere.
The first step in preparing your seed starting station is to identify the perfect location. Ideally, you’re looking for a spot that maximizes natural light, but can also accommodate supplemental lighting if needed. Think about the spaces in your home that receive the most sunlight, especially during the shorter days of autumn and winter. South-facing windows are often ideal, but east or west-facing windows can also work well, depending on your home's orientation. Sunrooms, if you're lucky enough to have one, are obviously a fantastic option.
Don’t despair if you don’t have a sun-drenched paradise. Even a corner of a basement or a spare room can be transformed into a thriving seed starting haven. Assess your existing spaces and consider which areas could be repurposed. A spare bedroom, a corner of the garage (if it's insulated and heated), or even a well-lit closet can all be viable options.
Consider the scale of your planned spring garden when determining your space requirements. Are you starting just a few herbs and vegetables, or do you envision a sprawling garden filled with a diverse array of plants? The more plants you plan to start, the more space you’ll need.
Equally important are temperature control and light. Seeds need warmth to germinate and light to grow healthy and strong. A stable temperature between 65-75°F (18-24°C) is ideal. Avoid locations that are prone to drafts or significant temperature fluctuations.
[VISUAL: Close-up of a thermometer and light meter reading near a seed tray]
A close-up shot showcasing a thermometer reading the temperature and a light meter showing the light intensity near a seed tray filled with young seedlings.
You might want to use a thermometer and a light meter to assess the conditions in your potential seed starting locations. This will help you determine if you need to make adjustments to the temperature or light levels.
Key Takeaway: Choose a location that maximizes natural light and offers temperature stability, even in a small space.
Section 2: Illuminating the Way: Selecting & Setting Up Grow Lights
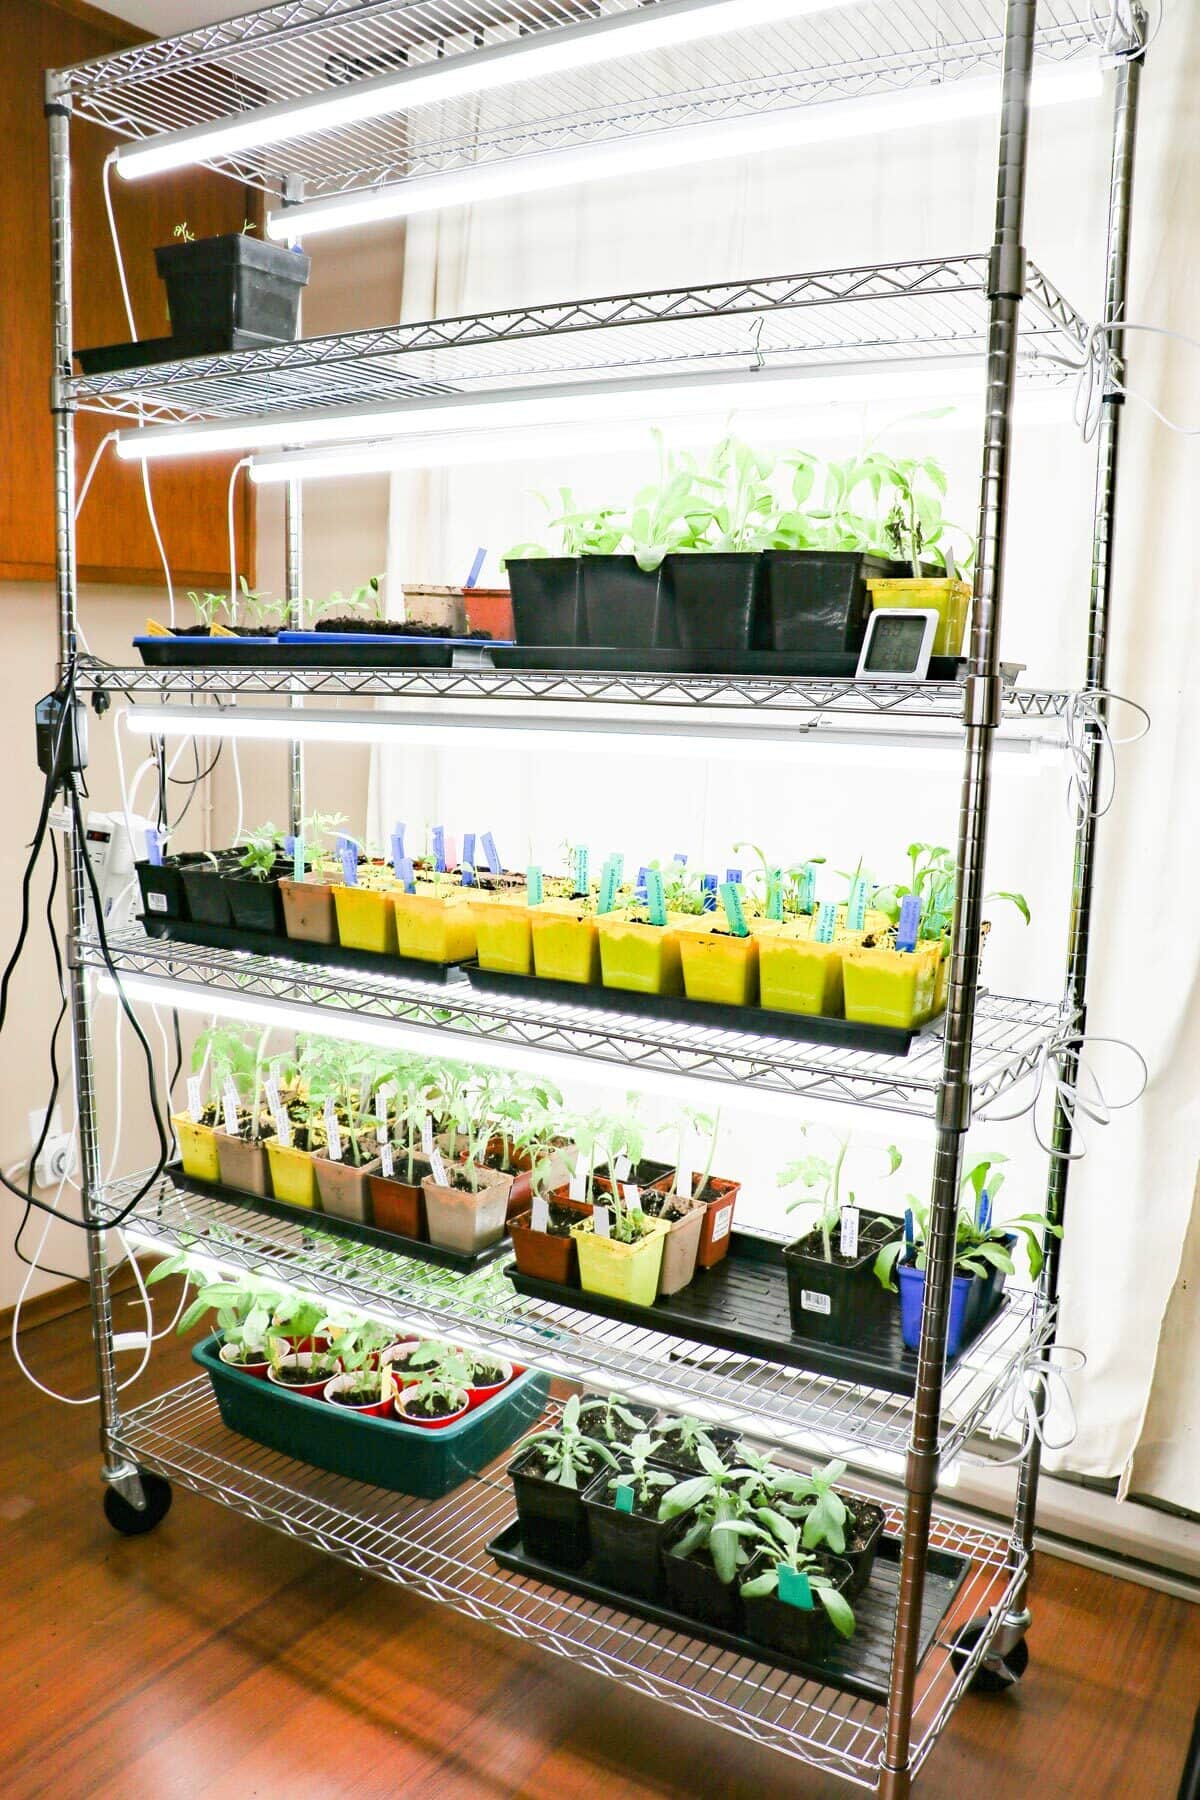
[VISUAL: grow lights seedlings timer indoor]
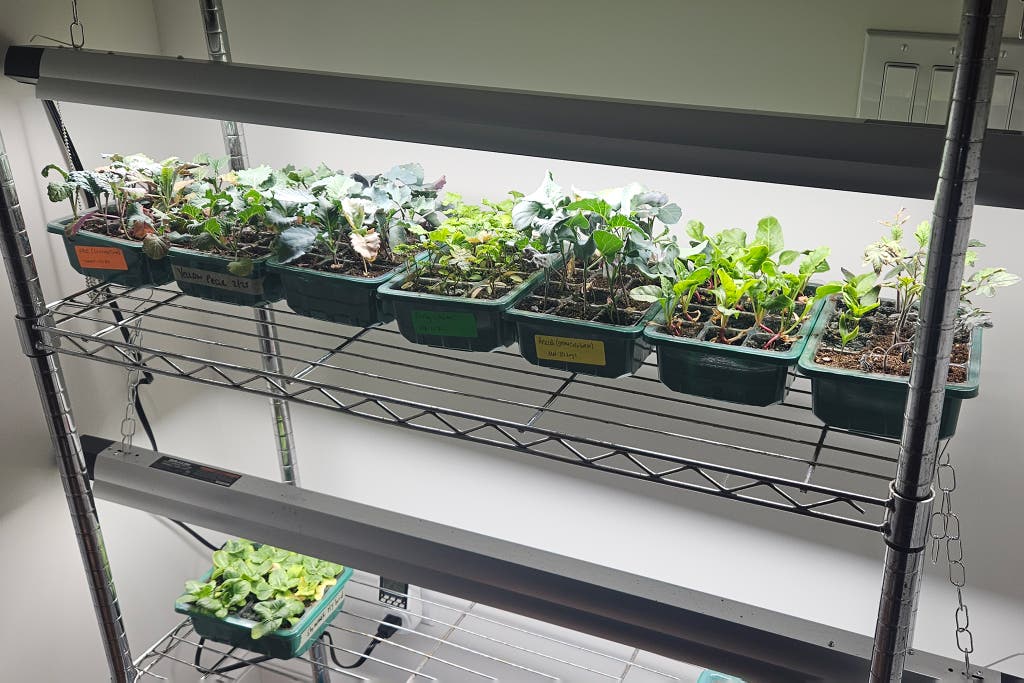
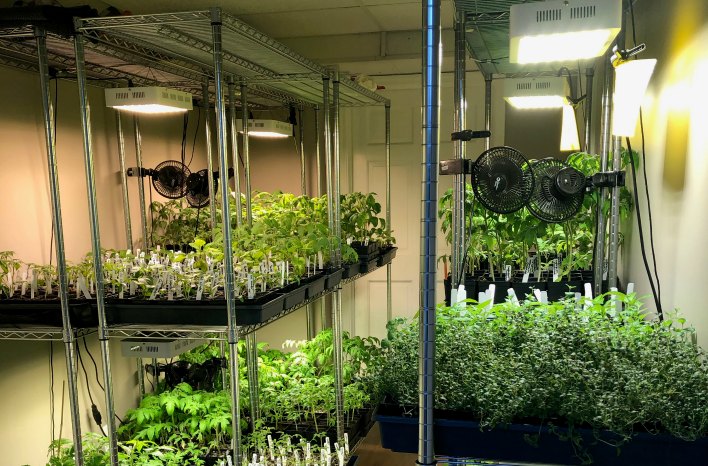
A well-organized indoor seed starting setup with multiple shelves of seedlings thriving under grow lights. A timer is visible, ensuring consistent light exposure.
Even with a sunny window, supplemental lighting is often essential for successful seed starting, particularly during the shorter days of autumn and winter. Without adequate light, your seedlings will become leggy and weak, struggling to develop into strong, healthy plants.
There are several types of grow lights available, each with its own pros and cons.
- LED Grow Lights: LEDs are energy-efficient, long-lasting, and produce very little heat. They are a popular choice for seed starting and are available in a variety of spectrums to suit different plant needs. They may be more expensive up front but save in energy consumption.
- Fluorescent Grow Lights: Fluorescent lights, particularly T5 fluorescent bulbs, are another good option. They are more affordable than LEDs but consume more energy and need to be replaced more frequently.
- Incandescent Lights: While incandescent lights are the least expensive option, they are not recommended for seed starting. They produce a lot of heat and very little usable light for plants.
When setting up your grow lights, it's crucial to position them correctly. The lights should be placed close enough to the seedlings to provide adequate light intensity, but not so close that they burn the plants. A good rule of thumb is to start with the lights a few inches above the seedlings and adjust as needed.
A timer is also essential for controlling the amount of light your seedlings receive. A general recommendation is to provide 14-16 hours of light per day. A timer will ensure that your seedlings receive consistent light exposure, even when you're not around.
Don't be afraid to get creative with your grow light setup. You can build your own using repurposed materials like shelving units, PVC pipes, and clamp lights. This is a great way to save money and reduce waste.
[VISUAL: Side-by-side comparison photo of seedling growth with and without supplemental lighting.]
Unfortunately, I cannot generate visual side-by-side comparisons. However, imagine a photo showing two sets of seedlings. The seedlings grown with supplemental lighting are vibrant, green, and sturdy. The seedlings grown without supplemental lighting are pale, leggy, and weak.
Key Takeaway: Grow lights are crucial for healthy seedling development during shorter days; choose wisely based on your needs and resources.
Section 3: Water Wise: Sustainable Watering Systems
[VISUAL: self-watering seed tray diy waterer]
A DIY self-watering seed tray made from recycled materials, showcasing a sustainable and efficient watering solution for seedlings.
Consistent moisture is critical for successful seed germination and seedling growth. However, overwatering can be just as detrimental as underwatering, leading to root rot and other problems. The key is to find a watering method that provides consistent moisture without saturating the soil.
There are several watering methods to consider:
- Misting: Misting is a gentle way to moisten the soil surface, especially for newly sown seeds. Use a spray bottle to lightly mist the soil whenever it feels dry to the touch.
- Bottom Watering: Bottom watering involves placing the seed tray in a shallow dish of water, allowing the soil to absorb the water from the bottom up. This method helps to prevent fungal diseases by keeping the foliage dry.
- Watering Can: A watering can with a gentle rose is a good option for watering larger seed trays. Be sure to water slowly and evenly to avoid disturbing the soil.
To make your watering system more sustainable and cost-effective, consider creating your own DIY self-watering system from recycled bottles or containers. Cut the top off a plastic bottle, invert it into the bottom half, and fill it with water. The soil will draw water from the bottle as needed.
[VISUAL: Step-by-step instructions for building a simple self-watering seed tray from recycled materials.]
Unfortunately, I am unable to provide step-by-step instructions with visuals. However, the description is as follows: Take a plastic water bottle and cut it in half. Invert the top half (the spout end) into the bottom half. Insert a cotton wick through the bottle neck so it dangles into the bottom part. Fill the bottom part with water. Add your soil and seeds into the inverted top. As the soil dries, the wick will draw up water from the bottom reservoir.
Using filtered water or rainwater is also a great way to reduce your environmental impact. Tap water can contain chlorine and other chemicals that can harm seedlings. Rainwater is naturally soft and free of these chemicals.
Key Takeaway: Efficient and consistent watering is key; explore DIY options for sustainable and cost-effective solutions.
Section 4: Repurposed & Recycled: Choosing Seed Starting Containers
The containers you use to start your seeds don't have to be expensive or fancy. In fact, many common household items can be repurposed into perfectly suitable seed starting containers. Using repurposed containers is a great way to reduce waste, save money, and embrace a more sustainable approach to gardening.
Yogurt cups, egg cartons, plastic takeout containers, and even toilet paper rolls can all be used to start seeds. Just make sure that the containers are clean and have drainage holes to prevent waterlogging.
When selecting containers, consider the size of the plants you'll be starting. Small containers are suitable for seedlings that will be transplanted soon, while larger containers are better for plants that will be grown in the containers for a longer period of time.
Cleaning and sterilizing your containers before use is crucial to prevent the spread of diseases. Wash the containers with warm, soapy water and then rinse them with a solution of one part bleach to nine parts water.
Labeling your containers is essential for keeping track of what you've planted. Use recycled materials like popsicle sticks, cardboard scraps, or even painted rocks to create labels.
[VISUAL: Creative arrangement of different repurposed containers holding seedlings.]
Unfortunately, I'm unable to generate visuals. Imagine an image of a table top with repurposed yogurt containers, egg cartons, and take out containers, each holding seedlings and being labelled with cute handcrafted labels.
Key Takeaway: Reduce waste and save money by utilizing repurposed containers; prioritize drainage and cleanliness.
Section 5: Seed Sovereignty: Sourcing and Storing Seeds for Spring
The quality of your seeds is a major determinant of your garden's success. Choose seeds from reputable suppliers who offer high-quality, open-pollinated or heirloom varieties. Open-pollinated seeds produce plants that are true to type, meaning that you can save the seeds from these plants and grow the same variety year after year. Heirloom seeds are open-pollinated varieties that have been passed down through generations.
When sourcing seeds, consider your local climate and growing conditions. Choose varieties that are well-suited to your area to maximize your chances of success.
Proper seed storage is essential for maintaining seed viability. Seeds should be stored in a cool, dark, and dry place. A sealed container in the refrigerator or freezer is ideal.
Consider saving seeds from your own garden. Seed saving allows you to preserve unique varieties that are adapted to your specific growing conditions. It also helps to promote biodiversity and ensures that you have a reliable source of seeds for future generations.
[VISUAL: Seed packets organized seed storage box]
Unfortunately, I'm unable to generate visuals. However, imagine an image of an organized seed storage box with labelled packets and desiccant packets inside.
Key Takeaway: Invest in quality seeds and store them properly to ensure a successful spring garden.
Conclusion: A Head Start on Spring
[VISUAL: hands watering small seedling tray indoor light]
Unfortunately, I'm unable to generate visuals. However, imagine a person gently watering a seedling tray indoors with grow lights above the tray.
By taking the time to prepare your seed starting station this autumn, you're giving yourself a significant head start on spring. You'll reduce stress, increase your chances of success, and enjoy the satisfaction of nurturing your own plants from seed.
Embrace the slow-living approach and find joy in planning for your spring garden during the quieter autumn months. Let the anticipation of new growth fill your heart as you prepare your seed starting sanctuary.
Imagine the vibrant colors and delicious flavors of your spring garden, all nurtured from seeds started indoors with love and care. This autumn embrace is the first step towards that thriving garden.
Call-to-Action Suggestions:
- Share your own seed starting setups and tips in the comments below!
- Sign up for the Better Homes and Harvests newsletter for more homesteading tips and tricks.
- Check out our related articles on seed starting, gardening, and DIY projects.
- What are your favorite varieties to start indoors?