Autumn's Embrace: Hand-Dyeing Wool Ornaments with Nature's Palette
Imagine this: a crisp autumn morning, sunlight streaming through the golden leaves of the maple tree outside your kitchen window. A rustic wooden table sits bathed in this warm, inviting light, scattered with foraged treasures – vibrant goldenrod flowers, papery onion skins, and plump, juicy berries. The air smells of woodsmoke and simmering dye, a symphony of autumnal aromas that speaks of simpler times and the joy of creation. Today, we're slowing down, turning away from the bustle of the season, and embracing the mindful craft of hand-dyeing wool ornaments using nature's own palette.

Forget the plastic baubles and mass-produced decorations. This year, let's bring the beauty of the natural world into our homes with unique, hand-crafted ornaments. This project is more than just making decorations; it's about connecting with nature, embracing the slow rhythms of the season, and creating lasting memories with your family. So, gather your little ones, put on some cozy music, and let's get started!
Gathering Your Autumn Treasures: Foraging for Natural Dyes
The first step is a treasure hunt! Venture out into your backyard, local parks, or (with permission!) nearby fields and forests in search of dye materials. Autumn offers a wealth of options:
- Goldenrod: These bright yellow flowers yield a beautiful golden hue. Be mindful of where you harvest, ensuring you’re not disrupting sensitive ecosystems.
- Onion Skins: Don't toss those onion skins! They produce a range of yellows and oranges, depending on the type of onion and the mordant used. Save them up for a few weeks before dyeing.
- Berries: Many berries, like elderberries or blackberries, can create shades of purple, pink, and even blue. Be sure to accurately identify any berry before foraging and avoid poisonous berries.
- Other Options: Experiment with other materials like black walnuts (browns), marigolds (yellows), or even red cabbage (purples).
Important Note: Always be 100% certain you can identify your foraged materials before using them. If in doubt, leave it out!
Preparing Your Natural Dyes: Extracting Nature's Colors
Once you've gathered your treasures, it's time to extract their beautiful colors. This process is simple but requires patience:
- Clean Your Materials: Remove any dirt, leaves, or debris from your foraged items.
- Chop or Crush: Chop your plant materials into smaller pieces to increase the surface area for dye extraction. For berries, lightly crush them. Onion skins can be used as is.

*This image shows vegetables being chopped, which is visually similar to the step of prepping foraged materials like goldenrod or berries by chopping or crushing them to increase surface area for dye extraction.*
- Simmer in Water: Place your chopped materials in a stainless steel or enamel pot (avoid aluminum, as it can react with the dye) and cover with water. Use about twice as much water as plant material.
- Simmer Gently: Bring the water to a gentle simmer and let it cook for at least an hour, or even longer for richer colors. Stir occasionally. You'll notice the water gradually changing color as the dye is released.
- Strain the Dye: Once you're satisfied with the color, strain the dye through a cheesecloth or fine-mesh sieve into a clean pot. Discard the spent plant material (or compost it!).
Dyeing the Wool: Imparting Autumn Hues
Now for the magic! Before dyeing, the wool needs to be "mordanted". A mordant is a substance that helps the dye bond to the wool fibers, ensuring a colorfast and long-lasting result. Alum (potassium aluminum sulfate) is a common and safe mordant to use.
- Mordanting the Wool: Dissolve 1 tablespoon of alum per 100g of wool in a pot of warm water. Add the wool, ensuring it's fully submerged. Gently simmer for an hour, stirring occasionally. Let the wool cool in the mordant bath before removing it. Rinse thoroughly and gently squeeze out excess water.
- Preparing the Wool: Use undyed, natural wool yarn or felt sheets. You can find these at most craft stores.
- Dyeing Time: Place the mordanted, damp wool into the pot of dye. Make sure the wool is fully submerged. If needed, add more water.
- Gentle Simmer: Gently simmer the wool in the dye bath for 30-60 minutes, stirring occasionally to ensure even color absorption. The longer you simmer, the deeper the color will be.

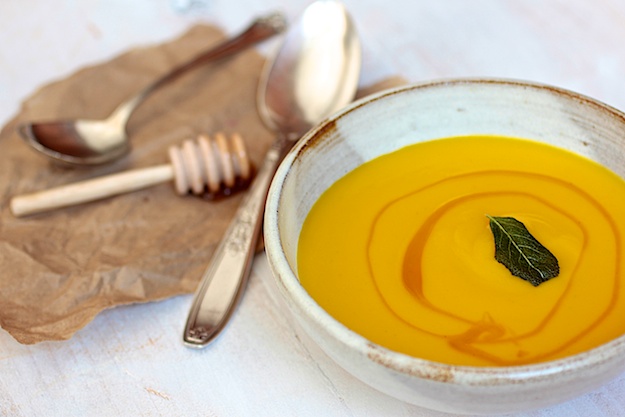
While this is not a picture of yarn, visualize the wool fiber soaking in the dye bath like these grains mixed with dressing.
- Cooling and Rinsing: Turn off the heat and let the wool cool completely in the dye bath. This allows the color to fully set. Once cool, remove the wool and rinse it thoroughly with cool water until the water runs clear.
- Drying: Gently squeeze out excess water (avoid wringing) and hang the wool to dry away from direct sunlight.
Creating Your Ornaments: A Touch of Autumn Magic
Once your wool is dyed and dry, the real fun begins! Let your creativity flow as you transform the dyed wool into charming ornaments. Here are a few ideas:
- Felt Shapes: Cut the dyed felt into simple shapes like stars, hearts, leaves, or animals. Sew or glue them together, adding embellishments like beads, buttons, or embroidery.
- Yarn Pom-Poms: Wrap the dyed yarn around a pom-pom maker or a piece of cardboard to create fluffy pom-poms. These make adorable ornaments on their own or can be added to other decorations.
- Wrapped Twigs: Gather small twigs and wrap them with dyed yarn to create rustic ornaments. Add a touch of greenery or berries for a festive look.

This image is an artistic representation of the natural colours found in plants and vegetables. You can imagine the same array of colors being imparted to the wool ornaments, creating a visually appealing and naturally beautiful decoration.
Displaying Your Creations: Spreading the Autumn Cheer
Now it’s time to display your hand-dyed treasures. Here are a few ideas:
- Adorn a Rustic Wreath: Add your wool ornaments to a grapevine wreath for a touch of autumnal charm.

This visual offers inspiration for arranging and displaying the finished wool ornaments. Like the ingredients in this image, the ornaments can be artfully arranged on a wreath, tree, or in a decorative bowl.
- Hang on a Fir Tree: Bring a touch of nature indoors by hanging your ornaments on a Christmas tree.
- Use as Gift Tags: Add a personal touch to your gifts by using the ornaments as gift tags.
- String them into a Garland: Create a beautiful autumnal garland to hang across your mantel or doorway.
Embracing the Slow Season: A Mindful Tradition
Hand-dyeing wool ornaments is more than just a craft; it's an experience. It's about slowing down, connecting with nature, and creating something beautiful with your own hands. It's about teaching our children the value of simplicity, sustainability, and the joy of creating. As you hang your hand-dyed ornaments, remember the crisp autumn air, the warm sunlight, and the time spent together as a family. These are the moments that truly make the season special. So, embrace the slow season, celebrate the beauty of nature, and create memories that will last a lifetime. These small, handmade touches are what transform a house into a home, filled with love, warmth, and the spirit of the harvest.