
Autumn's Embrace: Apple Cider Doughnuts, Mobile Chicken Coop, and Rain Barrel Set-Up
As the leaves turn crimson and gold, and a crispness fills the air, Autumn whispers of cozy days spent harvesting the last of the season's bounty. The scent of spiced apples fills the air, hinting at the heartwarming treats and practical homestead preparations that define this time of year. Picture yourself biting into a warm, homemade Apple Cider Doughnut, its cinnamon-sugar coating sparkling in the afternoon sun, after a satisfying day spent building a mobile chicken coop and setting up a rainwater harvesting system.

Image: A cozy farmhouse kitchen scene embodying the spirit of autumn with homemade doughnuts and a glimpse of homestead projects.
Apple Cider Doughnuts - A Taste of Autumn's Sweetness
There's nothing quite like the comforting taste of a freshly made doughnut on a crisp autumn day. Our Apple Cider Doughnuts are not only delicious but also incredibly simple to make with ingredients you likely already have in your pantry. Using fresh-pressed apple cider elevates this treat to a whole new level, capturing the essence of the season in every bite. This apple cider doughnuts recipe is sure to be a fall favorite!
Ingredients:
- 3 cups all-purpose flour
- 1 tsp baking soda
- 1 tsp ground cinnamon
- 1/2 tsp ground nutmeg
- 1/4 tsp ground cloves
- 1/2 tsp salt
- 1 cup fresh-pressed apple cider
- 1/2 cup granulated sugar
- 1/4 cup (1/2 stick) unsalted butter, melted and slightly cooled
- 2 large eggs, lightly beaten
- 1 tsp vanilla extract
- Vegetable oil, for frying (about 6 cups)
- 1 cup granulated sugar, for coating
- 2 tsp ground cinnamon, for coating
Instructions:
- In a large, well-worn mixing bowl, whisk together the flour, baking soda, cinnamon, nutmeg, cloves, and salt until evenly combined. This ensures even distribution of the spices for the perfect homemade apple cider doughnuts.
- In a separate glass bowl, whisk together the apple cider, sugar, melted and cooled butter, beaten eggs, and vanilla extract until smooth.
- Gradually add the wet ingredients to the dry ingredients, mixing with a wooden spoon until just combined. Be careful not to overmix, as this will result in tough doughnuts. The dough will be slightly sticky.
- Cover the dough tightly with plastic wrap and chill in the refrigerator for at least 1 hour or up to overnight. This chilling time allows the gluten to relax, resulting in a more tender doughnut.
- Heat vegetable oil in a large, heavy-bottomed cast-iron pot or Dutch oven to 350°F (175°C). Use a candy thermometer to ensure accurate temperature. Maintaining the right oil temperature is crucial for perfectly cooked doughnuts.
- In a shallow bowl, combine the sugar and cinnamon for coating. Set aside.
- Lightly flour a clean work surface. Roll out the chilled dough to about 1/2 inch thickness. Use a floured 3-inch doughnut cutter or two different-sized round cookie cutters (3-inch and 1-inch) to cut out doughnuts.
- Carefully drop the doughnuts into the hot oil, a few at a time, ensuring not to overcrowd the pot. Fry for 2-3 minutes per side, or until golden brown and cooked through.
- Remove the doughnuts with a slotted spoon or spider strainer and transfer them to a wire rack lined with paper towels to drain excess oil.
- While the doughnuts are still warm, toss them in the cinnamon-sugar mixture to coat evenly.
- Serve immediately and enjoy the warm, comforting taste of Autumn's Sweetness. Best enjoyed with a cup of hot apple cider!
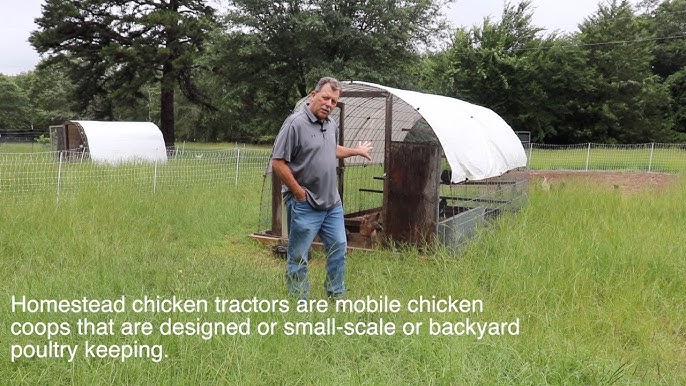
Image: A close-up of the delicious end result – freshly made Apple Cider Doughnuts.
Building a Mobile Chicken Coop: A Homestead Project
A chicken tractor, or mobile chicken coop, is a fantastic addition to any homestead. It allows your chickens to graze on fresh pasture, naturally reducing pests and weeds in the garden while simultaneously improving soil fertility. Building your own chicken tractor is a rewarding DIY project that can be easily accomplished using reclaimed materials, making it both cost-effective and sustainable. These chicken tractor plans will help you get started!
Materials:
- 4 - 4x4 pressure-treated posts (for the base frame) cut to 8 ft lengths
- 8 - 2x4 untreated lumber (for framing) 8 ft lengths
- Galvanized hardware cloth (1/2 inch mesh) - 25ft roll
- Exterior grade plywood - one 4x8 sheet for nest boxes and roost
- 2 - Heavy-duty rubber wheels or casters (at least 10-inch diameter) for mobility
- 2 - Gate hinges (4-inch) and 1 - latch for access door
- 3-inch exterior wood screws, 1 1/2-inch galvanized nails, and other fasteners
- Corrugated metal roofing sheets, reclaimed wood shingles or heavy-duty tarp (approx. 6ft x 8ft) for roofing material
Instructions:
- Build the base frame using the 4x4 pressure-treated posts. Cut each post to the desired length. Ensure it is square and sturdy, using a carpenter's square. Attach wheels or casters to the corners for mobility. A solid foundation is key to a safe and durable DIY mobile chicken coop.
- Frame the sides, front, and back of the coop using 2x4 lumber. Space the framing members approximately 16 inches apart for structural integrity. Ensure adequate ventilation and sunlight penetration by leaving openings for windows which will be covered with hardware cloth.
- Attach galvanized hardware cloth to the frame to enclose the coop. Securely fasten the mesh using staples or screws to prevent predators from entering. Overlap the edges of the hardware cloth for added security.
- Build nest boxes and a roost inside the coop using exterior-grade plywood. Each nest box should be approximately 12 inches wide, 12 inches deep, and 12 inches high. Provide adequate space for the number of chickens you plan to house (approx. 4 sq ft per bird).
- Construct a door for easy access to the coop. Cut an opening in one side of the coop and frame it with 2x4 lumber. Attach the door using hinges and install a latch to secure the door.
- Attach roofing material to protect the chickens from the elements. Overlap the roofing material to prevent leaks. Ensure proper drainage to prevent water from pooling on the roof.
- Move the chicken tractor regularly (every 1-2 days) to provide fresh pasture for your chickens and fertilize different areas of your garden. This rotational grazing is a cornerstone of permaculture.

Image: A completed mobile chicken coop in action, with chickens enjoying fresh pasture.
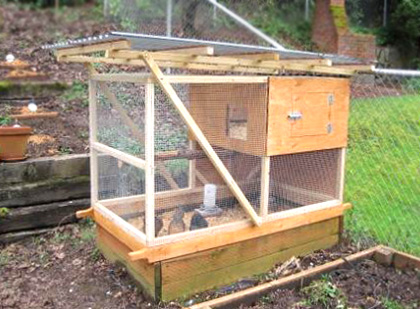
Image: A more in depth view of the interior roosting and nesting boxes within the mobile chicken coop
Rainwater Harvesting System
Rainwater harvesting is a cornerstone of sustainable homesteading. By collecting rainwater, you can conserve valuable resources, reduce your reliance on municipal water sources, and provide chemical-free water for your garden. This simple yet effective practice not only benefits the environment but also saves you money on your water bill. This is a truly important homestead project to consider. Using a rain barrel system homestead, you can create a more sustainable way of living.
Materials:
- Food-grade plastic rain barrel (55-gallon, dark green or brown to minimize algae growth)
- Downspout diverter (compatible with your existing downspout)
- Brass hose spigot (3/4-inch)
- Fine mesh screen or filter to keep out debris (nylon or stainless steel)
- Overflow hose (garden hose or flexible tubing) - at least 10 feet long
- Four concrete blocks or a sturdy wooden platform to elevate the barrel (at least 12 inches high)
Instructions:
- Choose a location for your rain barrel near a downspout, preferably on the north side of your house to minimize direct sunlight exposure. Ensure the location is level and can support the weight of a full barrel (approximately 450 pounds).
- Elevate the rain barrel on concrete blocks or a sturdy platform to provide gravity for watering and allow easy access to the spigot. This also protects the barrel from ground moisture.
- Install a downspout diverter to redirect rainwater from the downspout into the barrel. Follow the manufacturer's instructions for installation. The diverter should include a shut-off valve to prevent water from entering the barrel during winter.
- Attach a brass hose spigot to the bottom of the rain barrel for easy access to the collected water. Use Teflon tape to seal the threads and prevent leaks.
- Install a fine mesh screen or filter at the top of the barrel to prevent leaves, debris, and insects from entering. Secure the screen with a tight-fitting lid or clamps.
- Attach an overflow hose to the barrel to direct excess water away from the foundation of your home. Position the hose so that it drains into a rain garden or other designated area.
- Regularly clean the rain barrel and filter (at least twice a year) to prevent algae growth and ensure water quality. Remove any accumulated sediment or debris from the bottom of the barrel.
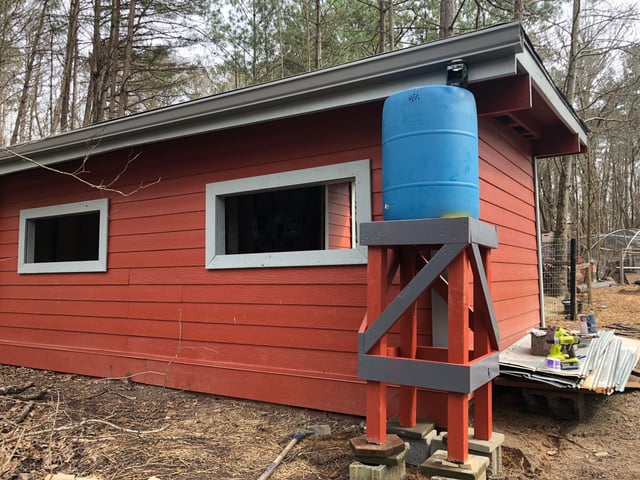
Image: A functioning rainwater harvesting system adds a touch of rustic charm to the homestead.

Image: Various rainwater harvesting containers used for optimal water conservation
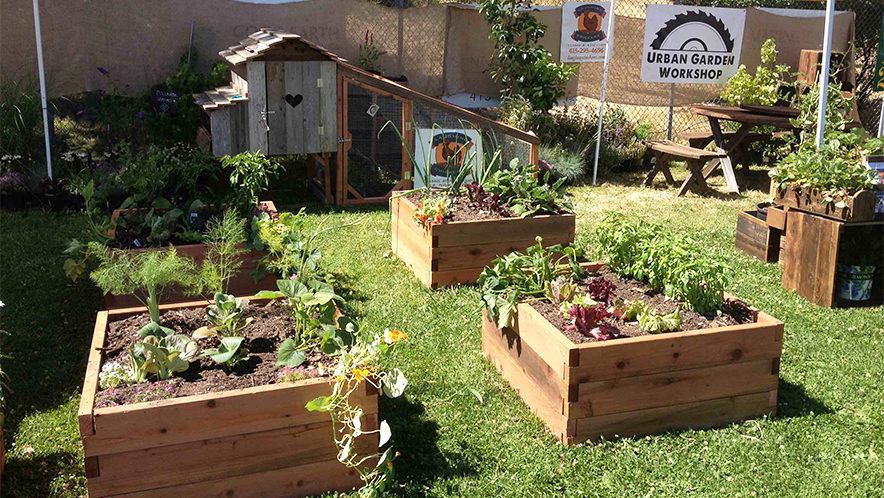
Image: Another view of various rainwater harvesting containers used for optimal water conservation and management
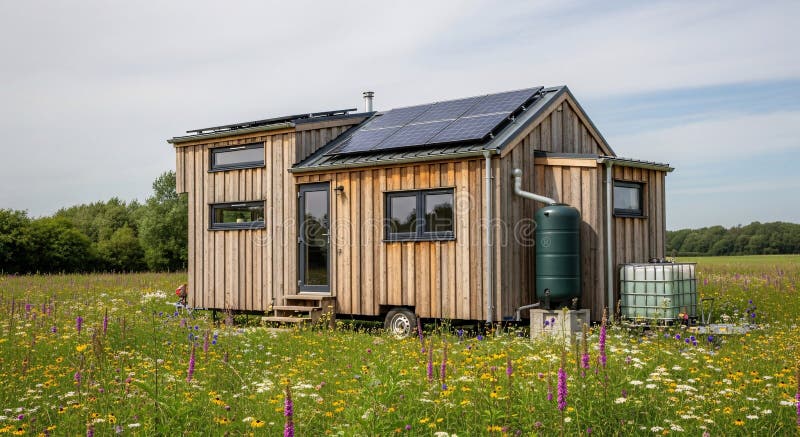
Image: Rainwater harvesting container is filled with water, and ready to use!
Closing Reflection
As autumn's embrace deepens, let's celebrate the resourcefulness and simple pleasures of the homestead. From the sweet taste of apple cider doughnuts warming the kitchen to the satisfaction of building a mobile chicken coop that provides fresh eggs and fertilizer, and the responsible practice of rainwater harvesting that conserves our precious resources, these activities connect us to the land, promote self-sufficiency, and honor the rhythm of the seasons. What are your favorite autumn activities on your homestead? Share your tips, tricks, and recipes in the comments below! We'd love to hear from you.
KEYWORDS: homesteading, self-sufficiency, seasonal living, apple cider doughnuts, chicken tractor, rainwater harvesting, winter preparation, sustainable living, organic gardening, country living, cozy living, winterizing, homesteading projects, fall harvest, homemade food, backyard animals, water conservation, autumn projects.