Autumn's Embrace: Apple Butter Pork Chops, Cozy Crafts, and Winter-Ready Homesteading
The sun dips below the horizon, painting the autumn sky in hues of fiery orange, deep crimson, and soft lavender. A crisp breeze whispers through the fields, carrying the scent of fallen leaves and woodsmoke. It's a time of year that fills me with a profound sense of peace and anticipation. The harvest is in full swing, the garden is yielding its final bounty, and the days are growing shorter, nudging us indoors to embrace warmth and comfort. There's a special kind of joy in creating a hearty meal on a chilly evening, something that warms the body and soul from the inside out. And what better embodies the flavors of fall than a batch of homemade apple butter? Today, I'm sharing a family favorite: Apple Butter Pork Chops – a dish that’s sure to become a seasonal staple in your home. But that's not all! We’ll also delve into winterizing your garden, using wool for insulation, and making beautiful beeswax candles, all crucial steps to getting your homestead ready for the colder months.

Section 1: Apple Butter Pork Chops - A Taste of Autumn
Apple butter holds a special place in American homesteading history. Before refrigeration, it was a way to preserve the abundance of the apple harvest, transforming it into a sweet, spreadable treat that could be enjoyed throughout the year. But apple butter is more than just a topping for toast; its rich, complex flavor makes it an incredible ingredient in both sweet and savory dishes. This recipe for Apple Butter Pork Chops is a testament to its versatility, combining the sweetness of apples with the savory richness of pork for a truly unforgettable meal.
Ingredients:
- 4 bone-in pork chops (1-inch thick)
- 1 teaspoon sea salt
- ½ teaspoon black pepper
- 2 tablespoons olive oil
- 1 medium yellow onion, thinly sliced
- 2 cloves garlic, minced
- 1 cup homemade apple butter
- ½ cup apple cider vinegar
- ¼ cup chicken broth
- 1 tablespoon Dijon mustard
- 1 sprig fresh rosemary
Instructions:
- Season pork chops generously with salt and pepper.
- Heat olive oil in a large skillet over medium-high heat. Sear pork chops for 3-4 minutes per side until golden brown. Remove from skillet and set aside.
- Add sliced onion to the skillet and cook until softened and translucent, about 5 minutes. Add minced garlic and cook for 1 minute more until fragrant.
- Stir in apple butter, apple cider vinegar, chicken broth, and Dijon mustard. Bring to a simmer, scraping up any browned bits from the bottom of the skillet. This is where the magic happens – deglazing the pan adds depth and complexity to the sauce.
- Return pork chops to the skillet, nestling them in the apple butter sauce. Add a sprig of fresh rosemary.
- Reduce heat to low, cover, and simmer for 15-20 minutes, or until pork chops are cooked through and tender. Internal temperature should reach 145°F (63°C).
- Remove rosemary sprig. Serve pork chops with a generous spoonful of apple butter sauce and roasted root vegetables (recipe follows). The sauce is divine drizzled over mashed potatoes or creamy polenta, too!
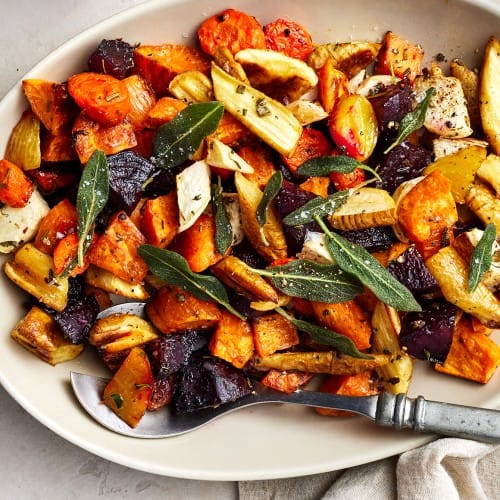
Section 2: From Garden to Table: Roasted Root Vegetables
Eating seasonally is one of the greatest joys of homesteading. There’s nothing quite like harvesting your own vegetables and transforming them into a delicious, nourishing meal. Root vegetables are a fall and winter staple, providing essential vitamins and minerals when other crops are scarce. Roasting them brings out their natural sweetness and creates a simple, satisfying side dish that perfectly complements the Apple Butter Pork Chops.
Ingredients:
- 1 lb carrots, peeled and chopped
- 1 lb parsnips, peeled and chopped
- 1 lb sweet potatoes, peeled and chopped
- 1 red onion, quartered
- 3 tablespoons olive oil
- 1 teaspoon sea salt
- ½ teaspoon black pepper
- 1 teaspoon dried thyme
- Optional: 2 cloves garlic, minced
Instructions:
- Preheat oven to 400°F (200°C).
- In a large bowl, toss carrots, parsnips, sweet potatoes, and red onion with olive oil, salt, pepper, thyme, and minced garlic (if using).
- Spread vegetables in a single layer on a baking sheet.
- Roast for 25-30 minutes, or until vegetables are tender and slightly caramelized, turning halfway through. Roasting them until slightly charred at the edges adds a wonderful smoky flavor.
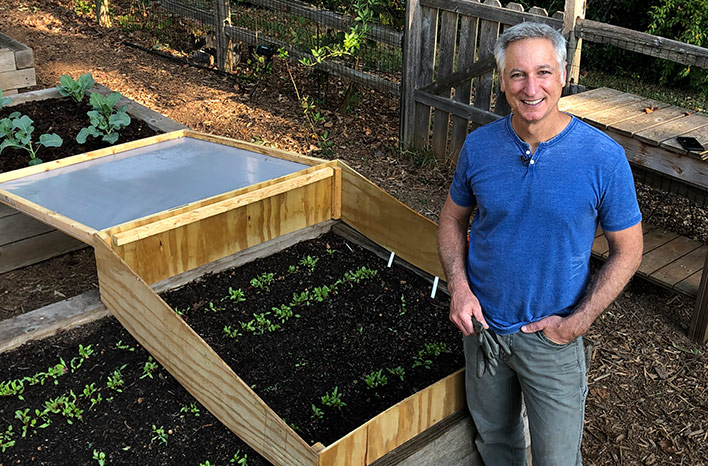
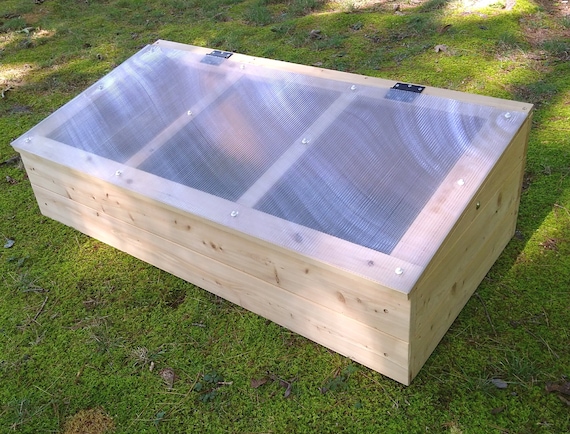
Section 3: Winterizing Your Garden: Building a Simple Cold Frame
Extending the growing season is a key aspect of self-sufficiency. A cold frame is a simple, effective way to protect delicate plants from frost and continue harvesting fresh greens well into the winter months. Remember those marigolds you planted as companion plants in the summer to help control nematodes and aphids? Now is the time to give your late-season vegetables that same protection.
Materials:
- Four untreated cedar boards (2 - 4ft long, 2 - 2ft long, all 6 inches wide)
- Clear polycarbonate sheet (4ft x 2ft)
- Hinges (2)
- Screws
- Drill
Instructions:
- Assemble the cedar boards into a rectangular frame, with the 4ft boards forming the longer sides and the 2ft boards forming the shorter sides. Screw the boards together at the corners. Cedar is naturally rot-resistant, making it an ideal choice for outdoor projects.
- Attach hinges along one of the longer sides of the frame.
- Attach the polycarbonate sheet to the hinges, creating a hinged lid for the cold frame. This allows you to easily access your plants and regulate the temperature inside.
- Place the cold frame over your existing garden bed to protect delicate plants from frost.
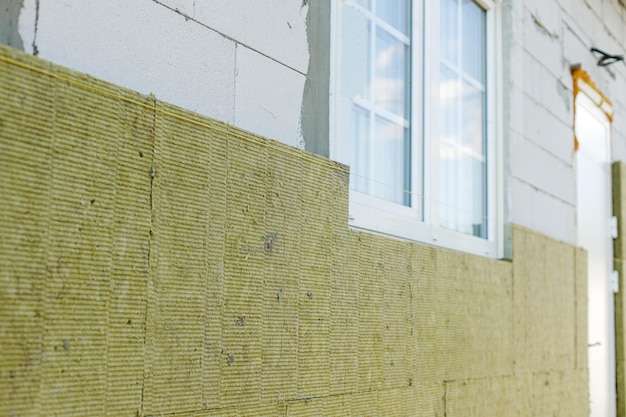
Section 4: Cozying Up the Homestead: Installing Wool Insulation
A well-insulated home is essential for comfort and energy efficiency, especially during the colder months. Wool insulation is a sustainable and effective option, offering excellent thermal performance and natural moisture regulation. I remember visiting a local sheep farmer this past spring and being so inspired by their dedication to using natural fibers. It really solidified my commitment to incorporating sustainable practices into our homestead.
Instructions:
- Measure the wall cavities you intend to insulate.
- Cut the wool insulation batts to fit the measured dimensions.
- Wear gloves and a mask to protect yourself from dust and fibers.
- Insert the wool insulation batts into the wall cavities, ensuring a snug fit.
- Cover the insulation with a vapor barrier to prevent moisture buildup. This is crucial for preventing mold and maintaining the insulation's effectiveness.

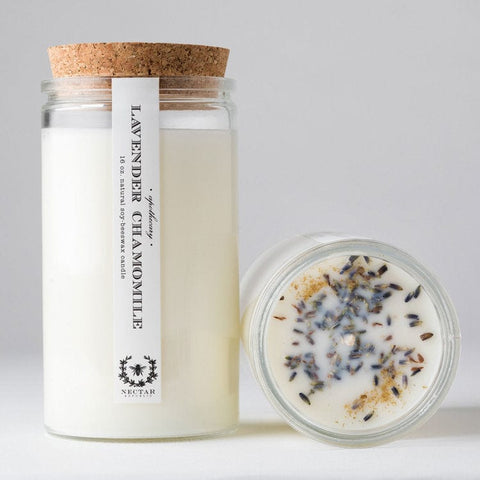
Section 5: Candlelit Evenings: DIY Beeswax Candles
As the days grow shorter, there's nothing quite like the warm, inviting glow of candlelight. Making your own beeswax candles is a simple and rewarding project that allows you to create a cozy ambiance using natural materials. Plus, if you have your own beehive, you can render your own beeswax, making it a truly sustainable and self-sufficient endeavor.
Materials:
- Beeswax (rendered from your own hive, if possible)
- Cotton wicks
- Dried lavender buds
- Dried chamomile flowers
- Small glass jars or tins
- Double boiler or heat-safe bowl
Instructions:
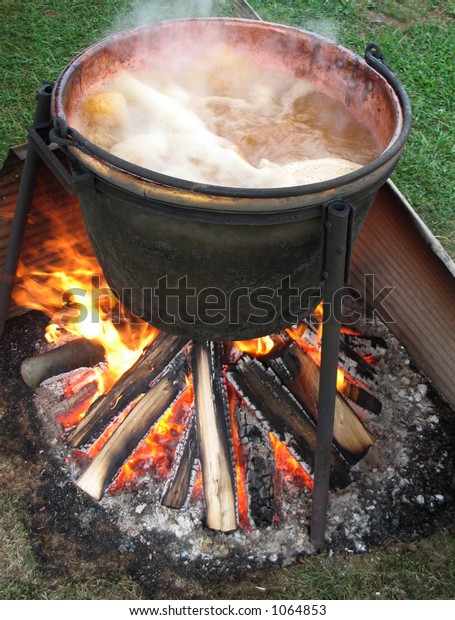
- Melt beeswax in a double boiler or heat-safe bowl set over a pot of simmering water. Beeswax has a low melting point, so be careful not to overheat it.
- Attach cotton wicks to the bottom of your glass jars or tins using a small amount of melted beeswax.
- Stir in dried lavender buds and chamomile flowers into the melted beeswax. These add a lovely scent and visual appeal to your candles. You can also use other dried herbs, spices, or essential oils.
- Carefully pour the scented beeswax into the prepared jars or tins.
- Center the wicks and allow the candles to cool and harden completely. This may take several hours, depending on the size of your candles.
Section 6: Home Draft Proofing
During colder months, drafts are a common issue. Draft-proofing your home reduces energy bills and keeps your living space comfortable. Start by identifying common draft locations such as windows, doors, and gaps around pipes. Seal gaps using weather stripping or caulk for a better insulated home.

Section 7: Building a Blanket Ladder
Building a blanket ladder is a great DIY project for a homestead that offers storage and adds a unique touch to your living area. Gather some reclaimed wood and construct a rustic ladder to place your blankets. This practical project adds character and ensures your blankets are always ready on those chilly evenings.
Section 8: Beeswax Lip Balm
Protect your lips in cold weather with beeswax lip balm. Combine beeswax with natural oils like coconut and almond, and a touch of honey. Melt these ingredients together, pour the mixture into small containers, and allow it to cool and harden. Beeswax lip balm keeps your lips hydrated and protected during colder months.
Closing Reflection:
As the days grow shorter and the nights grow colder, there's a unique sense of satisfaction in knowing that you've prepared your home and garden for the winter ahead. From savoring the flavors of fall with Apple Butter Pork Chops to creating a cozy and sustainable living space with wool insulation and beeswax candles, homesteading offers a way to connect with the natural world and create a life filled with purpose and meaning. I encourage you to embrace the season, explore new skills, and share your own experiences and tips for creating a warm, inviting homestead that you and your family can enjoy all winter long. Happy homesteading!