Autumn's Bounty: Sweet Potato Chili, Leaf Mold Compost, and Lavender Candles
As woodsmoke perfumes the crisp autumn air, carried on the breeze from the neighbor's chimney, and the last sugar maple leaves rain down in a flurry of crimson and gold, the homestead calls us to embrace the season's bounty. Our hands, roughened from weeding the late-season kale, instinctively reach for the vibrant orange of sweet potatoes, still clinging to the garden soil, while our minds consider the knee-deep drifts of fallen oak leaves and the promise of a cozy evening spent by the crackling fire. Today, we'll warm our bellies with a hearty Sweet Potato and Black Bean Chili, nurture our gardens with a Leaf Mold Compost Bin crafted from reclaimed wood, and fill our homes with the soothing glow of Beeswax Candles infused with fragrant, hand-picked dried Lavender. These are not just tasks, but rituals connecting us to the land and the rhythm of autumn.

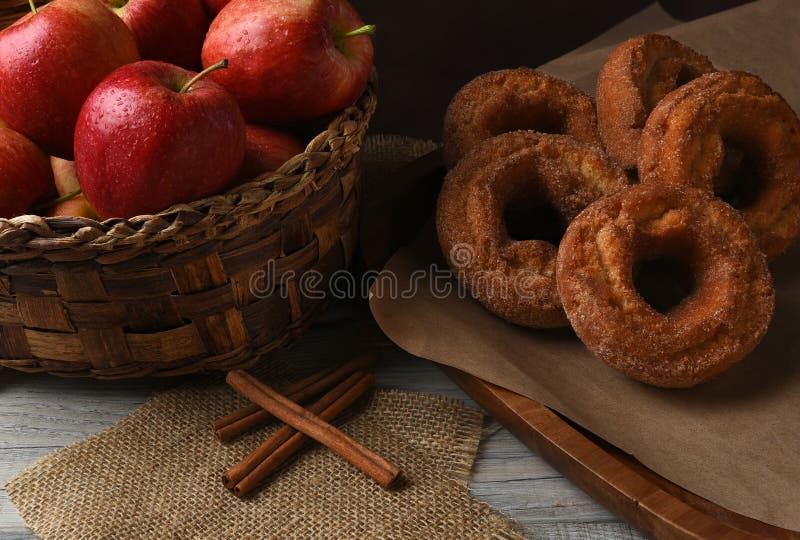
Section 1: Sweet Potato and Black Bean Chili with Cornbread Croutons: A Taste of Autumn's Harvest
This Sweet Potato and Black Bean Chili is a vibrant celebration of the season's flavors, inspired by the Southwestern landscape. The inherent sweetness of roasted sweet potatoes, caramelized at the edges, combined with the earthy depth of black beans and the warm embrace of smoked spices, creates a comforting and nourishing dish that's perfect for warding off the evening chill. The addition of rustic cornbread croutons, lightly seasoned with garlic, adds a delightful textural contrast and a hint of sweetness that elevates this chili to a new level of deliciousness.
Ingredients:
- 2 tablespoons extra virgin olive oil, cold-pressed
- 1 medium yellow onion, finely chopped (about 1 cup)
- 2 cloves garlic, minced (about 1 teaspoon)
- 1 red bell pepper, seeded and chopped (about 1 cup)
- 2 large sweet potatoes, peeled and diced into 1/2-inch cubes (about 3 cups)
- 1 teaspoon chili powder, preferably ancho chili powder
- 1/2 teaspoon ground cumin
- 1/4 teaspoon smoked paprika
- 1/4 teaspoon cayenne pepper (optional, for heat)
- 1 (28-ounce) can fire-roasted diced tomatoes, undrained
- 1 (15-ounce) can black beans, rinsed and drained
- 4 cups low-sodium vegetable broth
- Sea salt and freshly ground black pepper to taste
- For the Cornbread Croutons:
- 4 thick slices day-old cornbread, cut into 1/2-inch cubes (about 2 cups)
- 2 tablespoons unsalted butter, melted
- 1/4 teaspoon garlic powder
Instructions:
- In a large, heavy-bottomed pot or enameled Dutch oven, heat the olive oil over medium heat until shimmering. Add the onion and cook, stirring occasionally, until softened and translucent, about 5 minutes. Add the garlic and red bell pepper and cook for another 2 minutes, until fragrant.
- Add the sweet potatoes, chili powder, cumin, smoked paprika, and cayenne pepper (if using) to the pot. Cook, stirring occasionally, for 5 minutes, allowing the spices to bloom and coat the sweet potatoes.
- Add the fire-roasted diced tomatoes, black beans, and vegetable broth to the pot. Bring to a boil, then reduce heat to low, cover, and simmer for 20-25 minutes, or until the sweet potatoes are fork-tender.
- While the chili is simmering, prepare the cornbread croutons. Preheat oven to 375°F (190°C). In a medium bowl, toss the cornbread cubes with the melted butter and garlic powder until evenly coated. Spread the croutons in a single layer on a parchment-lined baking sheet and bake for 8-10 minutes, or until golden brown and crispy, flipping halfway through.
- Season the chili generously with sea salt and freshly ground black pepper to taste. Serve hot in warmed bowls, topped with golden-brown cornbread croutons. Consider garnishing with a dollop of sour cream or plain Greek yogurt and a sprinkle of chopped cilantro.
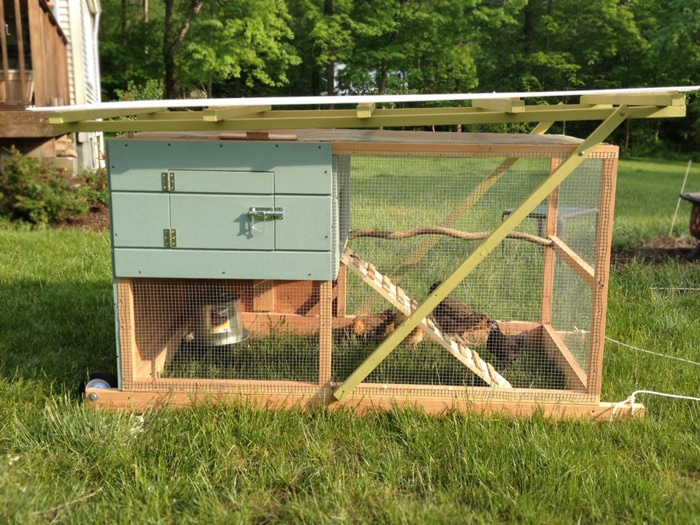
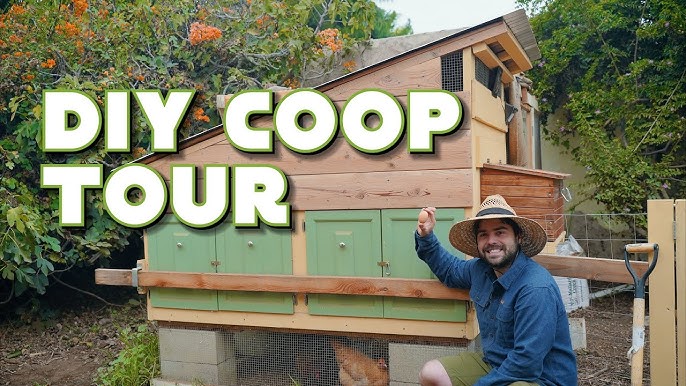
Section 2: Building a Leaf Mold Compost Bin: A Gardener's Treasure
As the leaves cascade from the trees in a breathtaking display of autumnal color, don't view them as a burdensome chore – see them as a valuable resource waiting to be unlocked! Leaf mold, that dark and crumbly gardener's gold, is a fantastic soil amendment that dramatically improves drainage, enhances water retention, and enriches overall soil structure, fostering a thriving ecosystem for your plants. Building a simple leaf mold compost bin from readily available materials is an easy, eco-friendly way to transform mounds of fallen leaves into a nutrient-rich garden asset, reducing waste and boosting the health of your soil.

Materials:
- 4 reclaimed wooden stakes (approximately 4 feet long, 2x2 inch dimensions) – cedar or redwood recommended for longevity
- Heavy-duty chicken wire or hardware cloth (approximately 12 feet long, 3 feet wide, 1/2-inch mesh)
- Heavy-duty staple gun with 1/2-inch staples
- Work gloves to protect your hands
- An abundance of fallen leaves – oak, maple, and beech are excellent choices. Avoid diseased leaves.
- Garden hose with a spray nozzle
Instructions:
- Choose a well-drained location for your leaf mold compost bin in a shady corner of your yard, away from direct sunlight to help retain moisture. A location near a water source is also beneficial for easy watering.
- Drive the wooden stakes firmly into the ground in a square or circular shape, leaving approximately 3-4 feet between each stake to create ample space for the leaves. Ensure the stakes are buried at least 1 foot deep for stability.
- Wearing work gloves, carefully unroll the chicken wire or hardware cloth and wrap it tightly around the stakes, stapling it securely to each stake every 6 inches. Overlap the ends of the wire by at least 6 inches to create a strong and closed bin.
- Gather fallen leaves from your yard or neighborhood, avoiding leaves that show signs of disease or pest infestation. Pile the leaves loosely into the bin, filling it to near capacity.
- Using a garden hose with a spray nozzle, water the leaves thoroughly to moisten them, but avoid saturating them completely. The leaves should be damp, not dripping.
- Turn the leaves occasionally with a pitchfork or shovel every few weeks to aerate them and promote even decomposition. Keep the leaves consistently moist, but not soggy, throughout the composting process. Add water as needed.

- Over time, the leaves will gradually decompose into a dark, crumbly material known as leaf mold. This natural transformation can take anywhere from 6 months to 2 years, depending on the type of leaves used, the climate conditions, and the frequency of turning and watering. The resulting leaf mold can then be used as a valuable soil amendment in your garden beds, potting mixes, or as a top dressing for lawns.
Section 3: Making Beeswax Candles with Dried Lavender: A Cozy Autumn Activity
As the days grow undeniably shorter and the evenings draw in with an inviting embrace, the need for warm, inviting light to illuminate our homes becomes ever more apparent. Making your own hand-poured beeswax candles is a rewarding and mindful craft that not only fills your living spaces with a natural, honeyed fragrance but also provides a comforting sense of accomplishment. Infusing these candles with the delicate scent of dried lavender, harvested from your own garden or purchased from a local artisan, elevates them to a new level of serenity, creating a calming atmosphere that soothes the mind and body.
Materials:
- 1 pound pure beeswax pellets, sourced from a local beekeeper if possible
- 1/4 cup dried lavender flowers, preferably organic and culinary grade
- Pre-waxed cotton wicks, size appropriate for your chosen containers (e.g., #2 or #4 for small jars)
- 6-8 small glass jars or metal tins, thoroughly cleaned and dried (4-ounce size recommended)
- Double boiler or a heat-safe stainless steel bowl and a saucepan
- Thermometer, preferably a digital candy thermometer
- Wooden skewers or chopsticks for centering the wicks
- Heat-resistant gloves or oven mitts
Instructions:
- Prepare your jars or tins by carefully centering a pre-waxed cotton wick in each container. You can use a small glue dot or a tiny piece of double-sided tape to adhere the wick to the bottom of the container, ensuring it remains in place during the pouring process. Wrap the top of the wick securely around a wooden skewer or chopstick and lay it across the top of the container to keep the wick perfectly centered while the wax cools and hardens.
- In a double boiler or heat-safe stainless steel bowl set over a saucepan of gently simmering water, melt the beeswax pellets slowly and evenly. Heat the wax gently, stirring occasionally with a heat-resistant spatula, until it is completely melted and smooth. Use a thermometer to carefully monitor the temperature of the wax, ensuring it does not exceed 185°F (85°C). Overheating the wax can damage its properties and create a safety hazard.

- Remove the melted wax from the heat and allow it to cool slightly, to around 160-170°F (71-77°C). Gently stir in the dried lavender flowers, using approximately 1-2 tablespoons of lavender per pound of wax, depending on your desired fragrance strength. Distribute the lavender evenly throughout the wax mixture.
- Carefully and slowly pour the melted wax into the prepared jars or tins, leaving about 1/2 inch of headspace at the top of each container. Avoid pouring too quickly, which can cause air bubbles to form in the wax.
- Let the candles cool completely undisturbed at room temperature, away from drafts or direct sunlight. This can take several hours, or even overnight, depending on the size of your candles.
- Once the candles are completely cool and the wax has fully hardened, trim the wicks to about 1/4 inch in length, using sharp scissors or wick trimmers.
- Light your homemade beeswax candles and enjoy the warm, soothing glow and the calming fragrance of lavender, creating a cozy and inviting ambiance in your home. Always burn candles within sight and never leave them unattended.

As autumn paints the world in breathtaking hues of gold and crimson, may these simple, homespun pleasures bring warmth, contentment, and a deeper connection to the land to your homestead. From the savory goodness of Sweet Potato Chili simmered on the stovetop to the enriching power of leaf mold compost nourishing your garden soil and the calming glow of lavender candles filling your home with tranquility, let us embrace the abundant bounty of the season and the empowering joy of self-sufficiency. What are your favorite autumnal traditions and homesteading activities? Share your inspiring thoughts and personal experiences in the comments below – we'd love to hear from you!