Autumn's Bounty: Preserving Your Late-Season Harvest for Cozy Winter Meals
The air is crisp, the leaves are putting on their final, fiery show, and the garden… well, it’s still overflowing! Despite the shortening days and cooler temperatures, the late-autumn garden often surprises us with a final burst of abundance. Tomatoes cling to their vines, peppers ripen in a rainbow of colors, and herbs stand strong, their fragrance intensified by the cool air. It's a truly satisfying sight, a testament to a summer well-spent.
But let's be honest, that abundance can also feel a little overwhelming. Does your kitchen counter look like a farmers' market exploded? Are you drowning in tomatoes and peppers, unsure what to do before the first frost? You're not alone!

In this post, I'll share three easy, beginner-friendly methods for preserving your late-season harvest, so you can enjoy the taste of summer all winter long and minimize food waste. Grab a cup of tea (maybe even one infused with some of those garden herbs!) and let's turn that abundance into delicious winter meals!
Freezing for Flavor: Simple Steps for Perfect Tomato Sauce Base
One of the easiest and most rewarding ways to preserve your late-season tomatoes is by turning them into a flavorful sauce base that you can freeze for later use. Imagine pulling out a jar of sun-ripened goodness in the middle of January to whip up a comforting bowl of pasta!
Here's how I do it:
Roast: Preheat your oven to 400°F (200°C). Roughly chop your tomatoes (any variety will do, but Roma or San Marzano are excellent for sauce), toss them with olive oil, garlic cloves (whole or minced), salt, pepper, and any other herbs you like (basil, oregano, thyme – all work beautifully). Spread them in a single layer on a baking sheet.
Bake: Roast for 45-60 minutes, or until the tomatoes are soft, slightly caramelized, and have released their juices.
Peel (Optional but Recommended): Let the tomatoes cool slightly. While not strictly necessary, peeling the tomatoes at this stage will result in a smoother sauce. The skins should slip off easily. If you're short on time, you can skip this step.
Blend (Optional): For a smoother sauce, blend the roasted tomatoes using an immersion blender or transfer them to a regular blender (working in batches, and being careful with hot liquids!). You can also leave them chunky if you prefer a more rustic sauce.
Cool & Freeze: Let the sauce cool completely. Transfer it to freezer-safe containers or bags, leaving some headspace for expansion. Label with the date and contents. Freeze for up to 6-8 months.

My Tomato Sauce Disaster (and What I Learned):
I’ll never forget the year I decided to freeze my tomato sauce in glass jars without leaving enough headspace. Let’s just say I woke up to a freezer filled with shattered glass and tomato sauce icicles! It was a messy, heartbreaking experience. That's why I always emphasize the importance of leaving that crucial bit of extra space in your containers – it's a lesson I learned the hard way!
Freezing Tip: Blanching is an important step in maintaining the quality of frozen produce. In this case, you are roasting the tomatoes so they are already cooked and blanched. However, if you were to freeze raw tomatoes, cut them in half and submerge them in boiling water for one minute. Then transfer them to ice water for 1-2 minutes. This stops the enzymatic processes that degrade the product quality.
Herb Infusions: Drying & Storing Your Fragrant Garden Treasures
Don't let those fragrant herbs go to waste! Drying herbs is a simple and satisfying way to preserve their flavor and aroma for use in winter soups, stews, sauces, and teas.
Here are two easy drying methods:
Air Drying:
- Harvest your herbs in the morning after the dew has dried.
- Tie small bunches together with twine.
- Hang them upside down in a cool, dry, well-ventilated place (away from direct sunlight) for 1-3 weeks, or until they are completely dry and brittle. A paper bag with holes poked in it can be placed over the bunches to protect them from dust.
- Once dry, strip the leaves from the stems and store them in airtight containers.
Oven Drying:
- Preheat your oven to the lowest setting (usually around 170°F or 77°C).
- Spread the herb leaves in a single layer on a baking sheet lined with parchment paper.
- Dry in the oven for 2-4 hours, or until they are completely dry and brittle, flipping them occasionally. Leave the oven door slightly ajar to allow moisture to escape.
- Let cool completely before storing in airtight containers.
Herb-Infused Olive Oil: A Simple Luxury
One of my favorite ways to use dried herbs is to create herb-infused olive oil. Simply combine your dried herbs (rosemary, thyme, oregano, garlic – the possibilities are endless!) with good-quality olive oil in a clean jar. Let it infuse for a few weeks, shaking occasionally. Strain out the herbs and you'll have a delicious, fragrant oil for drizzling over salads, dipping bread, or cooking. This also makes a wonderful homemade gift!
Storage Tip: Store your dried herbs in airtight glass jars or containers in a cool, dark place. Properly stored, they should retain their flavor for up to a year. Avoid storing them above the stove, where heat and humidity can degrade them quickly.
Apple Butter Bliss: A Slow Cooker Recipe for Fall's Sweetest Treat
Is there anything more comforting than the aroma of apples simmering with cinnamon and spices? Apple butter is a classic fall treat that's surprisingly easy to make in a slow cooker. It's perfect spread on toast, stirred into oatmeal, or used as a filling for pies and tarts.
Slow Cooker Apple Butter Recipe:
Ingredients:
- 6 pounds apples, peeled, cored, and chopped (I love using a mix of varieties like Honeycrisp and Gala for a balanced flavor)
- 1 cup apple cider or apple juice
- ¾ cup brown sugar (or maple syrup for a more natural option)
- 2 tablespoons apple cider vinegar
- 2 teaspoons ground cinnamon
- ½ teaspoon ground nutmeg
- ¼ teaspoon ground cloves (optional)
- Pinch of salt
Instructions:
- Combine all ingredients in a slow cooker.
- Cook on low for 8-10 hours, or until the apples are very soft and the mixture has thickened. Stir occasionally to prevent sticking.
- Use an immersion blender to puree the apple mixture until smooth. Alternatively, let cool slightly and transfer to a regular blender (working in batches).
- Continue cooking on low, uncovered, for another 1-2 hours, or until the apple butter reaches your desired consistency. Stir frequently to prevent scorching.
- Ladle the hot apple butter into sterilized jars, leaving ¼ inch headspace. Process in a boiling water bath for 10 minutes to ensure proper sealing. (If you're not familiar with canning, you can skip this step and simply store the apple butter in the refrigerator for up to 2 weeks, or freeze it for longer storage.)

Spice It Up!
Feel free to experiment with different spices in your apple butter. A pinch of cardamom or ginger can add a unique and warming flavor. I sometimes like to add a splash of bourbon or rum for an extra layer of richness!
Actionable Tips for Preserving Your Harvest
To make the process even easier, here's a quick recap:
Freezing Tomato Sauce Base:
- Roast tomatoes with garlic and herbs.
- Peel (optional) and blend (optional).
- Cool completely and freeze in freezer-safe containers, leaving headspace.
Drying Herbs:
- Harvest herbs in the morning.
- Air dry by hanging in bunches, or oven dry on low heat.
- Store dried herbs in airtight containers.
Slow Cooker Apple Butter:
- Combine chopped apples, spices, and liquid in a slow cooker.
- Cook on low for 8-10 hours, then puree.
- Cook uncovered for another 1-2 hours until desired consistency is reached.
- Store in the fridge or freezer for an easy winter treat
Harvest Preservation Checklist:
- Inventory your harvest and prioritize what needs to be preserved first.
- Gather your supplies: containers, jars, olive oil, spices, etc.
- Set aside a dedicated time for preserving.
- Follow safe food handling practices.
- Label everything clearly with the date and contents.
For More Information:
For detailed information on safe food preservation practices, I highly recommend checking out the resources at your local agricultural extension office or the National Center for Home Food Preservation: https://nchfp.uga.edu/
Alternatives
If roasting tomatoes is not preferred, you may cut the tomatoes in half and submerge them in boiling water for one minute. Then transfer them to ice water for 1-2 minutes. Once cooled, the skins should slide off easily. This blanching process allows you to remove the skins easily so you may freeze the tomatoes whole or chopped without the oven.
If blanching is not preferred, adding 1-2 TBSP of lemon juice to the sauce while cooking will help preserve the quality and taste of the sauce while frozen.
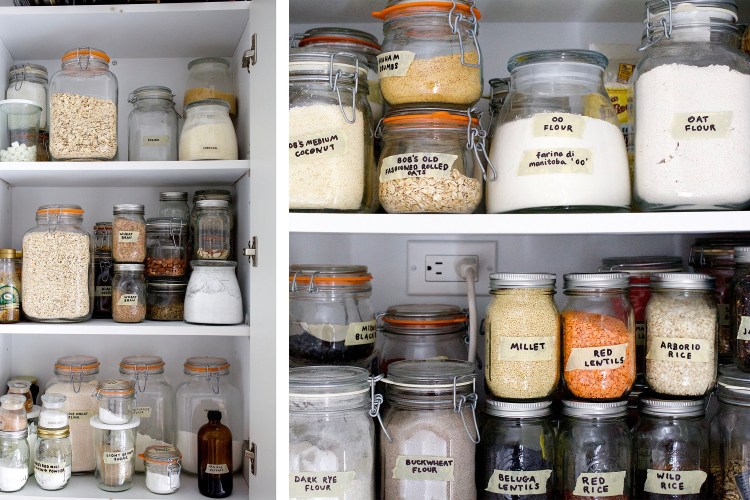
Closing Reflection
There's something incredibly satisfying about preserving your own food. It's a connection to the earth, a way to reduce food waste, and a gift to yourself that you can enjoy throughout the long winter months. Imagine the warmth and joy of using your homegrown tomato sauce in a lasagna on a snowy evening, or adding a sprinkle of your dried herbs to a comforting pot of soup.

What are your favorite ways to preserve your late-season harvest? Share your tips and experiences in the comments below! Don't forget to share this post with a friend who might find it helpful.
