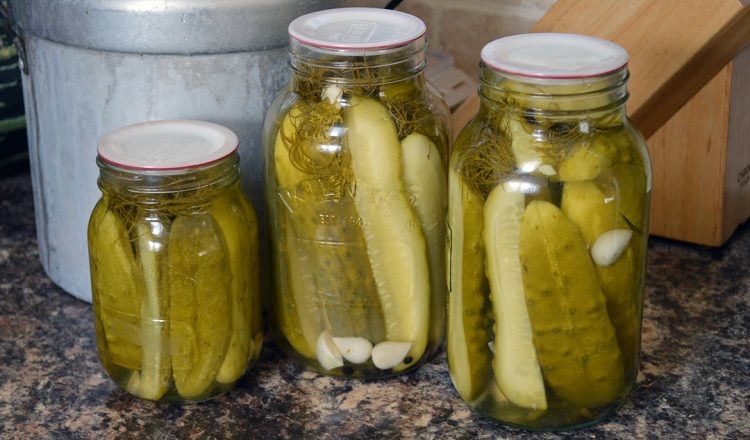
Autumn's Bounty: From Garden to Jar - Simple Pickling Recipes for a Cozy Winter Pantry
The crisp air bites with a promise of frost, and the leaves are putting on their final, fiery show. As gardeners, we feel a bittersweet pang. The long, sunny days of tending our plots are drawing to a close, but the earth has generously gifted us with its final treasures. Soon, the pumpkins will be carved, the last tomatoes plucked, and the root vegetables unearthed. What to do with this abundance?
Imagine your pantry, not as a space holding mere staples, but as a vibrant gallery of summer's captured flavors, ready to brighten even the chilliest winter evening. That's the magic of pickling! I remember my first attempt at dill pickles. I was so excited, but I forgot the dill! Let's just say they were... vinegary cucumbers. A valuable lesson learned! But don't let mishaps deter you. With a few simple techniques, you can transform your autumn harvest into a winter's delight. Let's dive in!

The Allure of Pickling (Why Pickle?)
Pickling is more than just preserving food; it's a connection to our ancestors, a sustainable way to enjoy seasonal produce year-round, and a creative culinary endeavor.
- Preserving the Harvest: Pickling allows you to extend the life of your precious homegrown vegetables and fruits, preventing waste and savoring summer's bounty long after the growing season ends. Think of enjoying crisp dill pickles alongside a hearty winter stew, or adding sweet and tangy pickled beets to a festive holiday salad.
- Health Benefits: Many pickled foods, especially those that are fermented, are rich in probiotics, beneficial bacteria that support gut health and boost your immune system.
- Culinary Creativity: Pickling offers endless possibilities for experimentation. From classic dill pickles to spicy pickled peppers, you can customize flavors to your liking and create unique condiments to complement your meals.
- Self-Sufficiency and Cost Savings: By pickling your own produce, you reduce your reliance on store-bought items and save money while enjoying high-quality, homemade goods.
Essential Equipment and Ingredients (Getting Started)
Before you begin your pickling adventure, gather these essential tools and ingredients:
Equipment:
- Canning Jars: Use specifically designed canning jars (e.g., Ball, Kerr) in various sizes (pint, quart) depending on your needs. These jars are made to withstand the heat of the canning process.
- Canning Lids and Rings: New lids are crucial for a proper seal. Rings can be reused as long as they are rust-free.
- Large Stockpot or Water Bath Canner: This is used for processing the filled jars in boiling water to create a vacuum seal.
- Jar Lifter: A jar lifter is essential for safely lifting hot jars out of the boiling water.
- Ladle: For transferring hot brine and vegetables into the jars.
- Bubble Remover/Headspace Tool: A plastic or wooden tool to remove air bubbles from the jars after filling and to measure headspace (the space between the top of the food and the lid).
- Kitchen Scale (Optional): For accurate measurements, especially for salt.
- Cutting Board and Knives: For preparing vegetables.
- Measuring Cups and Spoons: For accurate ingredient measurements.
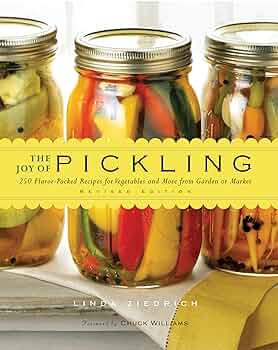
Ingredients:
- Vinegar: Distilled white vinegar (5% acidity) is the most common type used for pickling, as it has a neutral flavor and ensures proper preservation. Apple cider vinegar can also be used for a slightly different flavor profile.
- Salt: Use canning or pickling salt, which is pure sodium chloride without additives like iodine that can darken pickles.
- Sugar: Sugar is used to balance the acidity of the vinegar and enhance the flavor. Granulated sugar is most commonly used.
- Spices: Spices are what give pickles their unique flavor. Common pickling spices include dill seed, mustard seed, peppercorns, garlic, bay leaves, and red pepper flakes.
- Fresh Produce: Choose fresh, high-quality vegetables and fruits that are free from blemishes.
(Short Video Here - Showcase basic equipment: jars, lids, lifter, etc.)
Recipe 1: Zesty Dill Pickles
This classic recipe is a crowd-pleaser and a great starting point for beginner picklers.
Ingredients:
- 4 pounds pickling cucumbers, 3-4 inches long
- 8 cloves garlic, peeled
- 8 sprigs fresh dill
- 4 teaspoons mustard seed
- 2 teaspoons black peppercorns
- 4 cups distilled white vinegar (5% acidity)
- 4 cups water
- 1/4 cup canning salt
Instructions:
Prepare the Cucumbers: Wash cucumbers thoroughly and trim 1/16 inch off the blossom end (this contains enzymes that can cause softening).
Prepare the Jars: Sterilize canning jars and lids by boiling them in water for 10 minutes. Keep jars hot until ready to use.
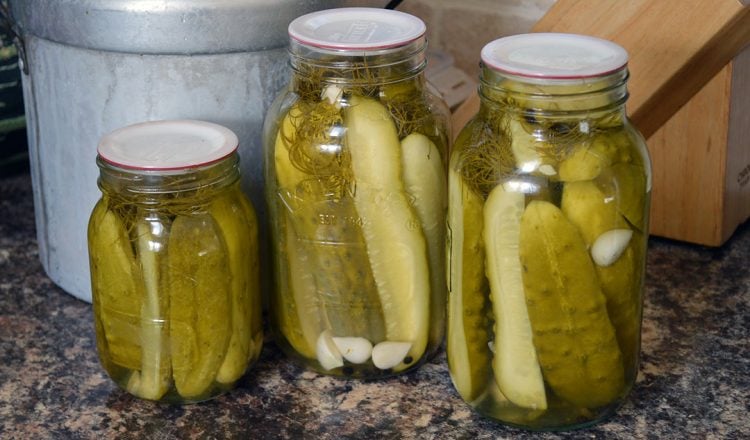
Pack the Jars: Place 2 cloves of garlic, 2 sprigs of dill, 1 teaspoon of mustard seed, and 1/2 teaspoon of black peppercorns in each hot jar. Pack cucumbers tightly into the jars, leaving 1/2-inch headspace.
Make the Brine: In a large saucepan, combine vinegar, water, and salt. Bring to a boil, stirring until salt is dissolved.
Pour Brine over Cucumbers: Carefully pour the hot brine over the cucumbers in each jar, leaving 1/2-inch headspace. Remove any air bubbles using a bubble remover tool.
Wipe Jar Rims: Wipe the rims of the jars with a clean, damp cloth.
Place Lids and Rings: Place lids on the jars and screw on the rings fingertip tight.
Process in Water Bath: Place jars in a boiling water bath canner. Ensure the water covers the jars by at least 1 inch. Bring to a boil and process for 10-15 minutes for pint jars, adjusting for altitude (add time for higher elevations).
Cool and Check Seals: Turn off the heat and let the jars sit in the water for 5 minutes before removing them with a jar lifter. Place jars on a towel-lined surface and let cool completely for 12-24 hours. As the jars cool, you should hear a "pop" sound, indicating that the lids have sealed.
Check Seals: After 24 hours, check the seals by pressing down on the center of each lid. If the lid flexes, it is not properly sealed and should be reprocessed with a new lid or refrigerated and consumed within a few weeks.
Troubleshooting Tips:
- Soft Pickles: Ensure you are using pickling cucumbers and trimming the blossom end. Avoid over-processing.
- Cloudy Brine: This can be caused by using iodized salt or hard water. Use canning salt and filtered water.
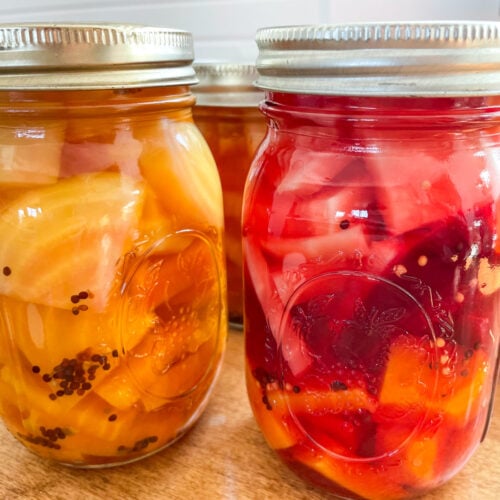
Recipe 2: Sweet and Spicy Pickled Beets
Add a vibrant pop of color and flavor to your winter meals with these delicious pickled beets.
Ingredients:
- 3 pounds beets, trimmed and scrubbed
- 1 cup water
- 1 cup distilled white vinegar (5% acidity)
- 1/2 cup sugar
- 1 teaspoon salt
- 1/2 teaspoon whole cloves
- 1 cinnamon stick
Instructions:
Cook the Beets: Place beets in a large pot and cover with water. Bring to a boil and cook until tender, about 30-45 minutes.
Cool and Peel: Drain the beets and let them cool slightly. Once cool enough to handle, slip off the skins.
Slice or Dice: Cut the beets into 1/4-inch thick slices or dice them into smaller pieces.
Prepare the Jars: Sterilize canning jars and lids.
Pack the Jars: Pack the beets into hot jars, leaving 1/2-inch headspace.
Make the Brine: In a saucepan, combine water, vinegar, sugar, salt, cloves, and cinnamon stick. Bring to a boil, stirring until sugar and salt are dissolved.
Pour Brine over Beets: Carefully pour the hot brine over the beets, leaving 1/2-inch headspace. Remove air bubbles.
Wipe Jar Rims: Wipe the rims of the jars with a clean, damp cloth.
Place Lids and Rings: Place lids on the jars and screw on the rings fingertip tight.
Process in Water Bath: Process in a boiling water bath for 30 minutes for pint jars, adjusting for altitude.
Cool and Check Seals: Cool and check seals as described in the dill pickle recipe.
Storing and Enjoying Your Pickles (The Winter Pantry)
- Storage: Properly sealed and processed pickles can be stored in a cool, dark, and dry place for at least one year. Once opened, refrigerate pickles.
- Enjoying:
- Dill Pickles: Enjoy them straight from the jar, on sandwiches, chopped into salads, or as a side to grilled meats.
- Pickled Beets: Add them to salads, use them as a colorful topping for goat cheese crostini, or serve them as a side dish.
Actionable Tips:
- Safety First:
- Always use proper canning techniques to prevent spoilage and ensure food safety.
- Sterilize jars and lids before filling.
- Use new lids for each batch.
- Follow recommended processing times.
- Preparation Checklist:
- Gather all necessary equipment and ingredients.
- Wash and prepare produce.
- Sterilize jars and lids.
- Prepare brine according to recipe.
(Include a printable canning label template that readers can customize)
Closing Reflection
Embrace the art of pickling and transform your autumn harvest into a winter's delight! Imagine the joy of opening a jar of sunshine on a cold winter day. What will you pickle first? Share your pickling plans and photos in the comments below! Let's celebrate the bounty of the season together.
For more inspiration, check out these other pickling recipes on Better Homes and Harvests: [link to related articles].