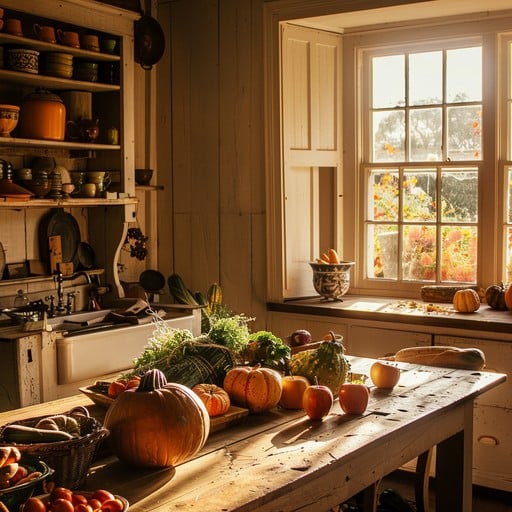
Autumn's Bounty: 5 Delicious & Easy Ways to Preserve Your Late-Season Harvest
The air is crisp, the leaves are ablaze with color, and the garden is overflowing with the last treasures of summer. There's a bittersweet beauty to autumn, a sense of urgency to gather and prepare before the frost sets in. What better way to honor this season than by preserving the fruits (and vegetables!) of your labor? In this post, you'll discover five simple methods for preserving your garden's late-season bounty, ensuring you can enjoy the homegrown flavors of autumn all winter long. Get ready to transform your harvest into delicious jams, pickles, sauces, and more!
1. The Magic of Quick Pickling: Veggies with Zing
Pickling is a fantastic way to preserve vegetables like cucumbers, green beans, peppers, and even beets. While traditional pickling can be a lengthy process, quick pickling (also known as refrigerator pickling) is incredibly simple and yields delicious results in just a few days. The best part? No special equipment is needed!
Here's the basic process:
- Prepare your vegetables: Wash and chop your chosen veggies into desired shapes and sizes.
- Make the brine: In a saucepan, combine equal parts vinegar (white or apple cider vinegar work well) and water. Add salt, sugar (optional), and any desired spices like dill, garlic, peppercorns, or red pepper flakes. Bring to a boil, stirring until the salt and sugar are dissolved.
- Pack and pour: Pack your prepared vegetables tightly into sterilized jars. Pour the hot brine over the vegetables, leaving about ½ inch of headspace.
- Refrigerate: Let the jars cool completely, then seal and refrigerate. Your pickles will be ready to eat in about 2-3 days.
I remember one year, my cucumber crop exploded! I was drowning in cucumbers. Quick pickling saved the day, and we enjoyed those tangy pickles on sandwiches and salads all winter long. They were a delicious reminder of summer, even on the coldest days.
2. Turning Apples into Liquid Gold: Homemade Apple Butter
Apple butter is a classic fall treat, perfect for spreading on toast, biscuits, or even using as a glaze for pork. It's essentially concentrated applesauce, cooked down until it's thick, smooth, and richly flavored. While it requires some simmering time, the hands-on work is minimal. This is a great sustainable home project and perfect for utilizing your seasonal harvest of apples.
Here’s the simplified approach:
- Prepare the apples: Wash, peel, core, and chop a large quantity of apples (about 6-8 pounds). A mix of varieties adds depth of flavor.
- Cook them down: Place the chopped apples in a large pot or slow cooker. Add a cup of apple cider or water, cinnamon, nutmeg, cloves, and a touch of sugar (optional, depending on the sweetness of your apples).
- Simmer, simmer, simmer: Bring to a simmer, then reduce heat and cook for several hours, stirring occasionally, until the apples are very soft and the mixture has thickened. For slow cooker method, cook on low for 8-10 hours.
- Blend and preserve (optional): Use an immersion blender to create a smooth consistency. If desired, you can can the apple butter in sterilized jars using a water bath canner for long-term storage. Otherwise, store in the refrigerator for up to two weeks.
The amber glow of the afternoon sun catching the dust motes in my kitchen as I stirred the simmering apple butter is a memory I cherish every fall. The scent alone is enough to transport me back to cozy moments.
3. Capturing Sunshine in a Jar: Freezing Herbs for Winter Flavor
Don't let your fresh herbs wither away with the first frost. Freezing herbs is a simple and effective way to preserve their flavor for use in soups, stews, sauces, and more.
Here's how:
- Wash and dry: Rinse your herbs thoroughly and pat them dry with a clean towel.
- Chop or leave whole: You can chop the herbs into small pieces or freeze them whole.
- Freeze in ice cube trays: Fill ice cube trays with chopped herbs and cover with water or olive oil. Freeze until solid, then transfer the cubes to a freezer bag.
- Freeze in bags: Spread whole leaves flat on a baking sheet lined with parchment paper and freeze until solid. Then, transfer the frozen leaves to a freezer bag.
I love having frozen basil cubes on hand for adding to pasta sauce in the dead of winter. It’s like a little taste of summer sunshine in every bite!
4. Tomato Sauce: From Garden to Pantry
If you've grown tomatoes, you know the joy of a bumper crop. Making your own tomato sauce is an incredibly rewarding experience. Imagine the possibilities! Turning your organic gardening efforts into a delicious sauce.
The steps are straightforward:
- Roast Tomatoes: Preheat oven to 400°F (200°C). Roughly chop your tomatoes (Roma or San Marzano varieties work well). Toss with olive oil, garlic, and herbs (basil, oregano, thyme). Spread on baking sheets and roast for 45-60 minutes, until softened and slightly caramelized.
- Puree: Let the roasted tomatoes cool slightly, then puree them in a food processor or blender until smooth.
- Simmer and Season: Pour the pureed sauce into a large pot. Simmer over medium-low heat for at least an hour, or longer for a thicker sauce. Season with salt, pepper, and any additional herbs or spices you like (red pepper flakes, bay leaf).
- Preserve: Follow proper canning procedures to preserve your tomato sauce in sterilized jars. Alternatively, freeze in freezer-safe containers.
5. Fermenting the Flavors: Homemade Sauerkraut
Sauerkraut is a fermented food made from shredded cabbage. This isn't just food preservation; it’s actually enhancing the nutritional value and health benefits!
Here's a simplified version to get you started:
- Shred the cabbage: Remove the outer leaves of a head of cabbage. Shred the cabbage finely using a knife, mandoline, or food processor.
- Salt and massage: Place the shredded cabbage in a large bowl. Add salt (about 2-3% of the cabbage weight). Massage the cabbage with your hands for 5-10 minutes until it starts to release its juices.
- Pack it down: Pack the salted cabbage tightly into a clean jar or crock. Use a weight (a smaller jar filled with water works well) to keep the cabbage submerged in its own juices.
- Ferment: Cover the jar with a lid or cloth secured with a rubber band. Place the jar in a cool, dark place (65-75°F) for 1-4 weeks. Check it daily and press down on the cabbage if needed to keep it submerged.
- Taste and store: After 1 week, start tasting the sauerkraut. It's ready when it has a pleasantly sour taste. Store in the refrigerator to slow down the fermentation process.
My first attempt at sauerkraut was a little… pungent, to say the least! But I learned from my mistakes, and now I make a batch every fall. It’s a delicious and healthy addition to sandwiches, salads, and even soups.
Actionable Tips for a Successful Harvest Preservation
- Start small: Don't feel like you need to preserve everything at once. Choose one or two methods to try this year.
- Gather your supplies: Before you start, make sure you have all the necessary equipment and ingredients. This will save you time and frustration.
- Follow recipes carefully: Especially when canning, it's important to follow tested recipes to ensure food safety.
- Label everything: Label your jars and freezer bags with the date and contents.
- Embrace the process: Preserving your harvest should be a joyful experience. Put on some music, invite a friend to help, and enjoy the process of transforming your homegrown bounty into delicious food for the winter.
- Practice good sanitation: Cleanliness is key to success! Make sure all your equipment is clean and sanitized. Wash your hands frequently.
- Composting scraps: Utilize leftover vegetable scraps to create compost.
Closing Reflection
As the days grow shorter and the nights grow cooler, there’s a deep satisfaction in knowing that we've taken the time to preserve the abundance of the fall harvest. These simple acts of self-sufficiency connect us to the rhythms of nature, nourish our bodies, and fill our homes with warmth and delicious aromas. Embrace the cozy living that comes with the season and remember every little bit of effort adds to creating your sustainable home.
We encourage you to share your own fall preserving adventures with us! Post photos of your homemade jams, pickles, and sauces on our Facebook page ([insert dummy link here]) and tag them with #BetterHomesAndHarvestsFall. We can't wait to see what you're creating! Remember to enjoy the fall foliage while you're at it!