Autumn's Abundance: 5 Delicious Ways to Preserve Your Apple Harvest for Cozy Winter Days

Oh, the magic of autumn! Crisp air, colorful leaves, and the sweet, tangy aroma of apples filling the air. There's nothing quite like a bountiful apple harvest. But what do you do when your trees are overflowing, and you can barely keep up with baking pies? The challenge is real, my friend! But so is the reward: a pantry stocked with homemade goodness that will bring sunshine to even the chilliest winter day. Did you know that nearly half of all apples produced are wasted? Let's change that, one delicious preserved apple at a time!
Today, let's chat over a cup of herbal tea about some simple and scrumptious ways to preserve your apple bounty. I'm excited to share my favorite methods for capturing the taste of fall and extending the joy of your harvest well into the winter months. These are tried and true methods, perfect for the beginner homesteader and experienced gardener alike. We'll focus on sustainable practices and reducing food waste, making the most of every precious apple. Ready? Let's dive in!
1. Making Apple Cider Vinegar: From Scraps to Liquid Gold
Apple cider vinegar (ACV) is a staple in any homestead kitchen. It's a versatile ingredient for cooking, cleaning, and even wellness remedies. And the best part? You can make it from apple scraps! This is a fantastic way to use up cores and peels that would otherwise end up in the compost. The apple cider vinegar recipe is so simple!
What you'll need:
- Apple scraps (cores, peels, bruised pieces)
- Filtered water
- Sugar (organic cane sugar works well)
- Large glass jar
- Cheesecloth or coffee filter
- Rubber band
Instructions:
- Collect your scraps: Save apple cores, peels, and any bruised pieces in a clean container.
- Fill the jar: Pack the apple scraps into your glass jar, leaving about an inch of space at the top.
- Sugar solution: Dissolve 2 tablespoons of sugar per quart of filtered water. This feeds the bacteria needed for fermentation.
- Submerge the apples: Pour the sugar water over the apple scraps, ensuring they are completely submerged. You may need to weigh them down with a small glass weight.
- Cover and wait: Cover the jar with cheesecloth or a coffee filter secured with a rubber band. This allows airflow while keeping out fruit flies.
- Fermentation: Store the jar in a dark, room-temperature place (around 65-75°F) for 2-3 weeks. You'll start to see bubbles forming as the fermentation process begins.
- Strain and taste: After 2-3 weeks, strain the liquid through cheesecloth into a clean jar. Taste it – it should taste tart and slightly sweet.
- Second fermentation: Cover the jar again with cheesecloth and let it sit for another 2-4 weeks, or until it reaches your desired level of acidity. Taste it regularly.
- Store: Once the ACV is ready, store it in a sealed bottle in a cool, dark place.
Troubleshooting:
- Mold: If you see mold forming, discard the batch. Ensuring the apple scraps are fully submerged is crucial.
- Fruit flies: Make sure the cheesecloth is tightly secured to prevent fruit flies from getting in.
My story: I remember the first time I made ACV, I forgot to weigh down the apple scraps, and they all floated to the top! It created a perfect environment for mold, and I had to toss the whole batch. Lesson learned! Now, I use a small glass fermentation weight to keep everything submerged.
2. Dehydrating Apple Chips: A Healthy and Delicious Snack
Dehydrating apples is a simple and effective way to preserve them. Apple chips are a healthy and delicious snack that kids and adults love. Plus, they're perfect for lunchboxes or road trips.
What you'll need:
- Apples (any variety)
- Lemon juice (optional, to prevent browning)
- Cinnamon or other spices (optional)
- Dehydrator or oven
Instructions:
- Prepare the apples: Wash, core, and slice the apples into thin, even slices (about 1/8 inch thick). A mandoline slicer makes this process much easier.
- Prevent browning (optional): Dip the apple slices in a mixture of lemon juice and water (1 tablespoon lemon juice per cup of water) for a few minutes. This helps prevent them from browning.
- Spice it up (optional): Sprinkle the apple slices with cinnamon, nutmeg, or any other spices you like.
- Dehydrate: Arrange the apple slices in a single layer on the dehydrator trays or on baking sheets lined with parchment paper.
- Dehydrator: Dehydrate at 135°F (57°C) for 6-12 hours, or until the apples are leathery and pliable.
- Oven: Bake at the lowest possible temperature (ideally 170°F or lower) for 2-4 hours, flipping the slices halfway through, until they are leathery. Leave the oven door slightly ajar to allow moisture to escape.
- Cool and store: Let the apple chips cool completely before storing them in an airtight container.
Tips:
- For extra flavor, try sprinkling the apple slices with a pinch of sea salt before dehydrating.
- Store the apple chips in a cool, dry place for up to several months.
3. Freezing Apple Slices: Ready for Pies and Crumbles
Freezing apple slices is a quick and easy way to preserve them for baking pies, crumbles, and other desserts later.
What you'll need:
- Apples (firm varieties like Granny Smith or Honeycrisp work well)
- Lemon juice
- Sugar (optional)
- Baking sheets
- Freezer bags or containers
Instructions:
- Prepare the apples: Wash, peel, core, and slice the apples into the desired size for your recipes.
- Prevent browning: Toss the apple slices with lemon juice (about 1 tablespoon per 4 cups of apples). This helps prevent them from browning in the freezer. You can also add a bit of sugar (optional) to help draw out moisture.
- Freeze in a single layer: Spread the apple slices in a single layer on baking sheets lined with parchment paper. Freeze for 1-2 hours, or until the apples are frozen solid.
- Transfer to freezer bags: Transfer the frozen apple slices to freezer bags or containers. Label and date the bags.
- Store: Store the frozen apple slices in the freezer for up to 6-9 months.
Tips:
- Freezing the apple slices in a single layer first prevents them from clumping together in the freezer.
- When using the frozen apples in recipes, there's no need to thaw them first. Just add them directly to your pie filling or crumble topping.
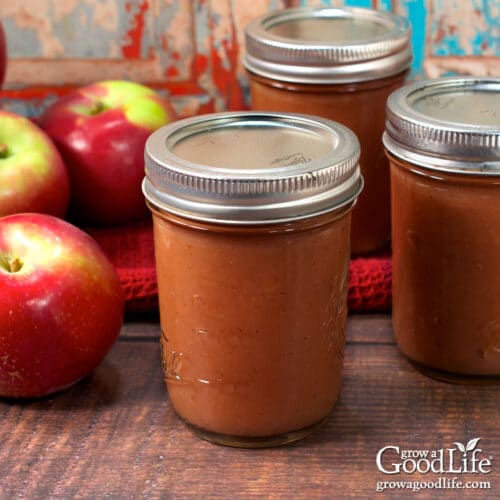
4. Making Apple Butter: A Taste of Fall in a Jar
Apple butter is a deliciously smooth and spreadable preserve made from cooked apples, spices, and a touch of sweetness. It's perfect on toast, biscuits, or even as a glaze for meats.
What you'll need:
- Apples (a mix of sweet and tart varieties works best)
- Apple cider or apple juice
- Sugar (brown sugar or maple syrup adds a rich flavor)
- Spices (cinnamon, nutmeg, cloves)
- Lemon juice
- Slow cooker or large pot
Instructions:
- Prepare the apples: Wash, peel, core, and chop the apples.
- Combine ingredients: In a slow cooker or large pot, combine the apples, apple cider or juice, sugar, spices, and lemon juice.
- Cook:
- Slow cooker: Cook on low for 8-10 hours, or until the apples are very soft and the mixture has thickened. Stir occasionally.
- Pot: Cook over medium-low heat for 2-3 hours, or until the apples are very soft and the mixture has thickened. Stir frequently to prevent sticking.
- Puree: Use an immersion blender or transfer the mixture to a regular blender to puree until smooth.
- Continue cooking (optional): If the apple butter is too thin, continue cooking it for another hour or two, stirring occasionally, until it reaches your desired consistency.
- Can (optional): For long-term storage, you can can the apple butter using a water bath canner. Follow proper canning procedures to ensure safety.
- Store: Store the apple butter in the refrigerator for up to 2 weeks, or in the freezer for up to 6 months. If canned, store in a cool, dark place for up to a year.

5. Composting Apple Cores: A Sustainable Solution
Even the parts of the apple we don't eat can be put to good use! Composting apple cores and peels is a fantastic way to reduce food waste and enrich your garden soil. Compost apple cores for a sustainable home.
What you'll need:
- Apple cores and peels
- Compost bin or pile
- Brown materials (leaves, straw, shredded paper)
Instructions:
- Add to compost: Simply add the apple cores and peels to your compost bin or pile.
- Balance with browns: Be sure to balance the "green" materials (apple scraps) with "brown" materials (leaves, straw, shredded paper) to maintain a healthy compost balance. A good ratio is about 2 parts brown to 1 part green.
- Turn regularly: Turn the compost pile regularly to aerate it and speed up the decomposition process.
- Use the compost: After several months, the apple scraps will break down into nutrient-rich compost that you can use to fertilize your garden.

Composting tips:
- Chop the apple cores and peels into smaller pieces to help them break down faster.
- Avoid adding diseased apples to the compost pile, as the disease may spread to your garden.
Embracing the Abundance
Preserving the fall harvest is more than just a way to save food; it's a way to connect with the seasons, appreciate the abundance of nature, and create a truly fulfilling life. The feeling of opening a jar of homemade apple butter on a cold winter morning is simply unmatched.
So, Sarah, I encourage you to try one (or all!) of these methods for preserving your apple harvest this year. Don't be afraid to experiment and put your own twist on things. And most importantly, have fun!
Now, I'd love to hear from you. What are your favorite ways to preserve apples? Share your tips and tricks in the comments below!
And if you're looking for delicious ways to use your preserved apples, check out our recipe for Easy Apple Cake
Happy preserving!