Autumn Bounty: 5 Deliciously Simple Ways to Preserve Your Apple Harvest
The air is crisp, carrying the sweet scent of ripe apples. Sunlight, tinged with gold, filters through the laden branches of your apple trees. It's harvest time – a fleeting season of abundance that fills our hearts with joy and our kitchens with delicious possibilities. But what to do with all those apples? This year, don't let your precious apple harvest go to waste! We'll explore five simple, time-tested methods to savor the taste of autumn all winter long. From the comforting warmth of homemade applesauce to the tangy zing of apple cider vinegar, there's a preservation method here for every taste and skill level. Let's dive in and transform that autumn bounty into pantry staples!
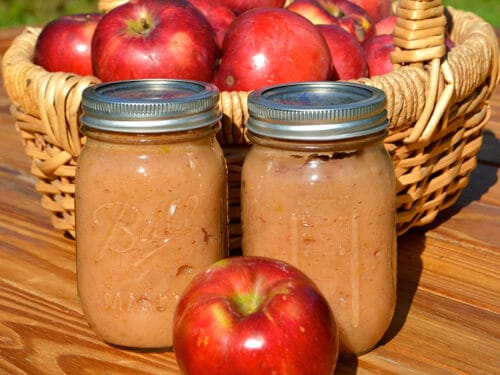
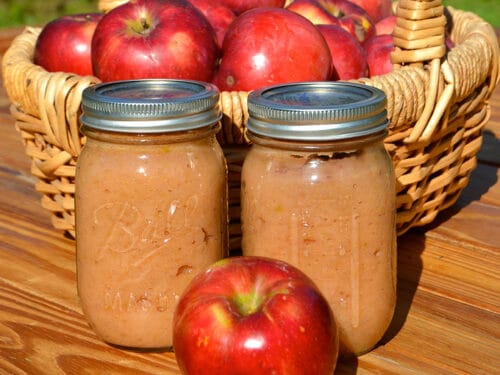
Making and canning applesauce is a great way to preserve the flavors of fall and enjoy them all year long.
Method 1: Apple Sauce (with a Twist)
Applesauce is a quintessential comfort food, and making it from scratch is surprisingly easy. Plus, it's a fantastic way to use up slightly bruised or imperfect apples.
Ingredients:
- 4 pounds apples (a mix of varieties is ideal)
- 1/2 cup water
- 1/4 cup lemon juice (to prevent browning and add brightness)
- Optional: 1/2 cup maple syrup or 1/4 cup brown sugar (adjust to taste)
- Optional spices: 1 teaspoon ground cinnamon, 1/2 teaspoon ground nutmeg, a pinch of ground ginger
Instructions:
- Wash, peel, core, and chop the apples into roughly equal pieces.
- Place the apples in a large pot with the water and lemon juice.
- Bring to a boil, then reduce heat to low, cover, and simmer for 20-25 minutes, or until the apples are very soft.
- Use an immersion blender or a regular blender (working in batches) to puree the apples until smooth.
- Return the applesauce to the pot. If using, stir in the maple syrup or brown sugar and spices.
- Simmer for another 5-10 minutes to allow the flavors to meld.
- Let cool and store in the refrigerator for up to a week, or freeze for longer storage.
A Family Favorite: My grandmother always added a secret ingredient – a pinch of ginger – which gave her applesauce a delightful warmth that everyone loved. I still use her recipe to this day!
Canning Applesauce for Long-Term Storage: If you want to enjoy your applesauce all winter long, canning is the way to go.
- Prepare your canning jars and lids according to manufacturer's instructions.
- Ladle the hot applesauce into the hot jars, leaving 1/2 inch headspace.
- Remove air bubbles, wipe the rims of the jars, and place the lids and rings on.
- Process in a boiling water bath canner for 20 minutes for pint jars and 25 minutes for quart jars (adjust processing time for altitude). Consult a reliable source like the National Center for Home Food Preservation for specific canning instructions.
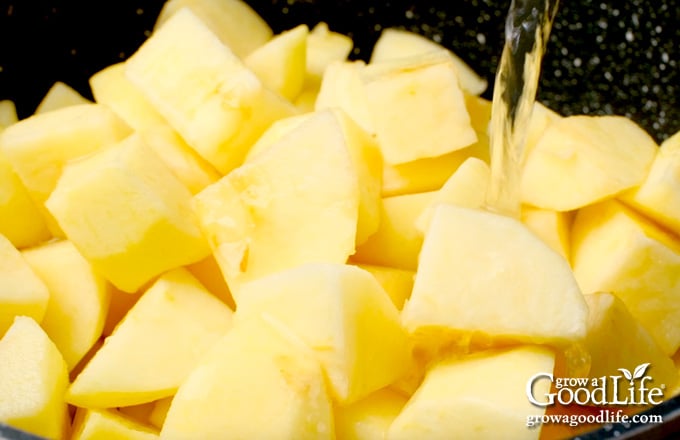
The beginning steps to making applesauce are as easy as adding your ingredients to a pot.
Method 2: Apple Chips
Crispy, sweet, and utterly addictive, apple chips are a healthy and delicious snack that's perfect for satisfying your sweet tooth.
Ingredients:
- Apples (firm varieties like Fuji, Gala, or Honeycrisp work best)
- Optional: Cinnamon, nutmeg, or other spices
Instructions (Dehydrator):
- Wash and core the apples.
- Slice the apples thinly (about 1/8 inch thick) using a mandoline or a sharp knife.
- Dip apple slices in lemon juice to prevent browning.
- Arrange the apple slices in a single layer on the dehydrator trays.
- Sprinkle with cinnamon or other spices, if desired.
- Dehydrate at 135°F (57°C) for 6-12 hours, or until the apples are crispy. The drying time will vary depending on the thickness of the slices and the humidity.
Instructions (Oven):
- Preheat your oven to the lowest setting (ideally 170°F or lower).
- Wash, core, and thinly slice the apples as described above.
- Dip apple slices in lemon juice to prevent browning.
- Arrange the apple slices in a single layer on baking sheets lined with parchment paper.
- Sprinkle with cinnamon or other spices, if desired.
- Bake for 2-4 hours, flipping the apple slices halfway through, until they are crispy. Leave the oven door slightly ajar to allow moisture to escape.
Tips for Perfect Apple Chips:
- Use a mandoline for even slices.
- Don't overcrowd the dehydrator trays or baking sheets.
- Check the apple chips frequently and remove them from the oven or dehydrator when they are crispy but not burnt.
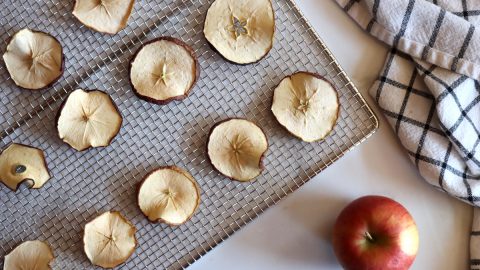
Apple chips dehydrate well and require only apples and your dehydrator!
Method 3: Apple Butter
Apple butter is a rich, decadent spread that's perfect on toast, biscuits, or even as a glaze for meats. It's a bit more time-consuming than applesauce, but the results are well worth the effort.
Ingredients:
- 6 pounds apples (a mix of varieties is ideal)
- 1 cup apple cider or apple juice
- 1 cup granulated sugar
- 1/2 cup brown sugar
- 2 tablespoons apple cider vinegar
- 2 teaspoons ground cinnamon
- 1 teaspoon ground cloves
- 1/2 teaspoon ground nutmeg
- 1/4 teaspoon salt
Instructions:
- Wash, peel, core, and chop the apples into roughly equal pieces.
- Place the apples in a large, heavy-bottomed pot or slow cooker.
- Add the apple cider, granulated sugar, brown sugar, apple cider vinegar, cinnamon, cloves, nutmeg, and salt.
- Bring to a boil, then reduce heat to low, cover, and simmer for 2-3 hours, or until the apples are very soft and the mixture has thickened. Stir occasionally to prevent sticking.
- If using a slow cooker, cook on low for 6-8 hours, or until the apples are very soft and the mixture has thickened. Stir occasionally.
- Use an immersion blender or a regular blender (working in batches) to puree the apple mixture until smooth.
- Return the pureed apple butter to the pot or slow cooker.
- Cook uncovered on low heat for another 1-2 hours, or until the apple butter is very thick and spreadable. Stir frequently to prevent sticking and burning. The apple butter is done when a spoonful placed on a cold plate doesn't run.
- Let cool and store in the refrigerator for up to two weeks, or can for longer storage.
Canning Apple Butter: Apple butter needs to be canned properly to ensure its safety and prevent spoilage.
- Prepare your canning jars and lids according to manufacturer's instructions.
- Ladle the hot apple butter into the hot jars, leaving 1/4 inch headspace.
- Remove air bubbles, wipe the rims of the jars, and place the lids and rings on.
- Process in a boiling water bath canner for 5 minutes for half-pint jars and 10 minutes for pint jars (adjust processing time for altitude). Consult a reliable source like the National Center for Home Food Preservation for specific canning instructions.
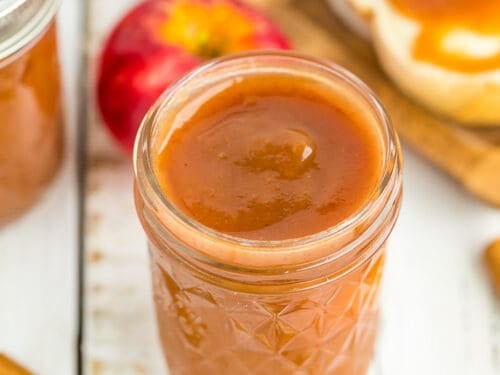
When canning apple butter, be sure to fill your jars and safely process them.
Method 4: Freezing Apple Slices
Freezing apple slices is a simple and convenient way to preserve apples for use in pies, crumbles, smoothies, and other baked goods.
Instructions:
- Wash, peel, core, and slice the apples into your desired size and shape.
- Dip the apple slices in a mixture of water and lemon juice (1 tablespoon lemon juice per cup of water) to prevent browning.
- Arrange the apple slices in a single layer on a baking sheet lined with parchment paper.
- Freeze for 1-2 hours, or until the apple slices are solid.
- Transfer the frozen apple slices to freezer bags or containers.
- Label and date the bags or containers, and store in the freezer for up to 6-8 months.
Tips for Freezing Apples:
- Freezing the apple slices individually before transferring them to bags or containers will prevent them from sticking together.
- Use heavy-duty freezer bags or containers to prevent freezer burn.
- When using frozen apples in baking, there is no need to thaw the slices before use. Simply add them directly to your recipe.
Method 5: Apple Cider Vinegar
Apple cider vinegar (ACV) is a versatile ingredient that can be used in salad dressings, marinades, cleaning products, and even as a health tonic. Making your own ACV is a great way to use up apple scraps and cores.
Ingredients:
- Apple scraps (cores, peels, and bruised pieces)
- Water
- Sugar (optional, but helps to speed up the fermentation process)
Instructions:
- Place the apple scraps in a clean glass jar.
- Add water to cover the apple scraps, leaving about 1 inch of headspace.
- If using, add 1 tablespoon of sugar per quart of water.
- Cover the jar with a breathable cloth (such as cheesecloth) secured with a rubber band. This will allow air to circulate while preventing fruit flies from entering.
- Store the jar in a dark, room-temperature location for 2-3 weeks, or until the apple scraps have sunk to the bottom of the jar. Stir the mixture every few days.
- Strain the liquid through a cheesecloth-lined strainer into a clean jar. Discard the apple scraps.
- Cover the jar with a breathable cloth and secure with a rubber band.
- Store the jar in a dark, room-temperature location for another 2-4 weeks, or until the ACV has a strong, vinegary smell and taste. A "mother" (a cloudy sediment) may form at the bottom of the jar. This is a natural part of the fermentation process and is perfectly safe.
- Once the ACV has reached your desired strength, you can bottle it and store it in a cool, dark place.
Important Notes on Apple Cider Vinegar:
- Use glass jars for the fermentation process, as the acidity of the vinegar can react with metal.
- Ensure adequate airflow during fermentation by using a breathable cloth cover.
- Apple cider vinegar can be used for cleaning, personal care, or culinary use.
With a little effort, you can transform your autumn apple harvest into a pantry full of delicious treats that will bring warmth and joy throughout the colder months. So, gather your apples, choose your favorite preservation method, and get ready to savor the taste of autumn all winter long!
What are your favorite apple-preserving traditions? Share your recipes and tips in the comments below!
Share this post with your fellow homesteading friends and be sure to subscribe to our newsletter for more seasonal recipes and DIY inspiration!