Autumn Abundance: Preserving Your Late-Season Harvest for Winter Comfort
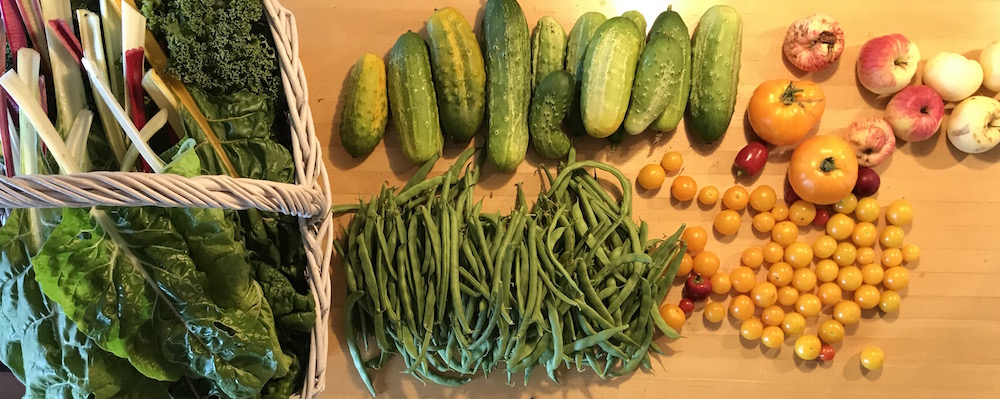
The air is crisp, carrying the scent of woodsmoke and fallen leaves. The days are shorter, but the garden is still overflowing with the last of summer's bounty. Tomatoes ripen on the vine, peppers blush with color, and herbs perfume the air with their earthy fragrance. It's a bittersweet time – a celebration of the harvest and a gentle reminder of the coming winter. But fear not, fellow homesteaders! This abundance doesn't have to end when the frost arrives. In this guide, we'll explore simple and satisfying ways to preserve your late-season harvest, transforming the flavors of autumn into comforting meals to nourish you through the colder months. Imagine the satisfaction of pulling a jar of sun-ripened tomatoes from the pantry in January, a vibrant reminder of summer's warmth on a snowy day.
From Garden to Jar: The Basics of Food Preservation
Preserving food might seem daunting at first, but it's a skill our ancestors mastered out of necessity, and one we can easily learn today. The basic principle is simple: to stop the microorganisms that cause spoilage, we need to either kill them, inhibit their growth, or remove them. There are several methods to choose from, each with its own advantages. We'll focus on canning, freezing, and drying, as they are well-suited for preserving the late-season harvest.
Canning: Capturing Summer in a Jar
Canning is a popular method for preserving fruits, vegetables, and sauces. It involves heating food in sealed jars to kill harmful bacteria and create a vacuum seal, preventing spoilage. There are two main types of canning: water bath canning and pressure canning. Water bath canning is suitable for high-acid foods like tomatoes, fruits, jams, and jellies. Pressure canning is necessary for low-acid foods like beans, corn, and meats.
Before you begin canning:
- Gather your equipment: You'll need canning jars with lids and bands, a large pot with a rack (or a dedicated water bath canner), jar lifters, a wide-mouth funnel, and a ladle.
- Inspect your jars: Check for any chips or cracks, especially around the rim. Damaged jars won't seal properly.
- Prepare your produce: Wash and prepare your fruits and vegetables according to the specific recipe you're using. Follow tested recipes from reputable sources to ensure safety. The National Center for Home Food Preservation is an excellent resource.
- Sanitize: Sterilize your jars. It's best to boil the jars in your water bath canner. After the water boils, continue to boil the jars for 10 minutes before you are ready to begin filling.
Canning Tomatoes: A Step-by-Step Guide
Tomatoes are a staple in many kitchens, and canning them is a great way to enjoy their flavor year-round.
- Prepare the tomatoes: Wash, core, and peel your tomatoes. You can easily peel them by blanching them in boiling water for 30-60 seconds, then plunging them into ice water. The skins will slip right off.
- Crush or dice the tomatoes: Depending on your preference, you can crush the tomatoes by hand or dice them into smaller pieces.
- Add citric acid or lemon juice: This is crucial for ensuring the acidity level is high enough to prevent botulism. Add 1 tablespoon of bottled lemon juice or ¼ teaspoon of citric acid per pint jar.
- Pack the jars: Fill the jars with the prepared tomatoes, leaving ½ inch of headspace. Remove any air bubbles by gently tapping the jars on the counter or using a non-metallic utensil.
- Wipe the rims: Clean the jar rims with a damp cloth to ensure a good seal.
- Place lids and bands: Place the lids on the jars and screw on the bands finger-tight.
- Process in a water bath canner: Lower the jars into the boiling water bath, ensuring they are covered by at least 1 inch of water. Bring the water back to a boil and process for the recommended time, according to your altitude and the size of the jars. For pints, typically process for 85 minutes.
- Cool and check the seals: Carefully remove the jars from the canner and place them on a towel-lined surface to cool completely. After 12-24 hours, check the seals by pressing down on the center of each lid. If the lid doesn't flex, the jar is properly sealed.
A Canning Mishap (and What I Learned)
I'll never forget the first time I tried canning tomatoes. I was so excited, I rushed through the process and didn't properly remove the air bubbles from the jars. A week later, I heard a pop in the pantry, and to my dismay, one of the jars had unsealed. It was a messy (and slightly terrifying) experience, but it taught me the importance of following each step carefully and paying attention to detail.
Freezing: A Quick and Easy Option
Freezing is a simple and effective way to preserve many fruits and vegetables. It's especially useful for items that don't hold up well to canning, such as berries, herbs, and some vegetables.
Freezing Tips:
- Blanch vegetables: Blanching vegetables in boiling water for a short period before freezing helps to stop enzyme activity that can cause them to lose color, flavor, and texture.
- Use freezer-safe containers: Choose containers that are designed for freezing, such as freezer bags or rigid plastic containers.
- Remove air: Press out as much air as possible from freezer bags before sealing them to prevent freezer burn.
- Label and date: Clearly label each container with the contents and the date to keep track of what you have in your freezer.
Freezing Herbs:
Freezing herbs is a great way to preserve their fresh flavor for use in soups, stews, and sauces. Simply wash and dry the herbs, chop them if desired, and pack them into ice cube trays. Fill the trays with water or olive oil, and freeze. Once frozen, transfer the herb cubes to a freezer bag for longer storage.

Drying: Concentrating Flavors and Saving Space
Drying, also known as dehydration, removes moisture from food, preventing spoilage. It's a great way to preserve fruits, vegetables, herbs, and even meats. You can use a dehydrator, an oven, or even the sun to dry your harvest.
Drying Basics:
- Prepare the food: Wash and slice your fruits and vegetables into thin, even pieces.
- Arrange on trays: Spread the slices on dehydrator trays or baking sheets, ensuring they are not overlapping.
- Dry at the correct temperature: Follow the manufacturer's instructions for your dehydrator or oven. Generally, fruits and vegetables should be dried at a low temperature (around 130-140°F) for several hours.
- Check for dryness: The food should be leathery and pliable, but not sticky.
Drying Tomatoes: Sun-Dried Tomato Delights
Sun-dried tomatoes are a culinary treasure, adding intense flavor to pasta dishes, salads, and appetizers.
- Halve or quarter small tomatoes: For larger tomatoes, slice them into ½-inch thick rounds.
- Arrange on trays: Place the tomato slices on dehydrator trays or baking sheets.
- Dry until leathery: Dry the tomatoes at 135°F (57°C) for 6-12 hours, or until they are leathery and slightly pliable.
- Store in olive oil: Pack the dried tomatoes in a jar and cover them with olive oil. Add herbs like oregano, basil, or thyme for extra flavor.
Tips for Success: Organic and Sustainable Preservation
- Choose organic produce: Whenever possible, use organically grown fruits and vegetables for preserving. This minimizes your exposure to pesticides and supports sustainable farming practices.
- Repurpose and reuse: Get creative with your preservation supplies. Use recycled glass jars, repurpose old towels for drying dishes, and turn fabric scraps into jar covers.
- Minimize waste: Compost vegetable scraps and peels, and use leftover brine or juice to make flavorful sauces or marinades.
- Label everything clearly: This seems obvious, but it is so important. Include the contents, the date, and any other important information (like if it's particularly spicy!).

A Warm Closing
Preserving your late-season harvest is more than just a way to stock your pantry for winter. It's a connection to the land, a celebration of the season, and a way to nourish yourself and your loved ones with wholesome, homegrown goodness. Don't be afraid to experiment, learn from your mistakes, and most importantly, enjoy the process! The satisfaction of savoring a jar of homemade goodness on a cold winter day is truly priceless. What are your favorite preservation methods? Share your tips and tricks in the comments below! As you put your garden to bed, consider what seeds you will start indoors in late winter for the spring. What flavors are you craving already?
