Autumn Abundance: 5 Simple Steps to Preserve Your Garden's Bounty and Embrace Cozy Farmhouse Living
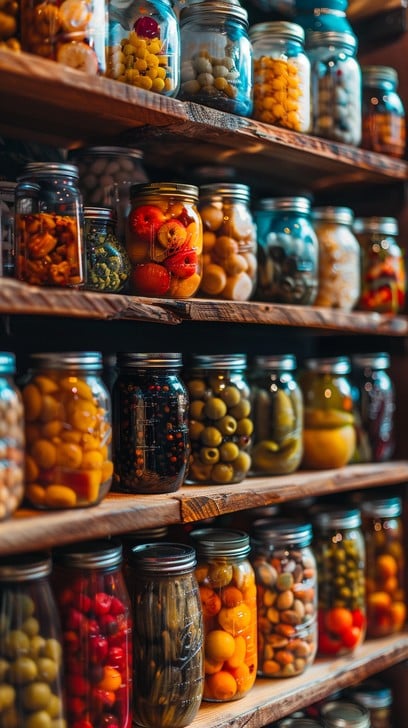
The air is crisp, the leaves are ablaze in hues of gold and crimson, and the garden… well, the garden is whispering its final secrets before winter's slumber. There's a bittersweet beauty to this time of year, a sense of urgency mixed with deep satisfaction as we gather the last of our tomatoes, herbs, cucumbers, and berries. The fleeting nature of autumn reminds us to appreciate the abundance while it lasts. This article will guide you through 5 easy steps to preserve your end-of-season harvest, ensuring you savor the flavors of summer throughout the cozy months ahead.

1. Transform Tomatoes into Tangy Sauce
Nothing beats the taste of homemade tomato sauce, especially when it’s made with tomatoes you’ve nurtured from seed to juicy ripeness. Turning your end-of-season tomato glut into a tangy sauce is easier than you might think.
What You'll Need:
- Ripe tomatoes (any variety will do, but Roma and San Marzano are excellent)
- Olive oil
- Onion, garlic, and other aromatics (basil, oregano, thyme)
- Salt, pepper, and a pinch of sugar (optional)
- Canning jars with lids and rings
- Water bath canner (or a large stockpot with a rack)
Instructions:
- Prepare Tomatoes: Wash and core your tomatoes. You can blanch them for easier peeling (score an "X" on the bottom, plunge into boiling water for 30-60 seconds, then transfer to an ice bath. The skins will slip right off). Alternatively, roughly chop them and cook them down with the skins on – you can strain the sauce later for a smoother consistency.
- Sauté Aromatics: In a large pot, heat olive oil over medium heat. Sauté chopped onion and garlic until softened. Add your peeled (or chopped) tomatoes.
- Simmer and Season: Bring the mixture to a simmer, then reduce heat and cook for 1-3 hours, or until the sauce has thickened to your desired consistency. Stir occasionally to prevent sticking. Season with salt, pepper, and a pinch of sugar (if needed to balance the acidity). Add your herbs during the last 30 minutes of simmering.
- Canning (Water Bath Method): Sterilize your canning jars and lids. Ladle the hot tomato sauce into the sterilized jars, leaving ½ inch of headspace. Remove any air bubbles. Wipe the jar rims clean, place the lids on top, and screw on the rings until fingertip tight.
- Process: Carefully lower the jars into your boiling water bath canner. Ensure the jars are completely submerged under at least 1 inch of water. Bring the water to a rolling boil and process for 35 minutes for pints and 40 minutes for quarts (adjust processing time according to your altitude – consult a canning guide for specifics).
- Cool and Check Seals: Turn off the heat and let the jars sit in the canner for 5 minutes before removing them. Place the jars on a towel-lined surface and let them cool completely. As they cool, you should hear a "pop" as the lids seal. Check the seals by pressing down on the center of the lid – it should not flex. If a jar doesn't seal, refrigerate it and use the sauce within a week.
Personal Anecdote: I remember the first time I canned tomato sauce. I was so nervous! I didn't have all the fancy equipment, so I used a large stockpot with a make-shift rack. It worked perfectly, and the taste of that homemade sauce all winter long was well worth the effort. One tip: don’t overfill the jars. Headspace is important for a good seal!
2. Dry Herbs for Flavorful Winter Dishes
Fresh herbs add incredible flavor to any dish, and drying them is a simple way to preserve that flavor for year-round enjoyment.
What You'll Need:
- Freshly harvested herbs (basil, oregano, thyme, rosemary, mint, etc.)
- String or twine
- Paper bags (optional)
- Dehydrator (optional)
Instructions:
- Harvest and Prepare: Harvest your herbs in the morning after the dew has dried. Rinse them gently and pat them dry.
- Air Drying: Tie small bundles of herbs together with string or twine. Hang them upside down in a cool, dry, and well-ventilated place. You can cover the bundles with paper bags (poke holes in the bag for ventilation) to protect them from dust and light.
- Dehydrator Drying: Arrange the herb sprigs in a single layer on the dehydrator trays. Set the temperature to the lowest setting (usually around 95-115°F) and dry for 2-4 hours, or until the leaves are brittle and crumble easily.
- Oven Drying (Alternative): Spread the herb sprigs on a baking sheet lined with parchment paper. Set the oven to the lowest possible temperature (ideally below 170°F) and crack the oven door open slightly to allow moisture to escape. Dry for 2-4 hours, or until the leaves are brittle.
- Storage: Once the herbs are completely dry, crumble them and store them in airtight containers in a cool, dark place.

3. Pickle Cucumbers for a Crisp & Crunchy Treat
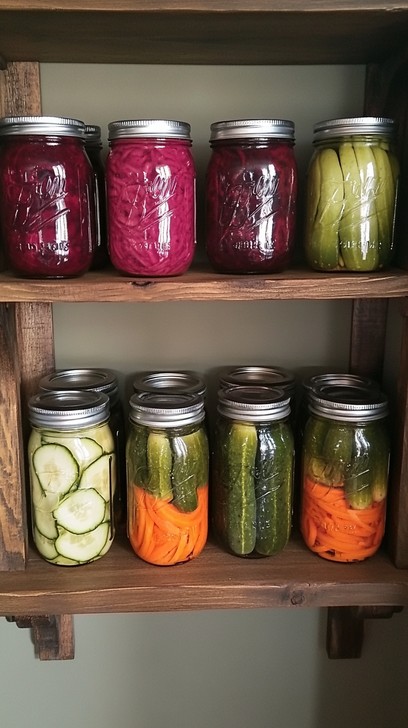
Pickled cucumbers, or dill pickles, are a classic way to preserve the taste of summer. There are many different pickling recipes out there, but this simple brine will give you deliciously crunchy pickles.
What You'll Need:
- Small cucumbers (Kirby cucumbers are ideal)
- Water
- Vinegar (white or apple cider vinegar)
- Salt (canning or pickling salt)
- Sugar (optional)
- Dill sprigs, garlic cloves, peppercorns, mustard seeds
- Canning jars with lids and rings
Instructions:
- Prepare Cucumbers: Wash the cucumbers and trim off the blossom end (this contains enzymes that can cause softening). You can leave them whole, slice them into spears, or cut them into rounds.
- Make Brine: In a large saucepan, combine water, vinegar, salt, and sugar (if using). Bring to a boil, stirring until the salt and sugar are dissolved.
- Pack Jars: Place dill sprigs, garlic cloves, peppercorns, and mustard seeds in the bottom of each sterilized jar. Pack the cucumbers tightly into the jars, leaving ½ inch of headspace.
- Pour Brine: Pour the hot brine over the cucumbers, leaving ½ inch of headspace. Remove any air bubbles. Wipe the jar rims clean, place the lids on top, and screw on the rings until fingertip tight.
- Process (Water Bath Method): Lower the jars into a boiling water bath canner. Ensure the jars are completely submerged under at least 1 inch of water. Bring the water to a rolling boil and process for 10 minutes for pints and 15 minutes for quarts (adjust processing time according to your altitude).
- Cool and Check Seals: Turn off the heat and let the jars sit in the canner for 5 minutes before removing them. Place the jars on a towel-lined surface and let them cool completely. Check the seals.

4. Freeze Berries for Smoothie Superstars
Freezing berries is arguably the easiest way to preserve their goodness. Whether you've grown your own or found a great deal at a local farm, freezing ensures you have a supply of antioxidant-rich berries for smoothies, pies, and snacks.
What You'll Need:
- Freshly picked berries (strawberries, blueberries, raspberries, blackberries, etc.)
- Baking sheet
- Freezer bags or containers
Instructions:
- Wash and Dry: Gently wash the berries and pat them completely dry.
- Flash Freeze: Spread the berries in a single layer on a baking sheet lined with parchment paper. Freeze for 1-2 hours, or until solid. This prevents the berries from clumping together in the freezer bag.
- Transfer to Freezer Bags: Transfer the frozen berries to freezer bags or containers. Remove as much air as possible to prevent freezer burn. Label with the date and contents.
- Freeze: Store in the freezer for up to 12 months.
5. Root Cellar Basics: Storing Your Winter Squash
A root cellar is a traditional way to store fruits and vegetables long-term, taking advantage of cool, dark, and humid conditions to slow down spoilage. If you don't have a dedicated root cellar, you can create a makeshift one in a cool basement, garage, or even a well-insulated box. Storing winter squash (butternut, acorn, spaghetti) is a great way to extend your harvest well into the winter.
What You'll Need:
- Mature winter squash with intact stems
- Cool, dark, and humid storage space
- Shelving or pallets
Instructions:
- Harvest Carefully: Harvest winter squash carefully, leaving at least 2-3 inches of stem attached. Avoid any squash with bruises or blemishes.
- Curing (Optional): Cure the squash by placing them in a warm, dry place (around 80-85°F) for 1-2 weeks. This helps to harden the skin and improve storage life.
- Storage: Store the squash in a single layer on shelves or pallets in your cool, dark, and humid storage space. Do not allow the squash to touch each other. The ideal storage temperature is around 50-60°F with 50-70% humidity.
- Check Regularly: Check the squash regularly for any signs of spoilage. Discard any squash that are soft, moldy, or have blemishes.

Actionable Tips & Troubleshooting:
- Canning Safety: Always follow tested canning recipes to ensure food safety. Botulism is a serious risk with improperly canned foods.
- Equipment Recommendations: A dehydrator is a great investment if you plan to dry herbs and vegetables regularly. For canning, a water bath canner is essential, and a pressure canner is needed for low-acid foods like beans and meats.
- Creative Uses: Add dried herbs to soups, stews, and sauces. Use your homemade tomato sauce for pasta dishes, pizzas, and casseroles. Serve pickled cucumbers as a side dish or add them to sandwiches and salads. Use frozen berries in smoothies, pies, and muffins. Roast winter squash and add it to soups, salads, or enjoy it as a side dish.
- Troubleshooting Pickles: If your pickles are soft, it could be due to using old cucumbers, insufficient salt, or improper processing. Use fresh cucumbers and follow the recipe carefully. Adding grape leaves or horseradish leaves to the jars can also help keep pickles crisp.
- Using Preserved Foods in Winter Recipes: Elevate winter recipes with preserved goods. A spoonful of tomato sauce can transform a simple soup, while dried herbs infuse comforting stews with summer's essence. Pickled vegetables provide a crisp, tangy counterpoint to richer winter meals, and frozen berries add a burst of sunshine to morning oats or evening desserts.
As the days grow shorter and the nights grow colder, there's a special kind of comfort in knowing that you've captured the essence of the harvest. From tangy tomato sauce to fragrant dried herbs, preserving your garden's bounty is a way to nourish both your body and your soul. Embrace the rhythm of the seasons, connect with the land, and savor the flavors of summer all winter long. What's your favorite way to preserve the flavors of fall? Share your tips and traditions in the comments below, and let's inspire each other to live a more abundant and sustainable life!