Appalachian Gold: Pawpaw Bread and the Magic of Worm Composting
As the days grow shorter and a cool breeze whispers through the holler, carryin' the scent of woodsmoke and damp earth, there's a secret sweetenin' the air—the pawpaws are ripe! These here fruits, taste like a mix of banana, mango, and sunshine all rolled into one, grow wild in the shady understory of the woods. They're nature's own custard. And what better way to celebrate this Appalachian bounty than with a loaf of Pawpaw Bread, baked golden brown in your own kitchen, and a worm compost bin that helps make next year's foraging even better? It's a way to honor the land that provides for us.
The Enigmatic Pawpaw: Nature's Appalachian Pudding
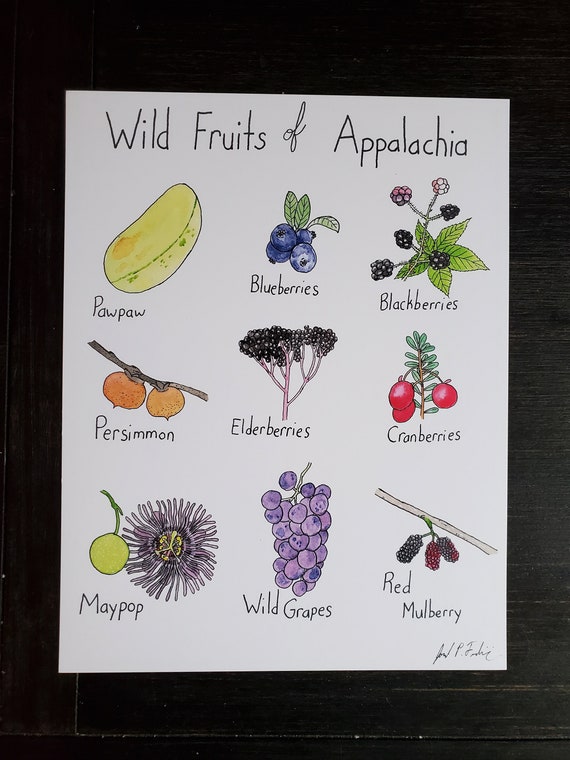
Pawpaws are a true Appalachian treasure, but you gotta harvest 'em right, like any other gift from nature. Only take what you need, leavin' plenty for the critters – the possums and raccoons love 'em just as much as we do – and for the trees to keep spreadin' their roots. If you find a patch of pawpaws, be sure to leave some of the fruit to rot on the ground; that's how the trees spread their seeds. This way, the pawpaws will be here for generations to come, a sweet reminder of the bounty of these mountains. They were a food source for many generations. And pioneers followed the pawpaw to know where the rich soil was. The pawpaw, also known as Asimina triloba, is North America's largest native fruit. Its flavor is often described as a blend of banana, mango, and vanilla, making it a truly unique culinary experience.
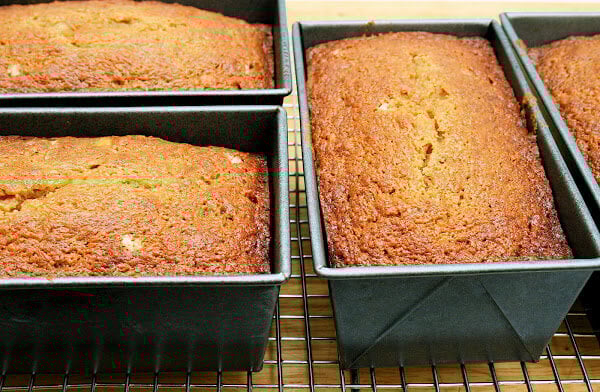
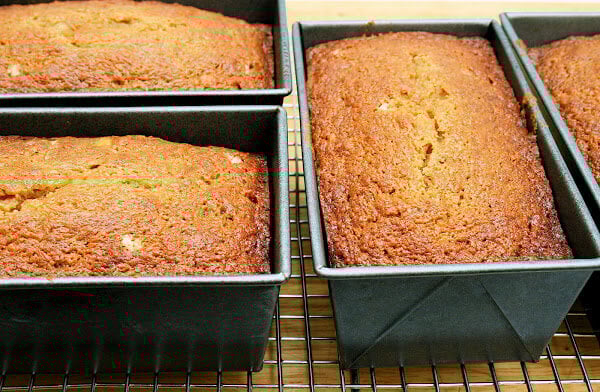
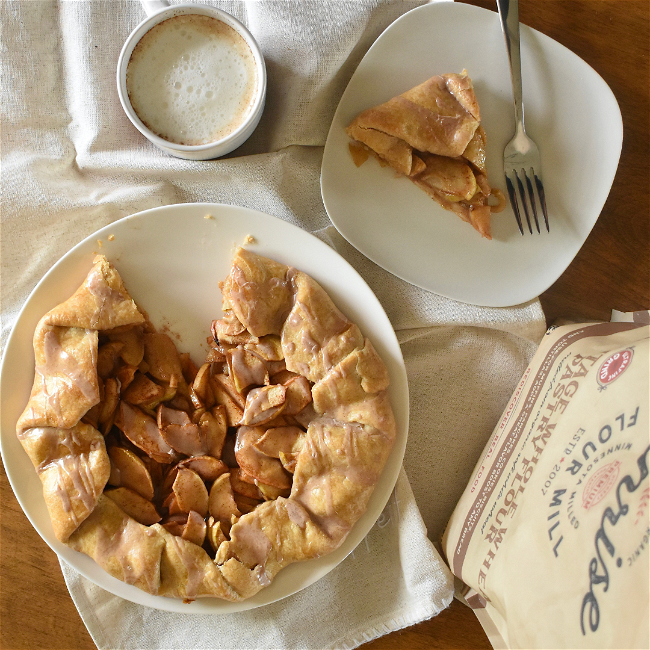
Pawpaw Bread: A Taste of Home
This Pawpaw Bread recipe is simple, honest, and full of the flavors of Appalachia. It's a treat that’ll warm you right up, especially on a chilly mountain mornin'.
Ingredients:
- 2 cups all-purpose flour, sifted to make it light as mountain air
- 1 teaspoon baking soda, to give it a good rise
- 1/2 teaspoon salt, a pinch to bring out the sweetness
- 1 teaspoon ground cinnamon, for a warm, comforting aroma
- 1/2 teaspoon ground nutmeg, a whisper of spice
- 1 cup granulated sugar, enough to sweeten the deal
- 1/2 cup vegetable oil, to keep it moist and tender
- 2 large eggs, from chickens scratchin' in the yard
- 1 cup mashed ripe pawpaw pulp, strained to remove any seeds or skin
- 1/2 cup chopped walnuts or pecans (optional), toasted for extra flavor
Instructions:
- Preheat oven to 350°F (175°C). Grease and flour a 9x5 inch loaf pan with shortening and a dusting of flour.
- In a large bowl, whisk together the sifted flour, baking soda, salt, cinnamon, and nutmeg.
- In a separate bowl, combine the sugar, oil, and eggs. Beat until well blended, like a mountain stream flowin' smooth.
- Stir in the mashed pawpaw pulp, makin' sure there ain't no lumps.
- Gradually add the wet ingredients to the dry ingredients, mixing until just combined. Don't overmix; just fold it together gentle-like.
- Fold in the chopped nuts, if desired, for a little crunch.
- Pour the batter into the prepared loaf pan and bake for 50-60 minutes, or until a wooden skewer inserted into the center comes out clean. Keep an eye on it; ovens can be temperamental.
- Let cool in the pan for 10 minutes before transferring to a wire rack to cool completely. Slice it thick and enjoy!
Tip: Be sure to mash the pawpaws until smooth to avoid stringy bits in the bread.

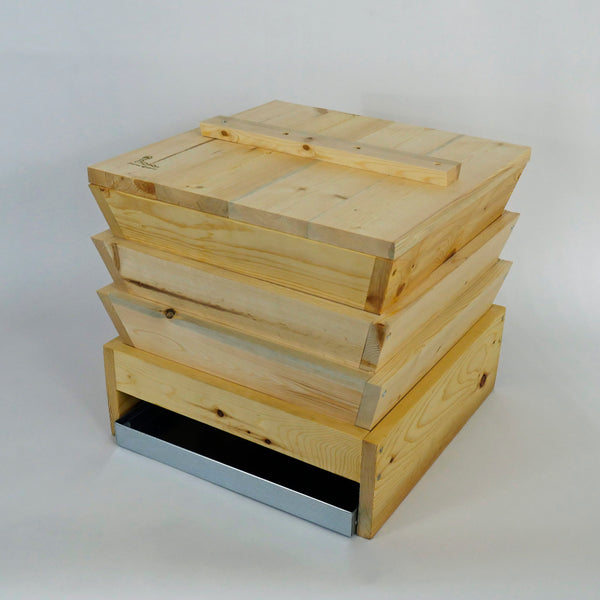
Building a Worm Compost Bin: Turning Scraps into Garden Gold
Building a worm compost bin ain't just about getting rid of scraps; it's about givin' back to the earth, and helpin make the pawpaws grow next year! These little fellers turn your kitchen waste into the best garden fertilizer you can find, makin' your soil rich and healthy for pawpaw trees and anything else you want to grow. It's like magic, watchin' them work! Using a worm compost bin reduces landfill waste and creates nutrient-rich castings (worm poop) and compost tea, perfect for enriching your garden soil.
Simple Plans for a Worm Hotel
Materials List: You'll need some old wooden pallets or scrap lumber – cedar or redwood is best if you have it, as it resists rot – nails or screws, a drill with various sized bits, some hardware cloth (1/4 inch mesh), a sturdy lid that fits snugly (an old piece of plywood will do), and a hammer. We always try to repurpose what we have around to save a dollar and keep things from goin' to waste!
Instructions:
First, you'll want to build two boxes, one slightly smaller than the other so it can nest inside. The bottom box will catch the "worm tea". The inside box should be about 24 inches long, 18 inches wide, and 12 inches tall, and the outside box 26 inches long, 20 inches wide, and 14 inches tall. Be sure to drill a few drainage holes in the bottom of the inside box and cover it with the hardware cloth to keep the worms from escaping. Assemble the boxes with nails or screws, making sure they're sturdy. Then, place the smaller box inside the larger one. Add a generous layer of bedding to the top box – shredded newspaper, coconut coir, or even dried leaves work great. Moisten the bedding until it's damp like a wrung-out sponge. Finally, introduce your worms! Red wigglers are the best for composting. Bury them gently in the bedding and start feeding them your kitchen scraps. Remember to keep the bin moist and out of direct sunlight. They like a dark, cool place.
This pawpaw bread and worm composting project is all about livin' in harmony with the land, just like our ancestors did. Sharin' what nature gives us and takin' care of it in return. We hope you give this a try and add your own Appalachian twist. Let us know your favorite ways to use pawpaws and what you're growing in your worm compost! We're all in this together, learnin' from each other and keepin' the old ways alive. And don't forget to share a slice of that pawpaw bread with your neighbors – that's the Appalachian way!