
3 Cozy Fall DIY Projects for a Sustainable & Soulful Farmhouse Life

Ah, autumn. The air turns crisp, carrying the scent of woodsmoke and fallen leaves. It’s a season that whispers of cozy evenings, warm drinks, and the simple pleasures of home. There's an undeniable urge to bring the beauty of the season indoors, transforming our spaces into havens of warmth and tranquility. But what if we could do so in a way that’s not only beautiful but also sustainable, connecting us to nature and minimizing our environmental footprint?
That's where the magic of DIY comes in! Creating something beautiful and useful with your own hands is incredibly rewarding. You connect with the seasons, learn new skills, and breathe new life into forgotten materials. In this blog post, we'll explore three easy, beautiful, and eco-friendly DIY projects perfect for fall. Get ready to infuse your farmhouse with cozy charm while embracing a more sustainable way of life. We're diving into upcycled sweater pumpkins, a homemade apple cider simmer pot, and leaf-printed tea towels. Let's get crafting!
Turn Old Sweaters into Charming Fall Decor
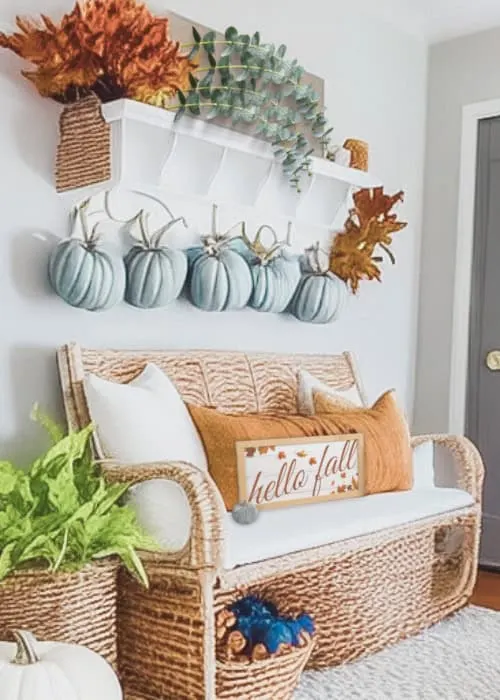
I remember the first time I discovered the potential of an old, holey sweater. I was about to toss it, when I paused. The chunky knit and beautiful texture seemed too good to waste. That's when the idea struck: upcycled sweater pumpkins! It was a simple project that brought so much joy and turned something destined for the landfill into a cherished piece of fall décor. The satisfaction of breathing new life into the old is a feeling you simply can't beat.
Materials List:
- Old sweaters (wool or chunky knit work best)
- Poly-fil stuffing (or scraps of fabric)
- Scissors
- Hot glue gun and glue sticks
- Twine or ribbon
- Cinnamon sticks (optional, for stems)
Step-by-Step Instructions:
- Prepare the Sweater: Lay your sweater flat and cut off one of the sleeves. Turn the sleeve inside out.
![Cut off sweater sleeve] (http://gingersnapcrafts.com/wp-content/uploads/2016/11/wow-me-wednesday-282-2-912443419.png) - Seal One End: Using your hot glue gun, seal one end of the sweater sleeve shut. Be careful not to burn yourself!
- Turn Right Side Out: Turn the sleeve right side out again.
- Stuff the Pumpkin: Begin stuffing the sleeve with Poly-fil or fabric scraps. Pack it firmly to create a round pumpkin shape.
- Close the Top: Once the pumpkin is stuffed to your desired fullness, gather the open end of the sleeve and secure it tightly with twine or ribbon. Leave a bit of extra twine to create a stem.
- Add a Stem (Optional): Insert a cinnamon stick into the center of the gathered fabric at the top to create a natural-looking stem. Secure with hot glue if needed.
- Shape the Pumpkin: To give your pumpkin more definition, wrap twine around the stuffed sweater, dividing it into sections. Tie the twine tightly at the top and bottom.
Troubleshooting Tips:
- If your sweater is too thin, double the fabric by using two sleeves or layering the fabric before stuffing.
- Don't overstuff the pumpkin, or it may lose its shape.
- Experiment with different sweater textures and colors for a variety of pumpkin styles.
Fill Your Home with the Scent of Autumn
Nothing evokes the feeling of fall quite like the aroma of warm spices and apples. I remember as a child, my grandmother always had a pot simmering on the stove throughout October and November, filling the house with the most comforting fragrance imaginable. Now, I carry on that tradition with my own homemade apple cider simmer pot. It's a simple pleasure that instantly transforms my home into a cozy sanctuary.
Ingredients List:
- 2 apples, sliced
- 2 cinnamon sticks
- 1 orange, sliced
- 1 teaspoon whole cloves
- Water
Instructions:
- Combine all ingredients in a small saucepan or pot.
- Cover with water.
- Bring to a simmer over low heat.
- Allow to simmer, adding more water as needed, to keep the pot from drying out. The longer it simmers, the stronger the scent will be.
Variations:
- Add star anise for a stronger, more complex aroma.
- Include a few cranberries for a festive touch.
- Experiment with different spice combinations, such as nutmeg, allspice, or cardamom.
Safety Tip: Never leave the simmer pot unattended. Ensure there is always enough water to prevent the pot from scorching.
Preserve the Beauty of Fall Foliage

One of my favorite fall activities is collecting colorful leaves. There's something so magical about the vibrant hues and intricate shapes. But their beauty is fleeting. Leaf print tea towels are a wonderful way to capture that beauty and bring a touch of the outdoors into your kitchen.
Materials List:
- Plain cotton tea towels (pre-washed)
- Assorted fall leaves
- Fabric paint (in fall colors)
- Foam brush
- Paper towels
- Iron
Instructions:
- Prepare Your Workspace: Cover your work surface with paper towels to protect it from paint.
- Collect and Prepare Leaves: Gather fresh, dry fall leaves. Arrange them in the desired pattern on your tea towel.
- Apply Paint: Using a foam brush, apply a thin, even layer of fabric paint to the underside of a leaf.
- Press the Leaf: Carefully press the painted side of the leaf onto the tea towel.
- Remove the Leaf: Gently lift the leaf to reveal the print.
- Repeat: Repeat steps 3-5 with different leaves and colors to create your desired design.
- Let Dry: Allow the paint to dry completely.
- Heat Set: Once dry, iron the tea towel on medium heat (following the fabric paint instructions) to heat-set the paint and make it washable.
Tips:
- Experiment with different leaf types for unique prints. Maple leaves, oak leaves, and fern fronds all create beautiful patterns.
- Use a variety of fall colors, such as red, orange, yellow, and brown.
- For a more subtle look, use a single color paint.
- Practice on a piece of scrap fabric before printing on your tea towels.
Closing Reflection
See? Creating a cozy, sustainable farmhouse fall doesn’t have to be complicated or expensive. These three projects are simple, rewarding, and a great way to connect with the beauty of the season. By upcycling materials, using natural ingredients, and embracing the joy of crafting, you can transform your home into a haven of warmth, authenticity, and mindful living. If you enjoy gardening, consider reading our previous article "The Ultimate Guide to Fall Gardening Prep" for tips to keep your garden in tip-top shape. If you're already thinking ahead to preserving some of your fall harvest, be sure to check out "Homemade Apple Butter: A Taste of Autumn in Every Bite" for a simple recipe.
Which of these projects are you most excited to try? Share your creations with us in the comments below! And don't forget to tag us on Instagram @BetterHomesAndHarvests – we can't wait to see your cozy farmhouse transformations! Happy crafting, and happy autumn!